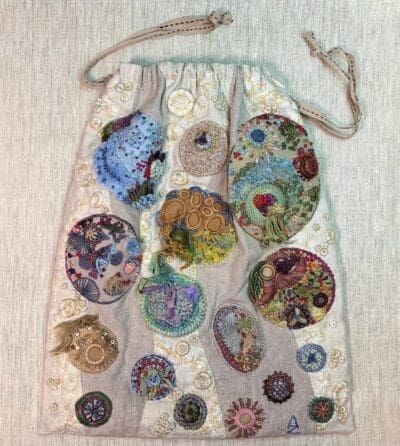
A month ago I taught a 2-hour stitching workshop exploring shapes and stitches at my quilt guild. It was a huge success, and lots of fun! I prepared squares of wool and precut circles in different sizes. More than 20 people attended and each person got to pick a wool square and some circles, which they then whipstitched on to their wool base. As most of the participants already knew how to do some of the more basic stitches such as the Running Stitch and Backstitch, I taught how to do the Bullion Knot and a Cast On Bullion stitch. (We only had two hours) It was a lot of fun! I really, really love teaching.
Through one of the participants (who also happens to be a friend) of that workshop I was introduced to one of the owners of the last remaining quilt shop in New York City, Gotham Quilts – New York City’s Quilt Shop. It was a terrific meeting and as a result of that meeting, I will be teaching a 6-hour Creative Stitching workshop playing with shapes using many of Sue Spargo‘s techniques in April. If you’d like to sign up for it, you can, by clicking ‘here‘. The workshop is on April 25th from 11:30 – 6. Everyone will get a “kit” which will include precut circles, a wool square base, wool thread to whipstitch the shapes onto the background, needles, lots of different kinds of threads to play with, tons of Perle Cotton threads, a piece of silk velvet, some stabilizer for the silk velvet, a sampling of beads, buttons and silk ribbon. I am SO excited and hope some of you will join me!
For those of you unfamiliar with Gotham Quilts, it opened in 2014 and is located at 40 West 37th Street between 5th and 6th Avenues in the heart of Manhattan and just a block from the Garment District. Two friends, Andrea and Ivete, own and run it. Over the years they have expanded what began as a tiny shop on the second floor, to a multi level space, carrying a wonderfully curated selection of fabrics and notions as well as Bernina Sewing Machines. They are now open six days a week, everyday but Sunday, from 11 – 6, and on Thursdays until 7pm.
Gotham Quilts
I hope to see some of you there!
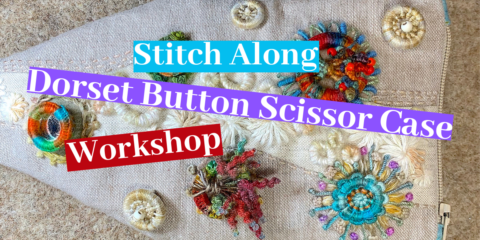
Have you checked out my latest YouTube video? My channel is: Ariane Zurcher – On the Other Hand where I give tutorials on all things involving stitching, sewing, design and creating. I will be doing videos that are for Left Handers, but others that are not hand specific. So join me, and stitch along!
Tutorial: How stitch the Pekinese Stitch
How to stitch The Coral Stitch with 2 (okay 3) variations!
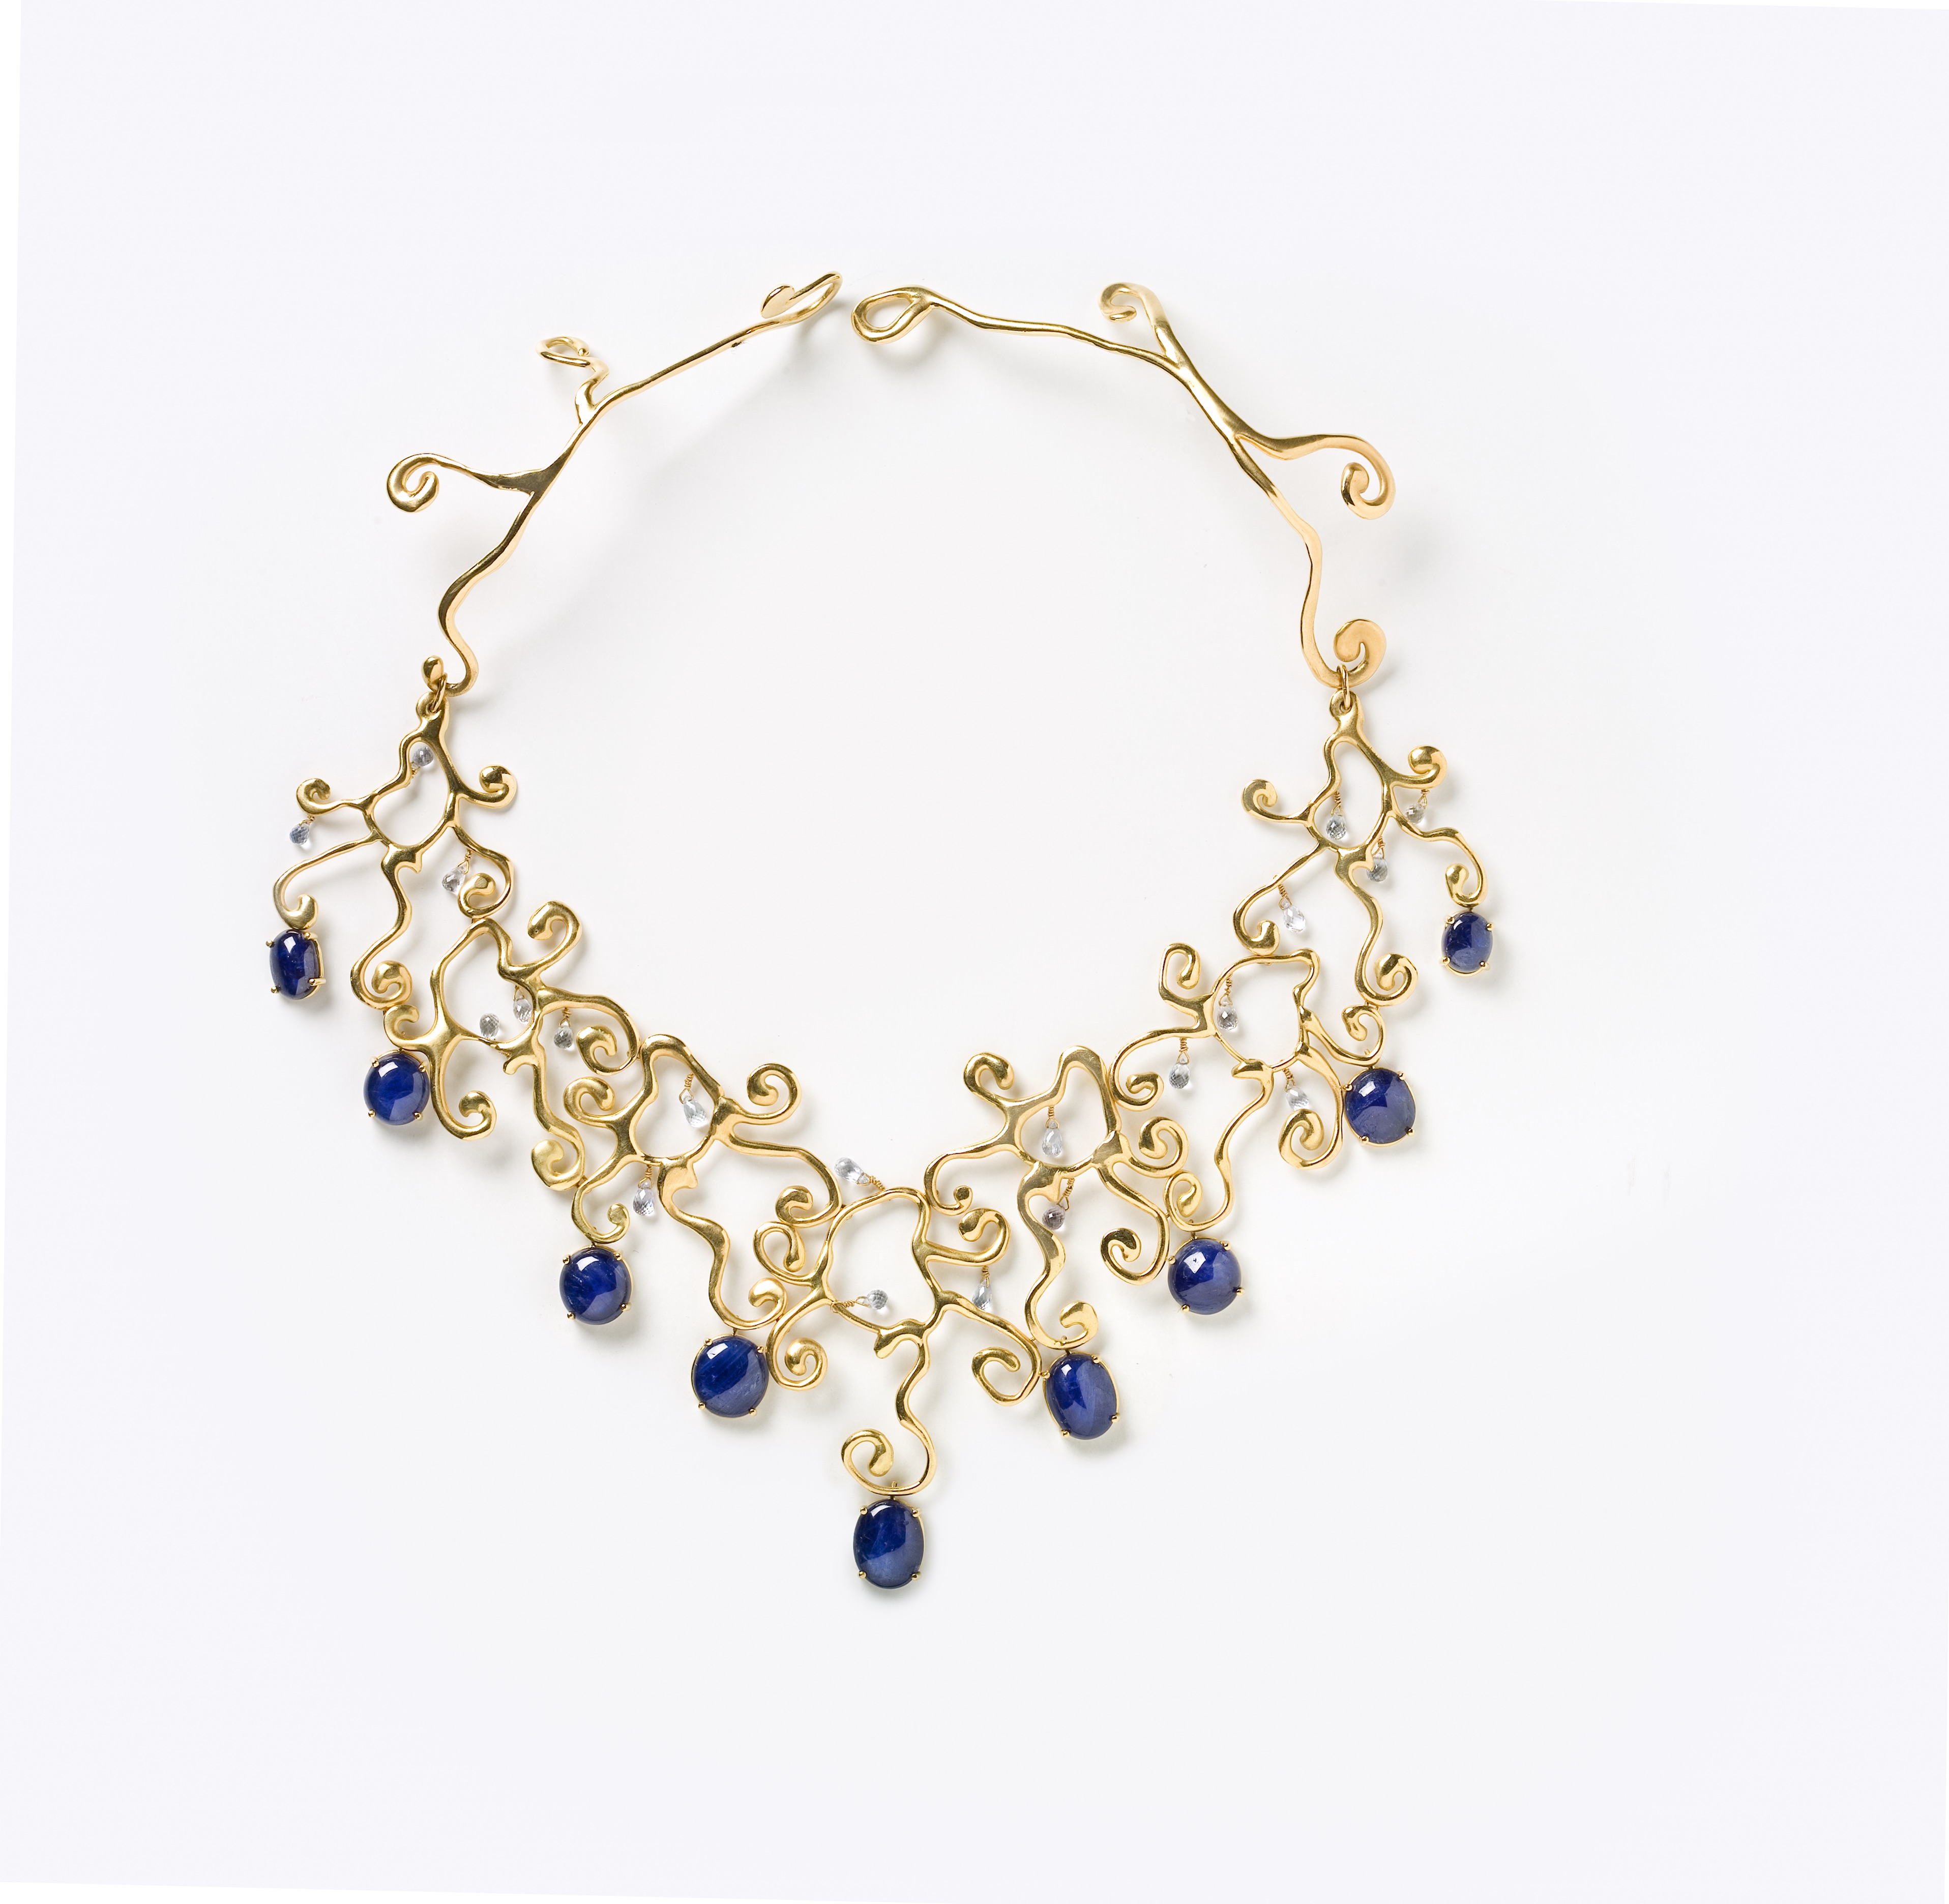
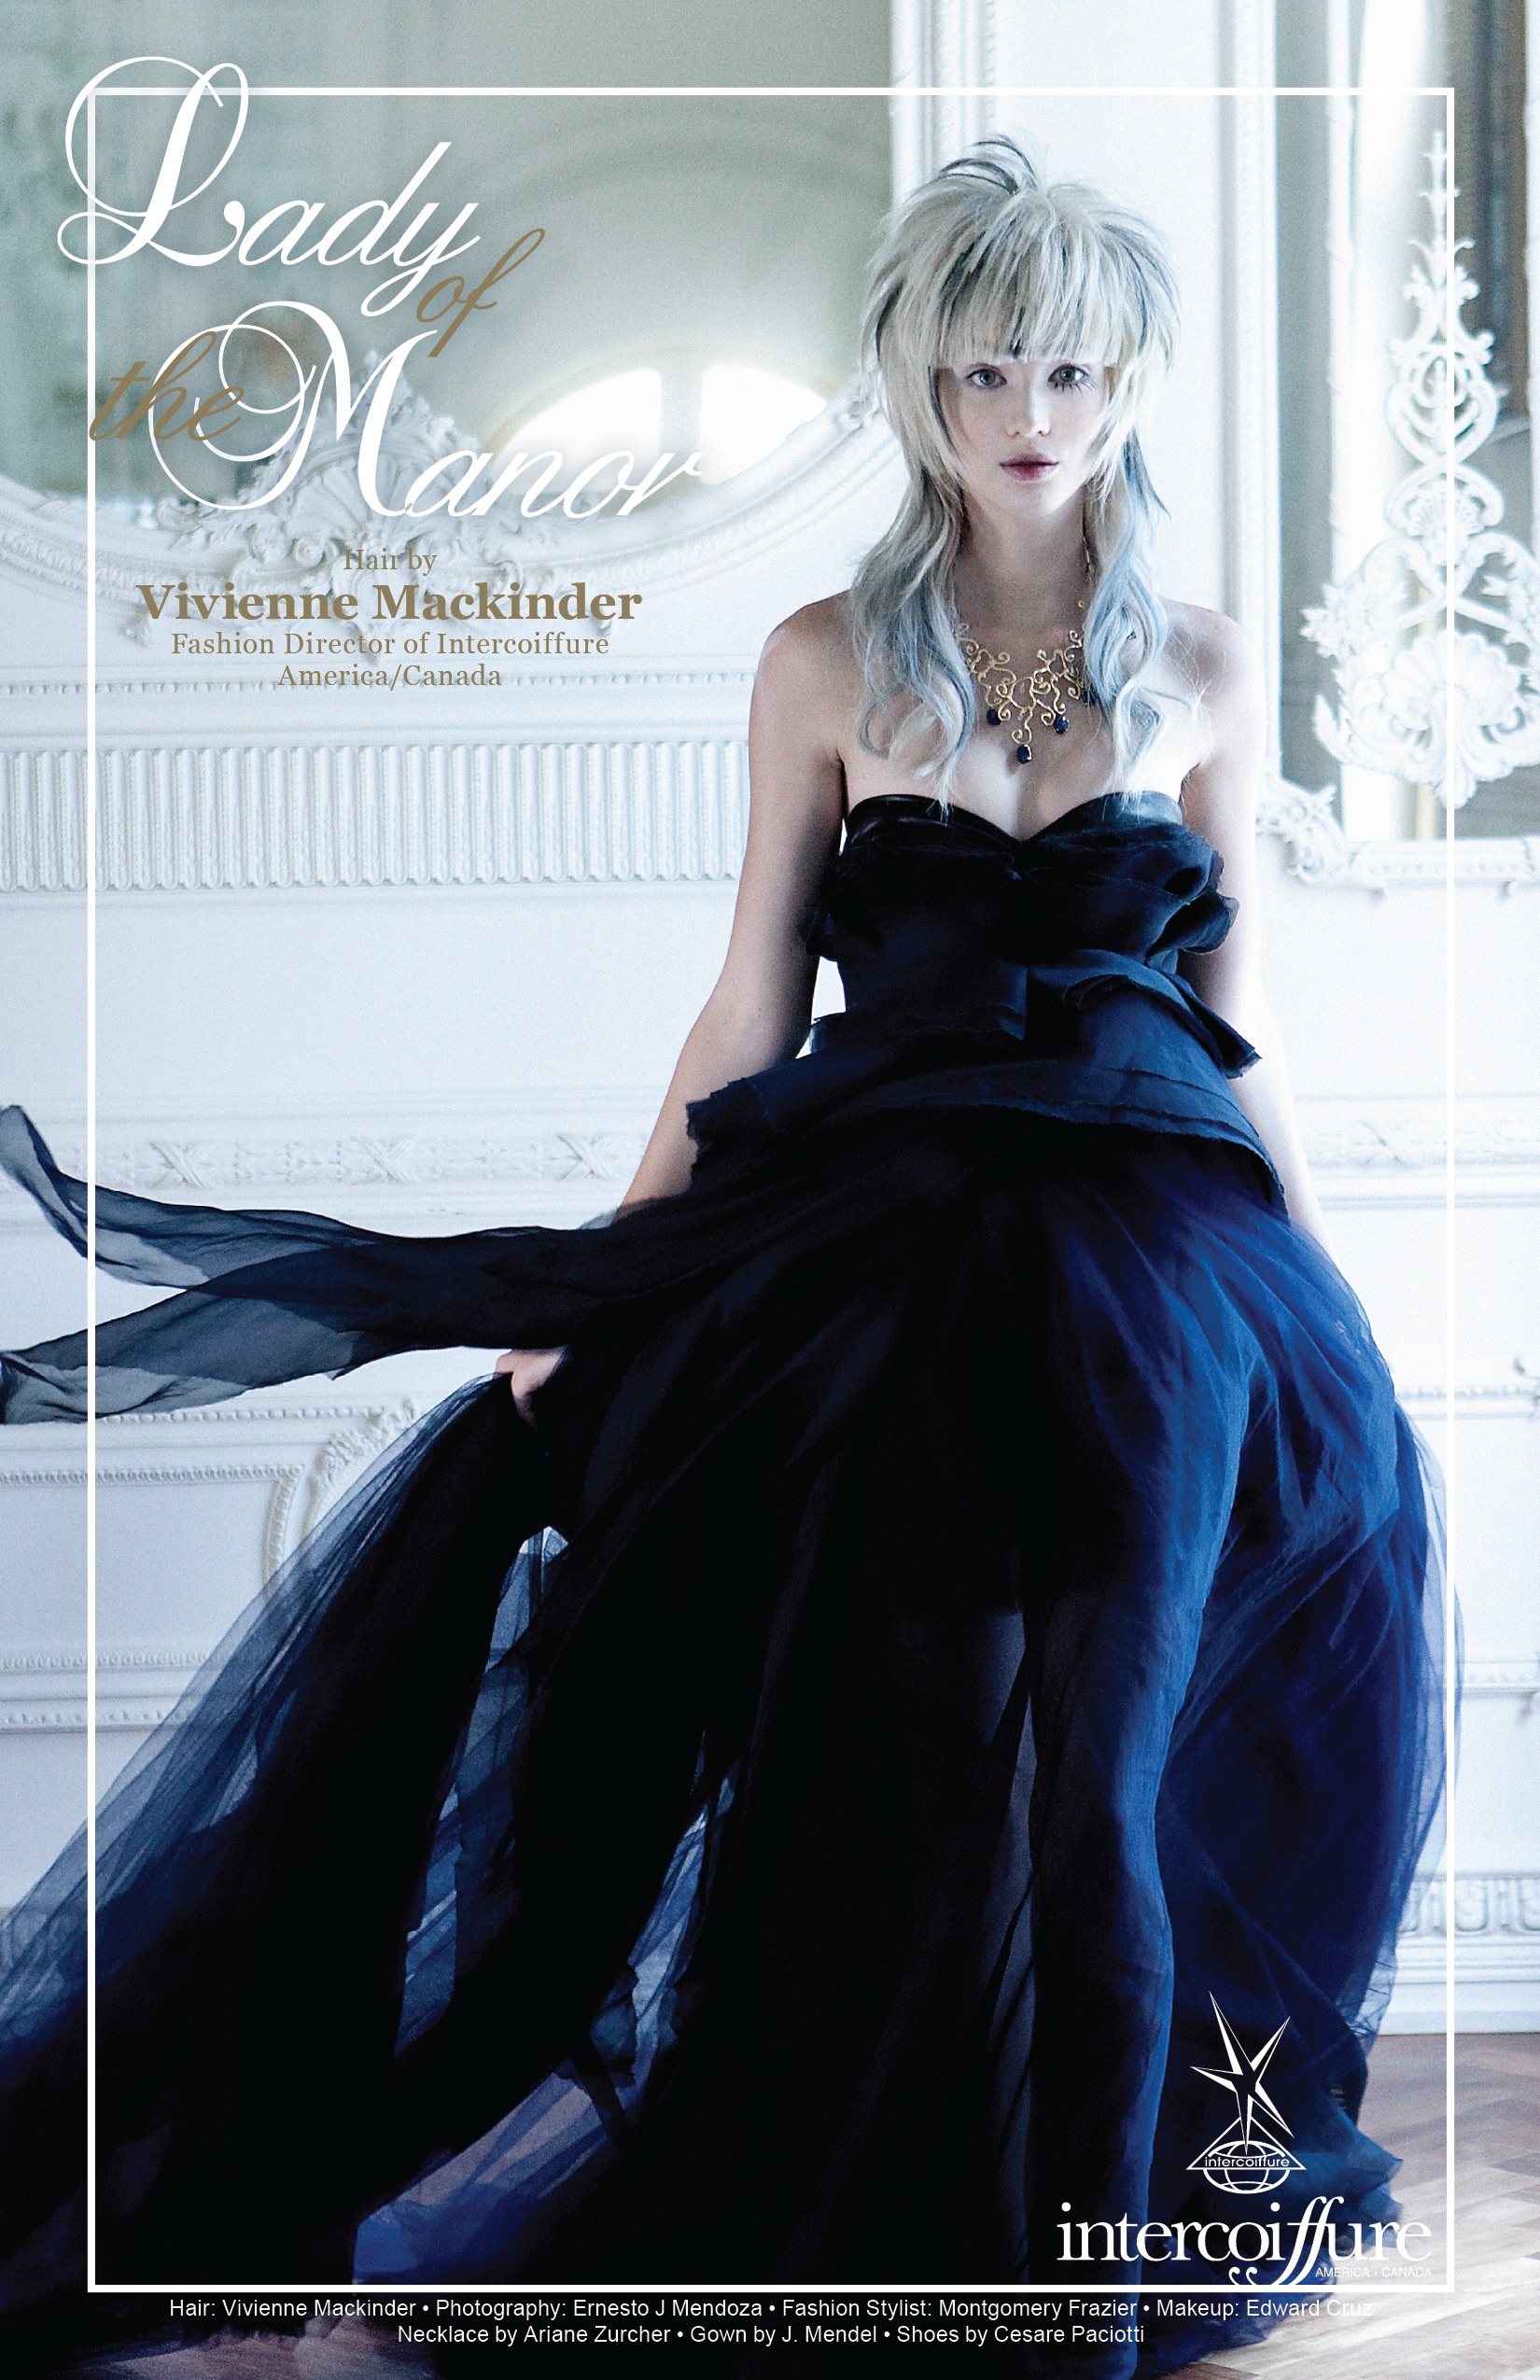
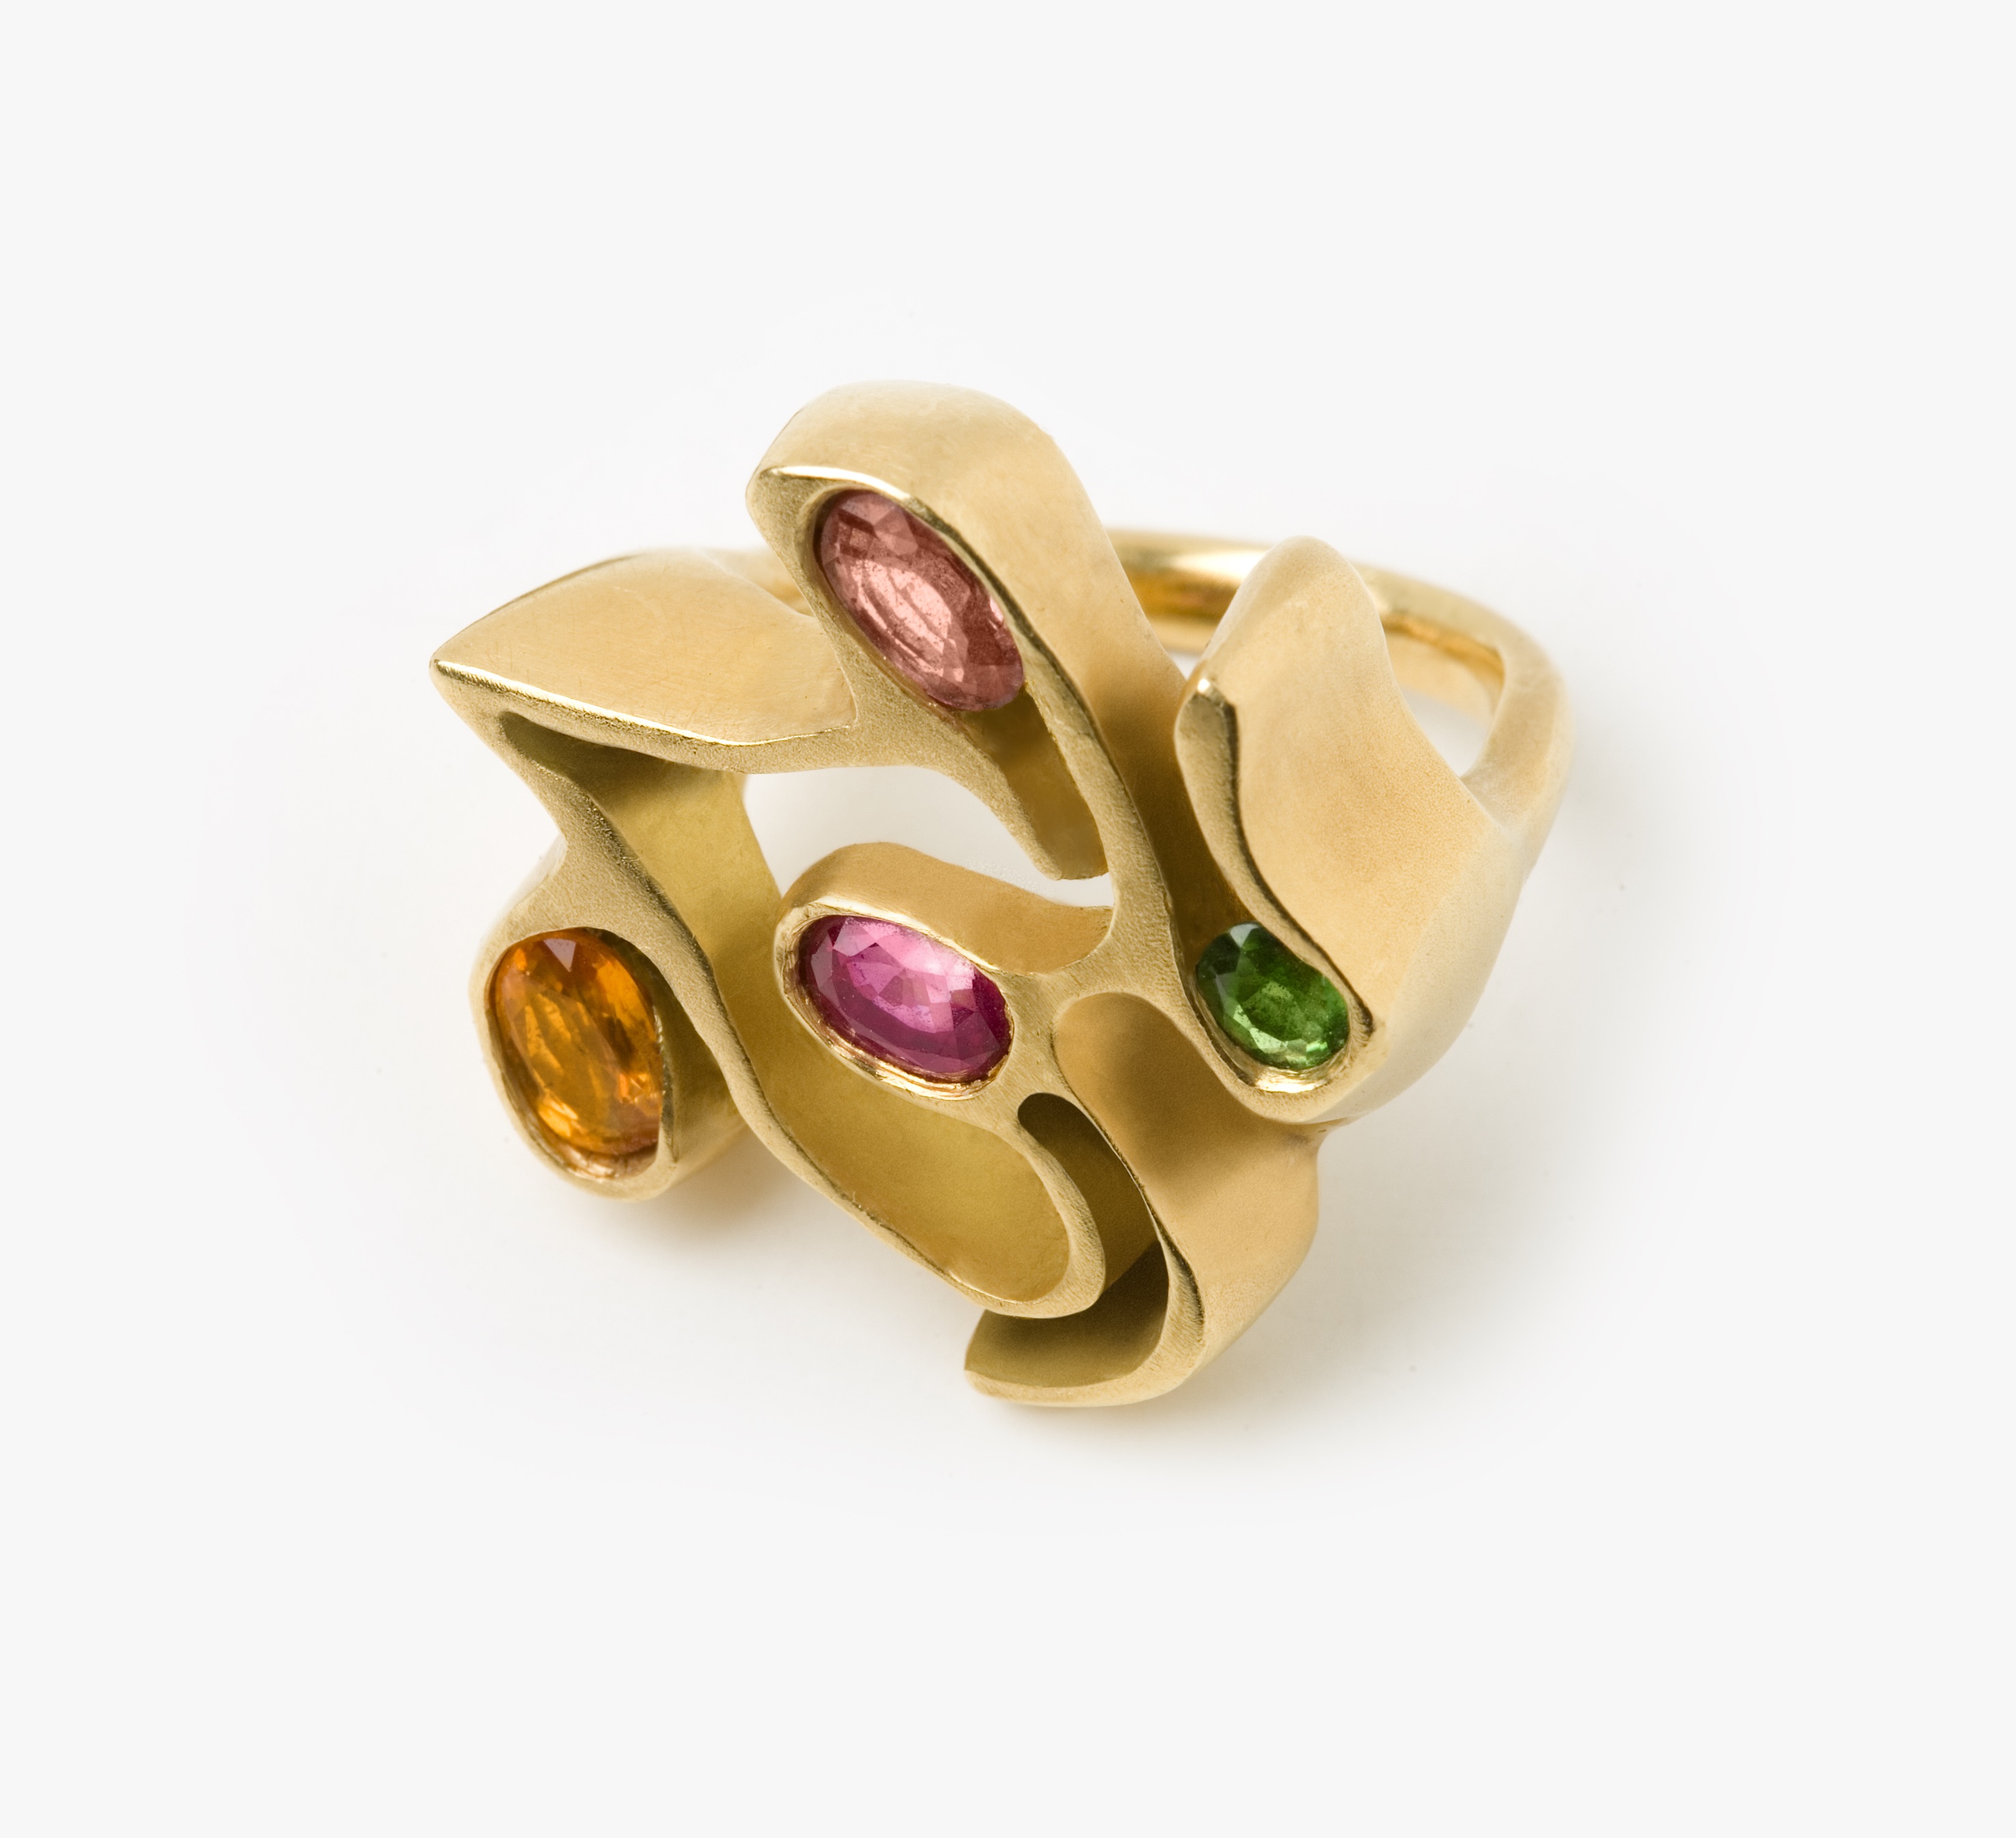
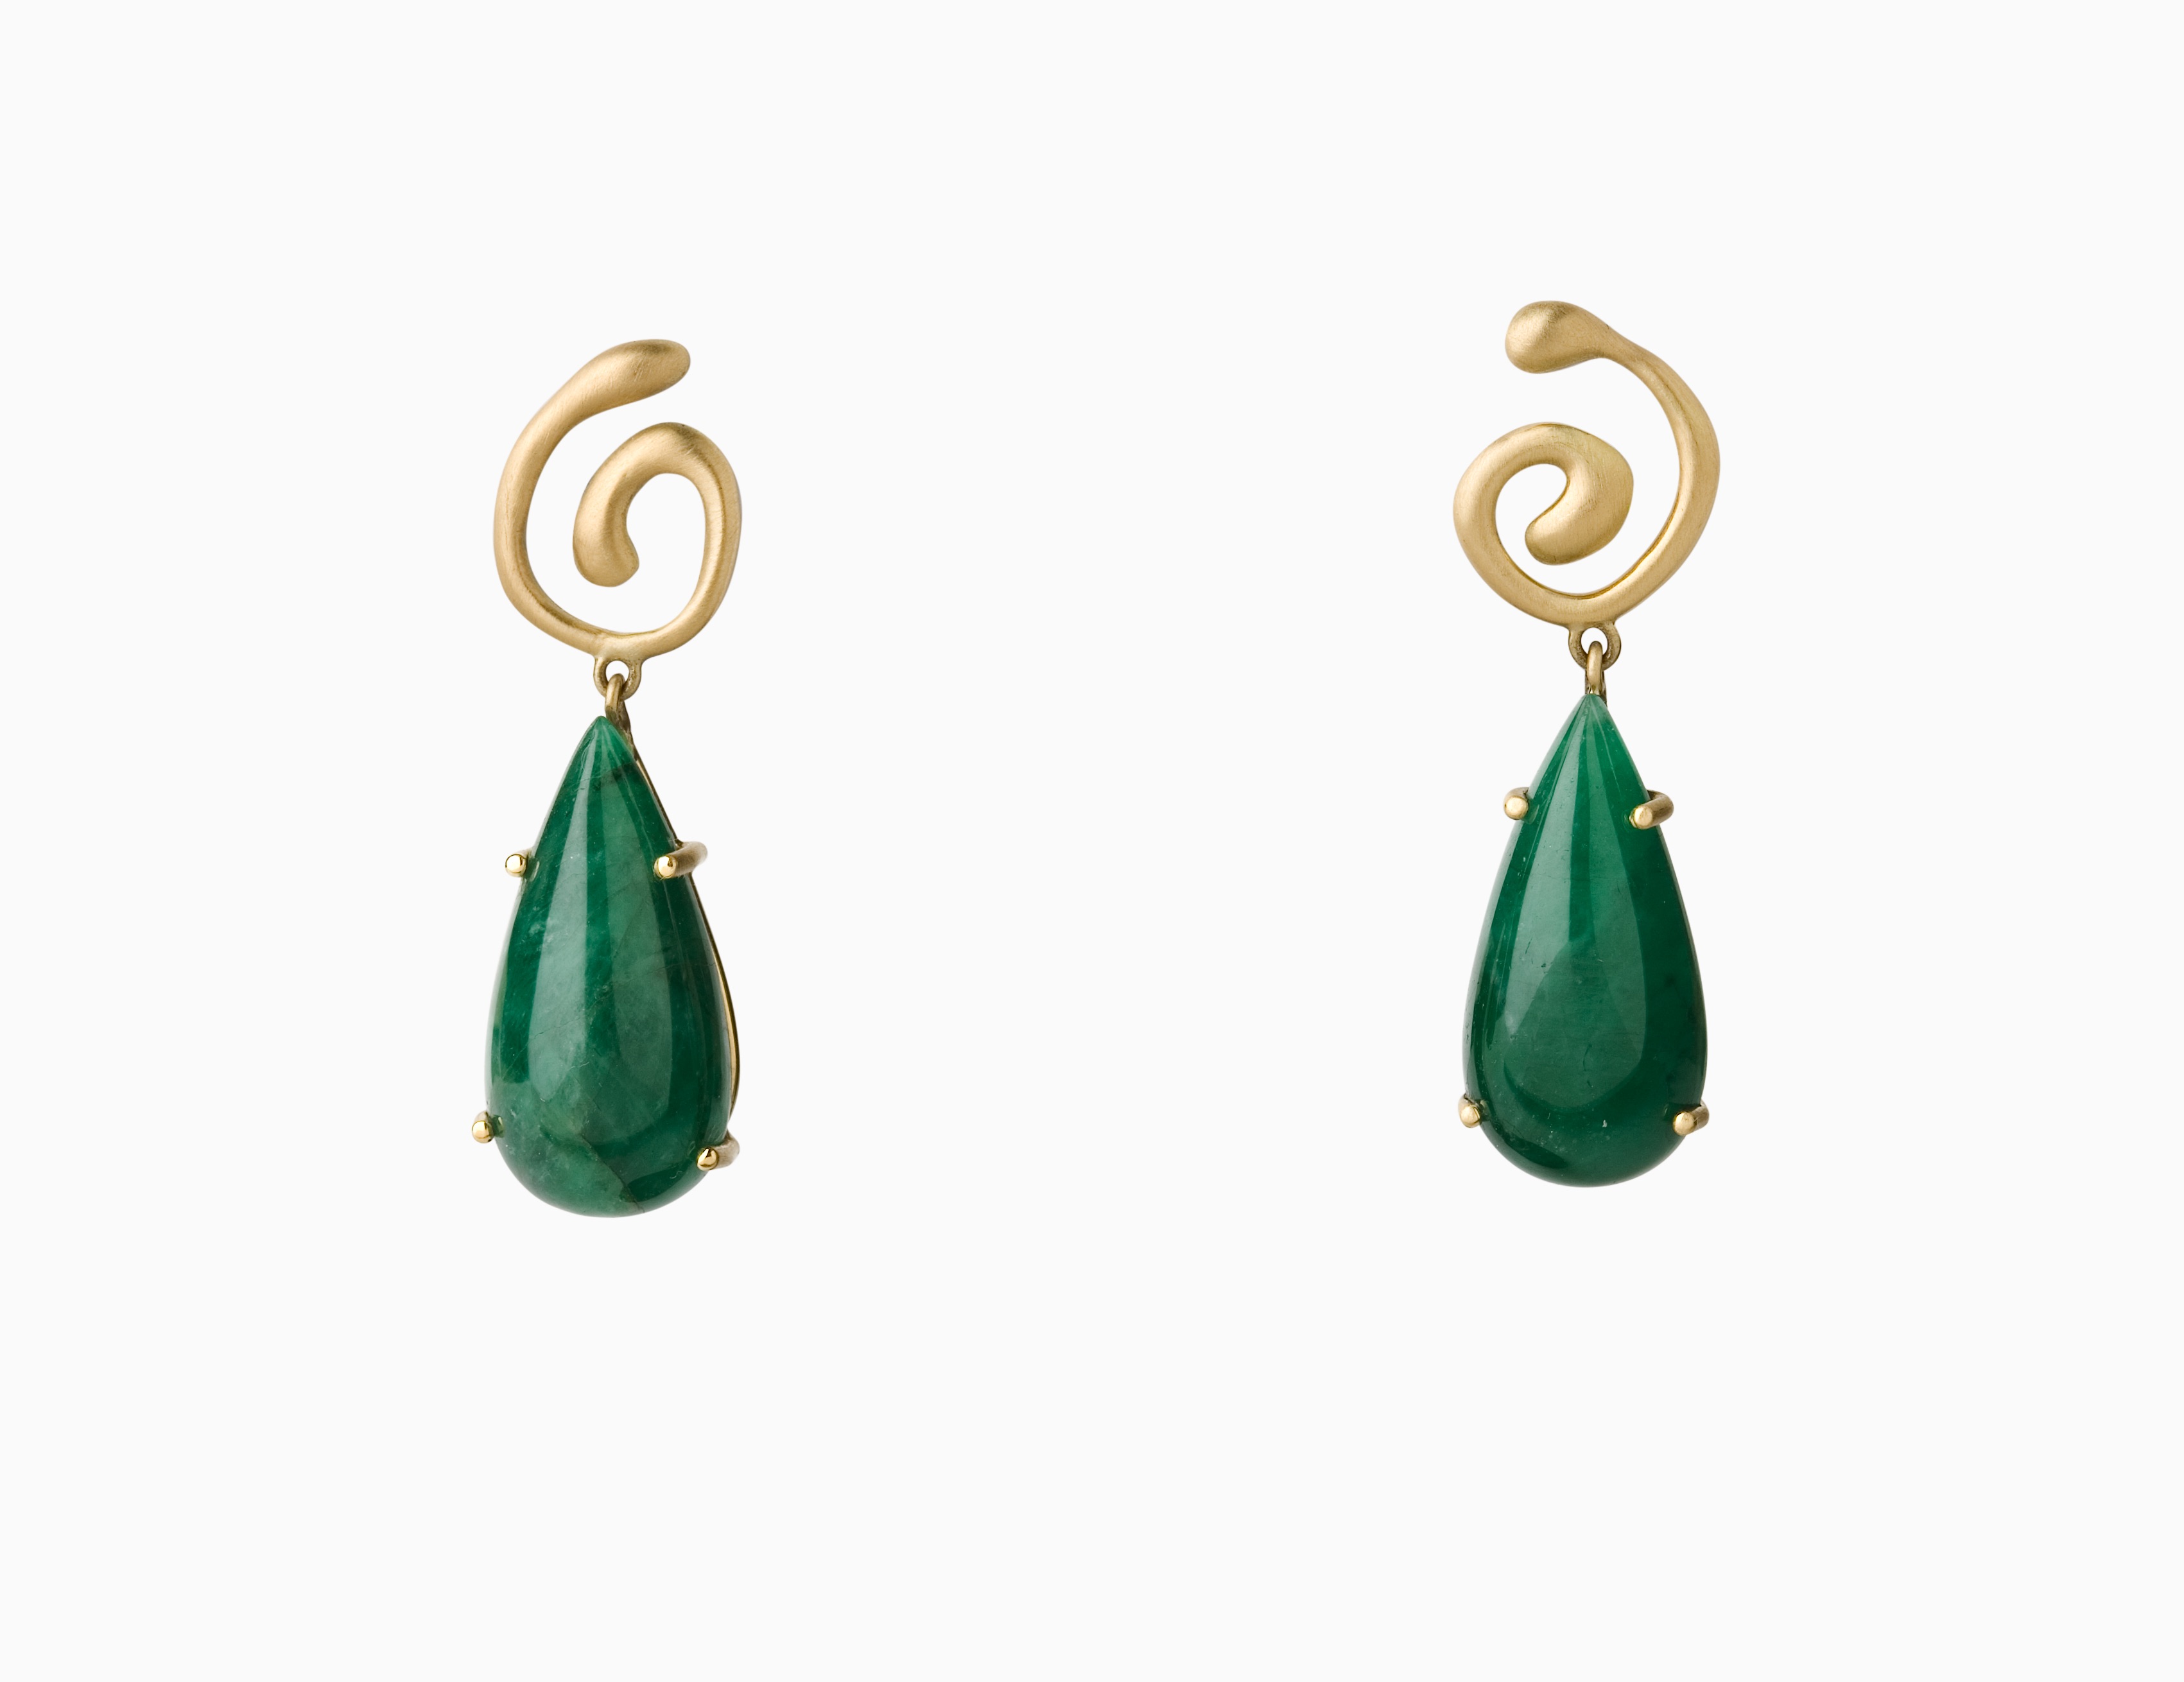
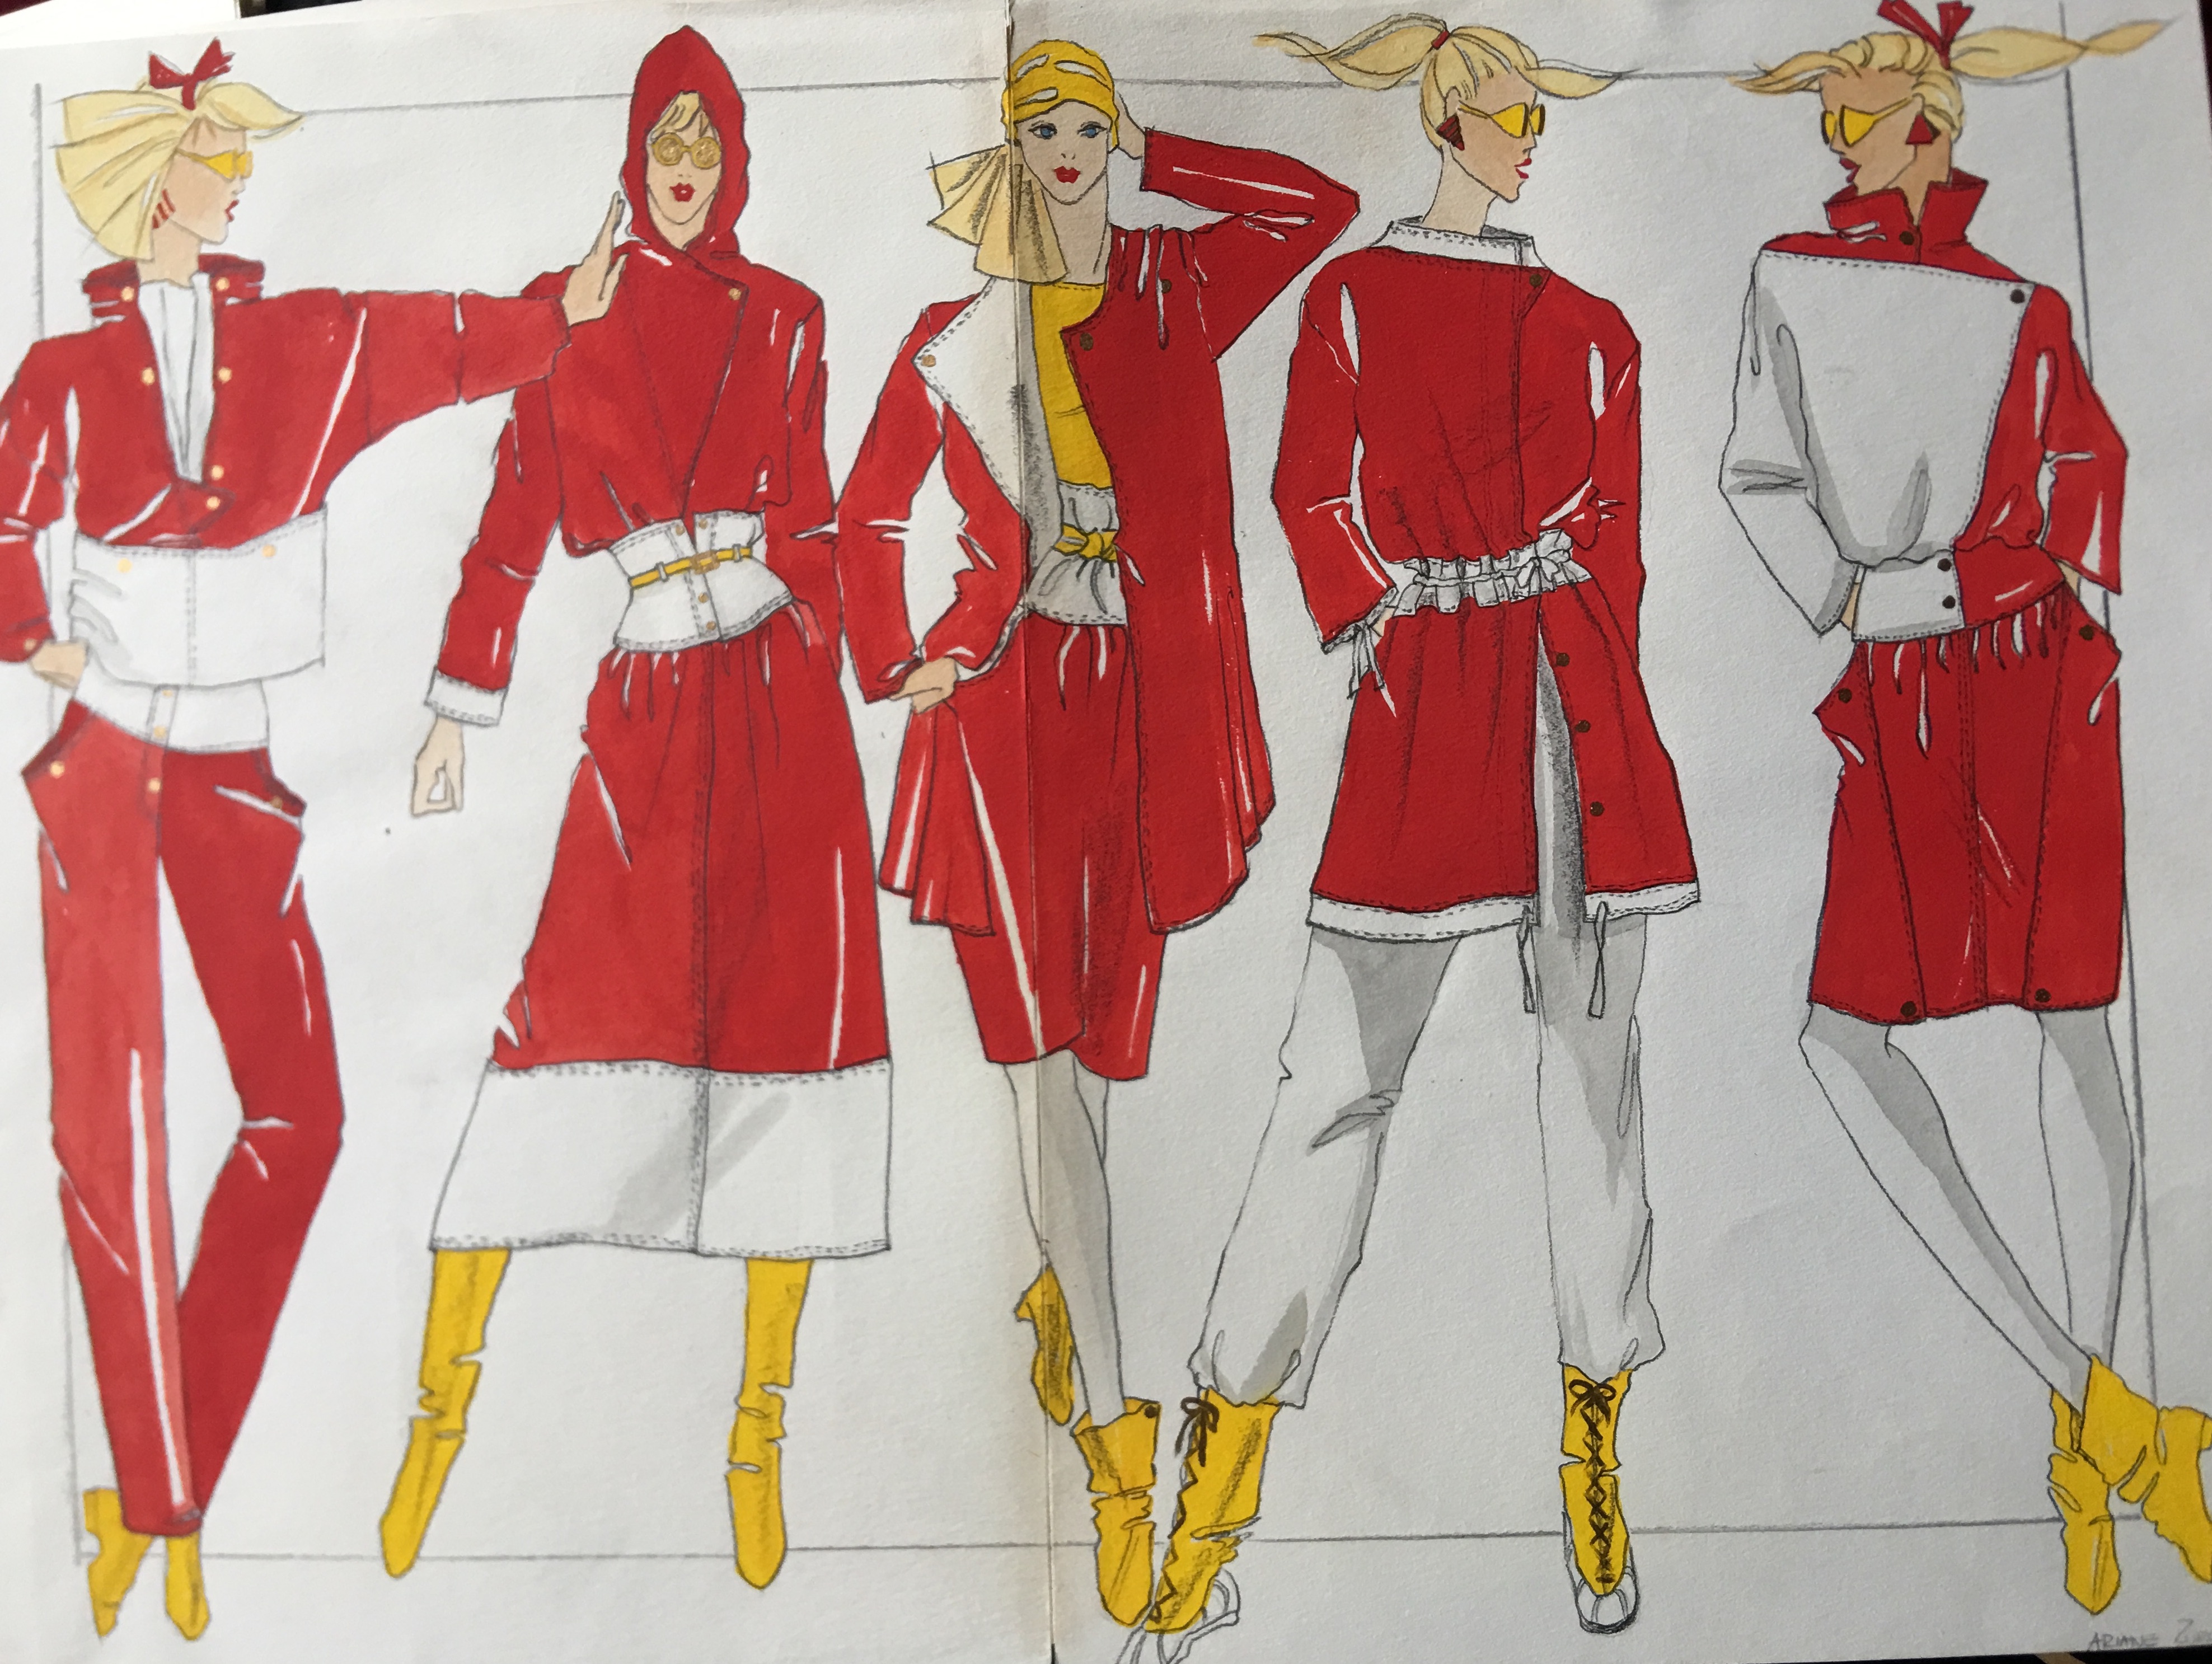
In January I had the opportunity to go to one of Sue Spargo‘s fabulous workshops in Tucson, Arizona, a place I’d never been. While there I met some lovely people, one of whom was Anna Bates, who has a blog, Woolie Mammoth, a YouTube channel – Quilt Roadies, and blogs for The Quilt Show once a week under the heading – Anna and G on the Road. During the course of our five days together, Anna interviewed me and wrote a lovely post about me and my work. Though I realized afterward that while I sent her photographs of my early designs in fashion and knitting, even a photo of one of my hand thrown and hand painted pots, I didn’t send photos of my jewelry! (insert wide eyed emoji). So here are a few additions to her post…
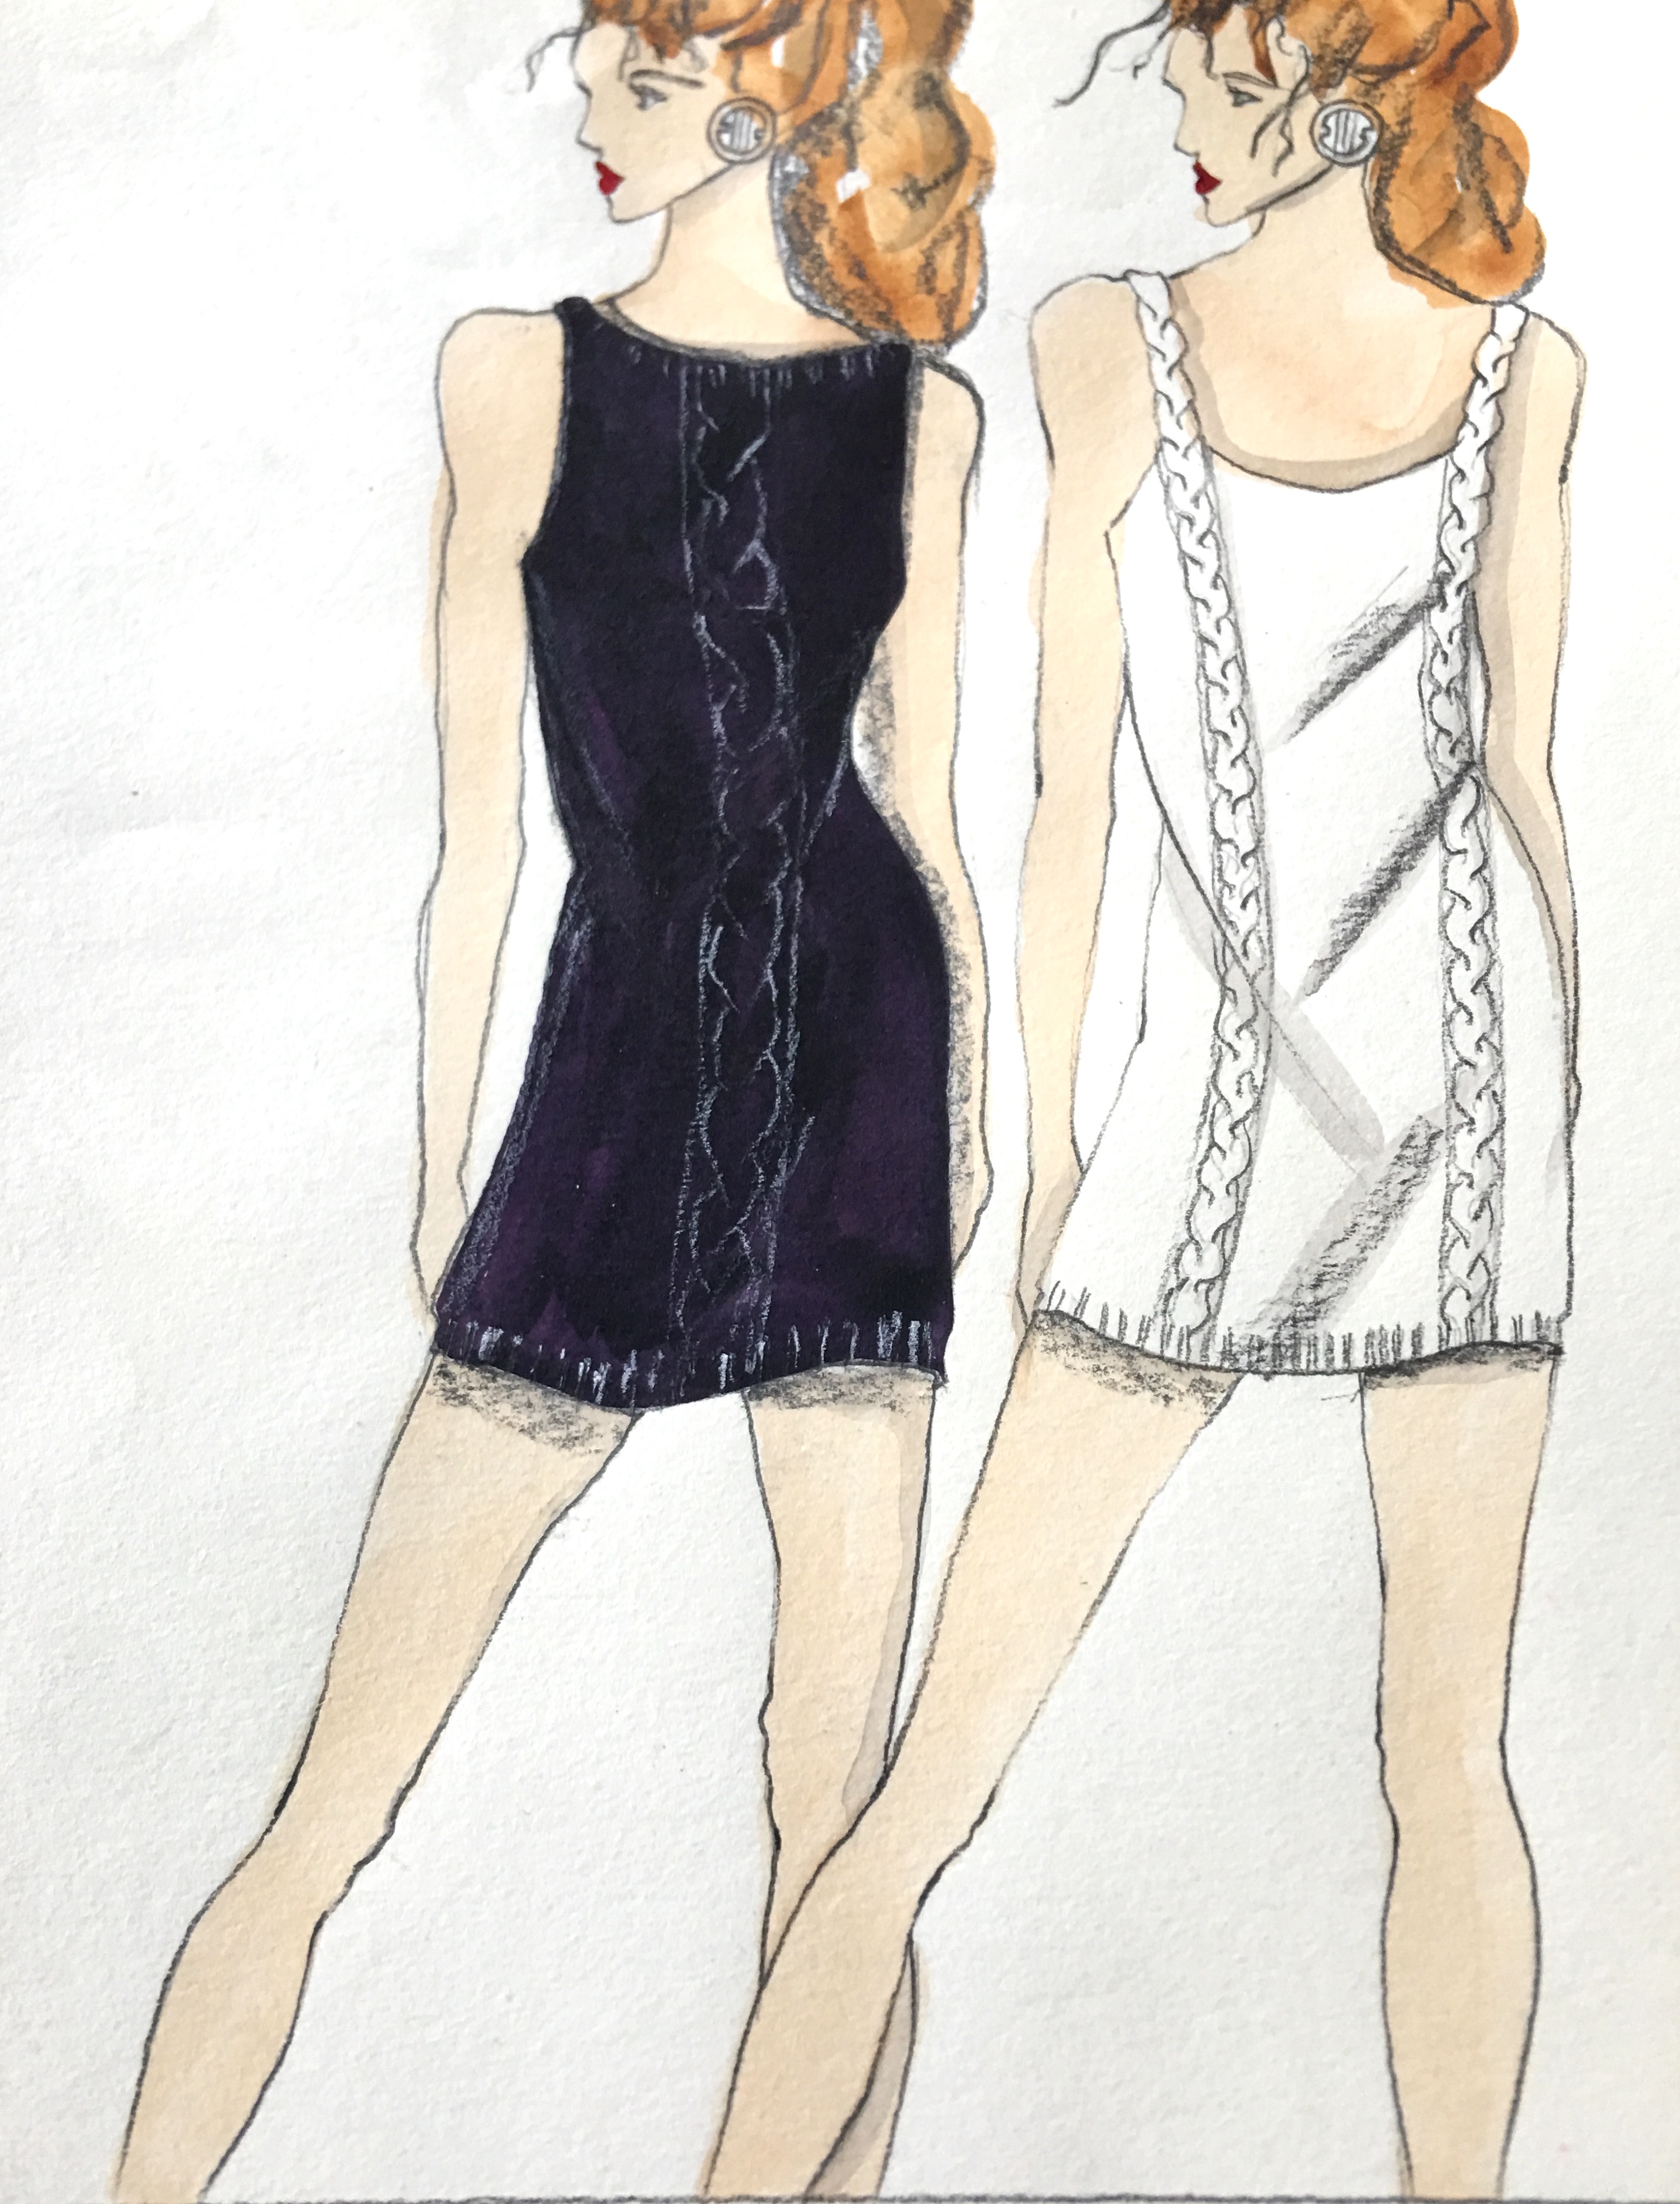
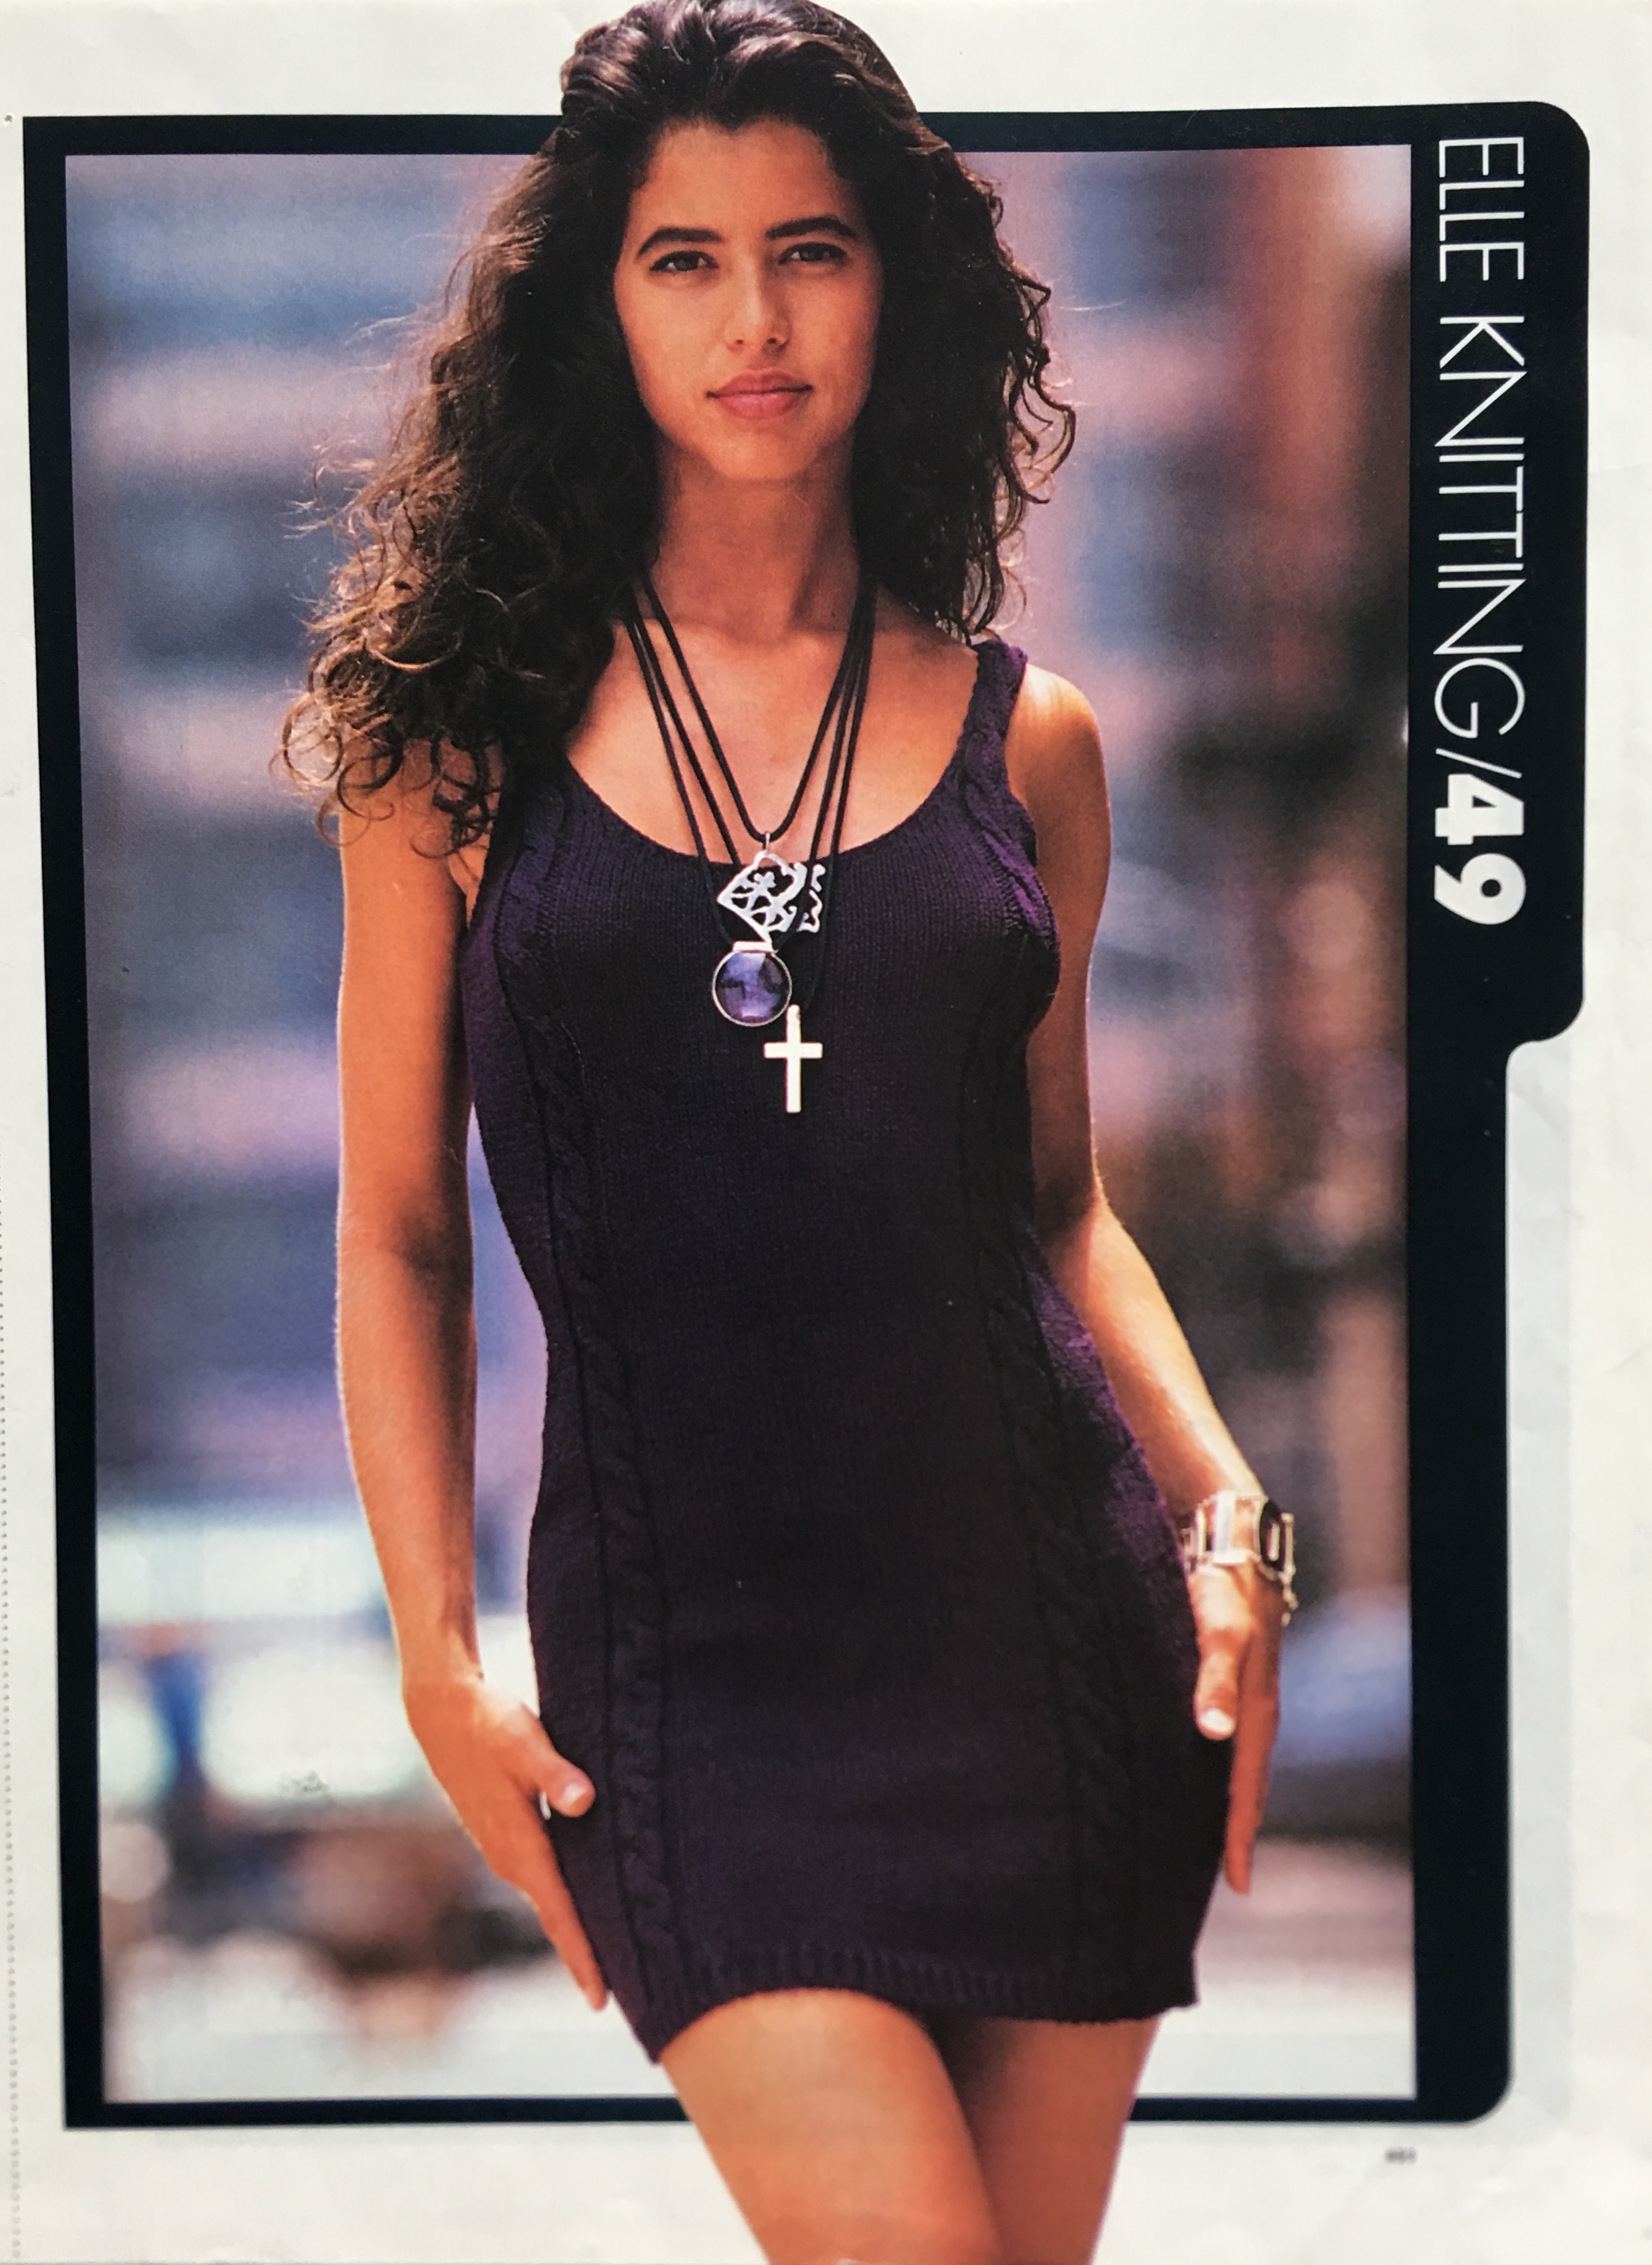
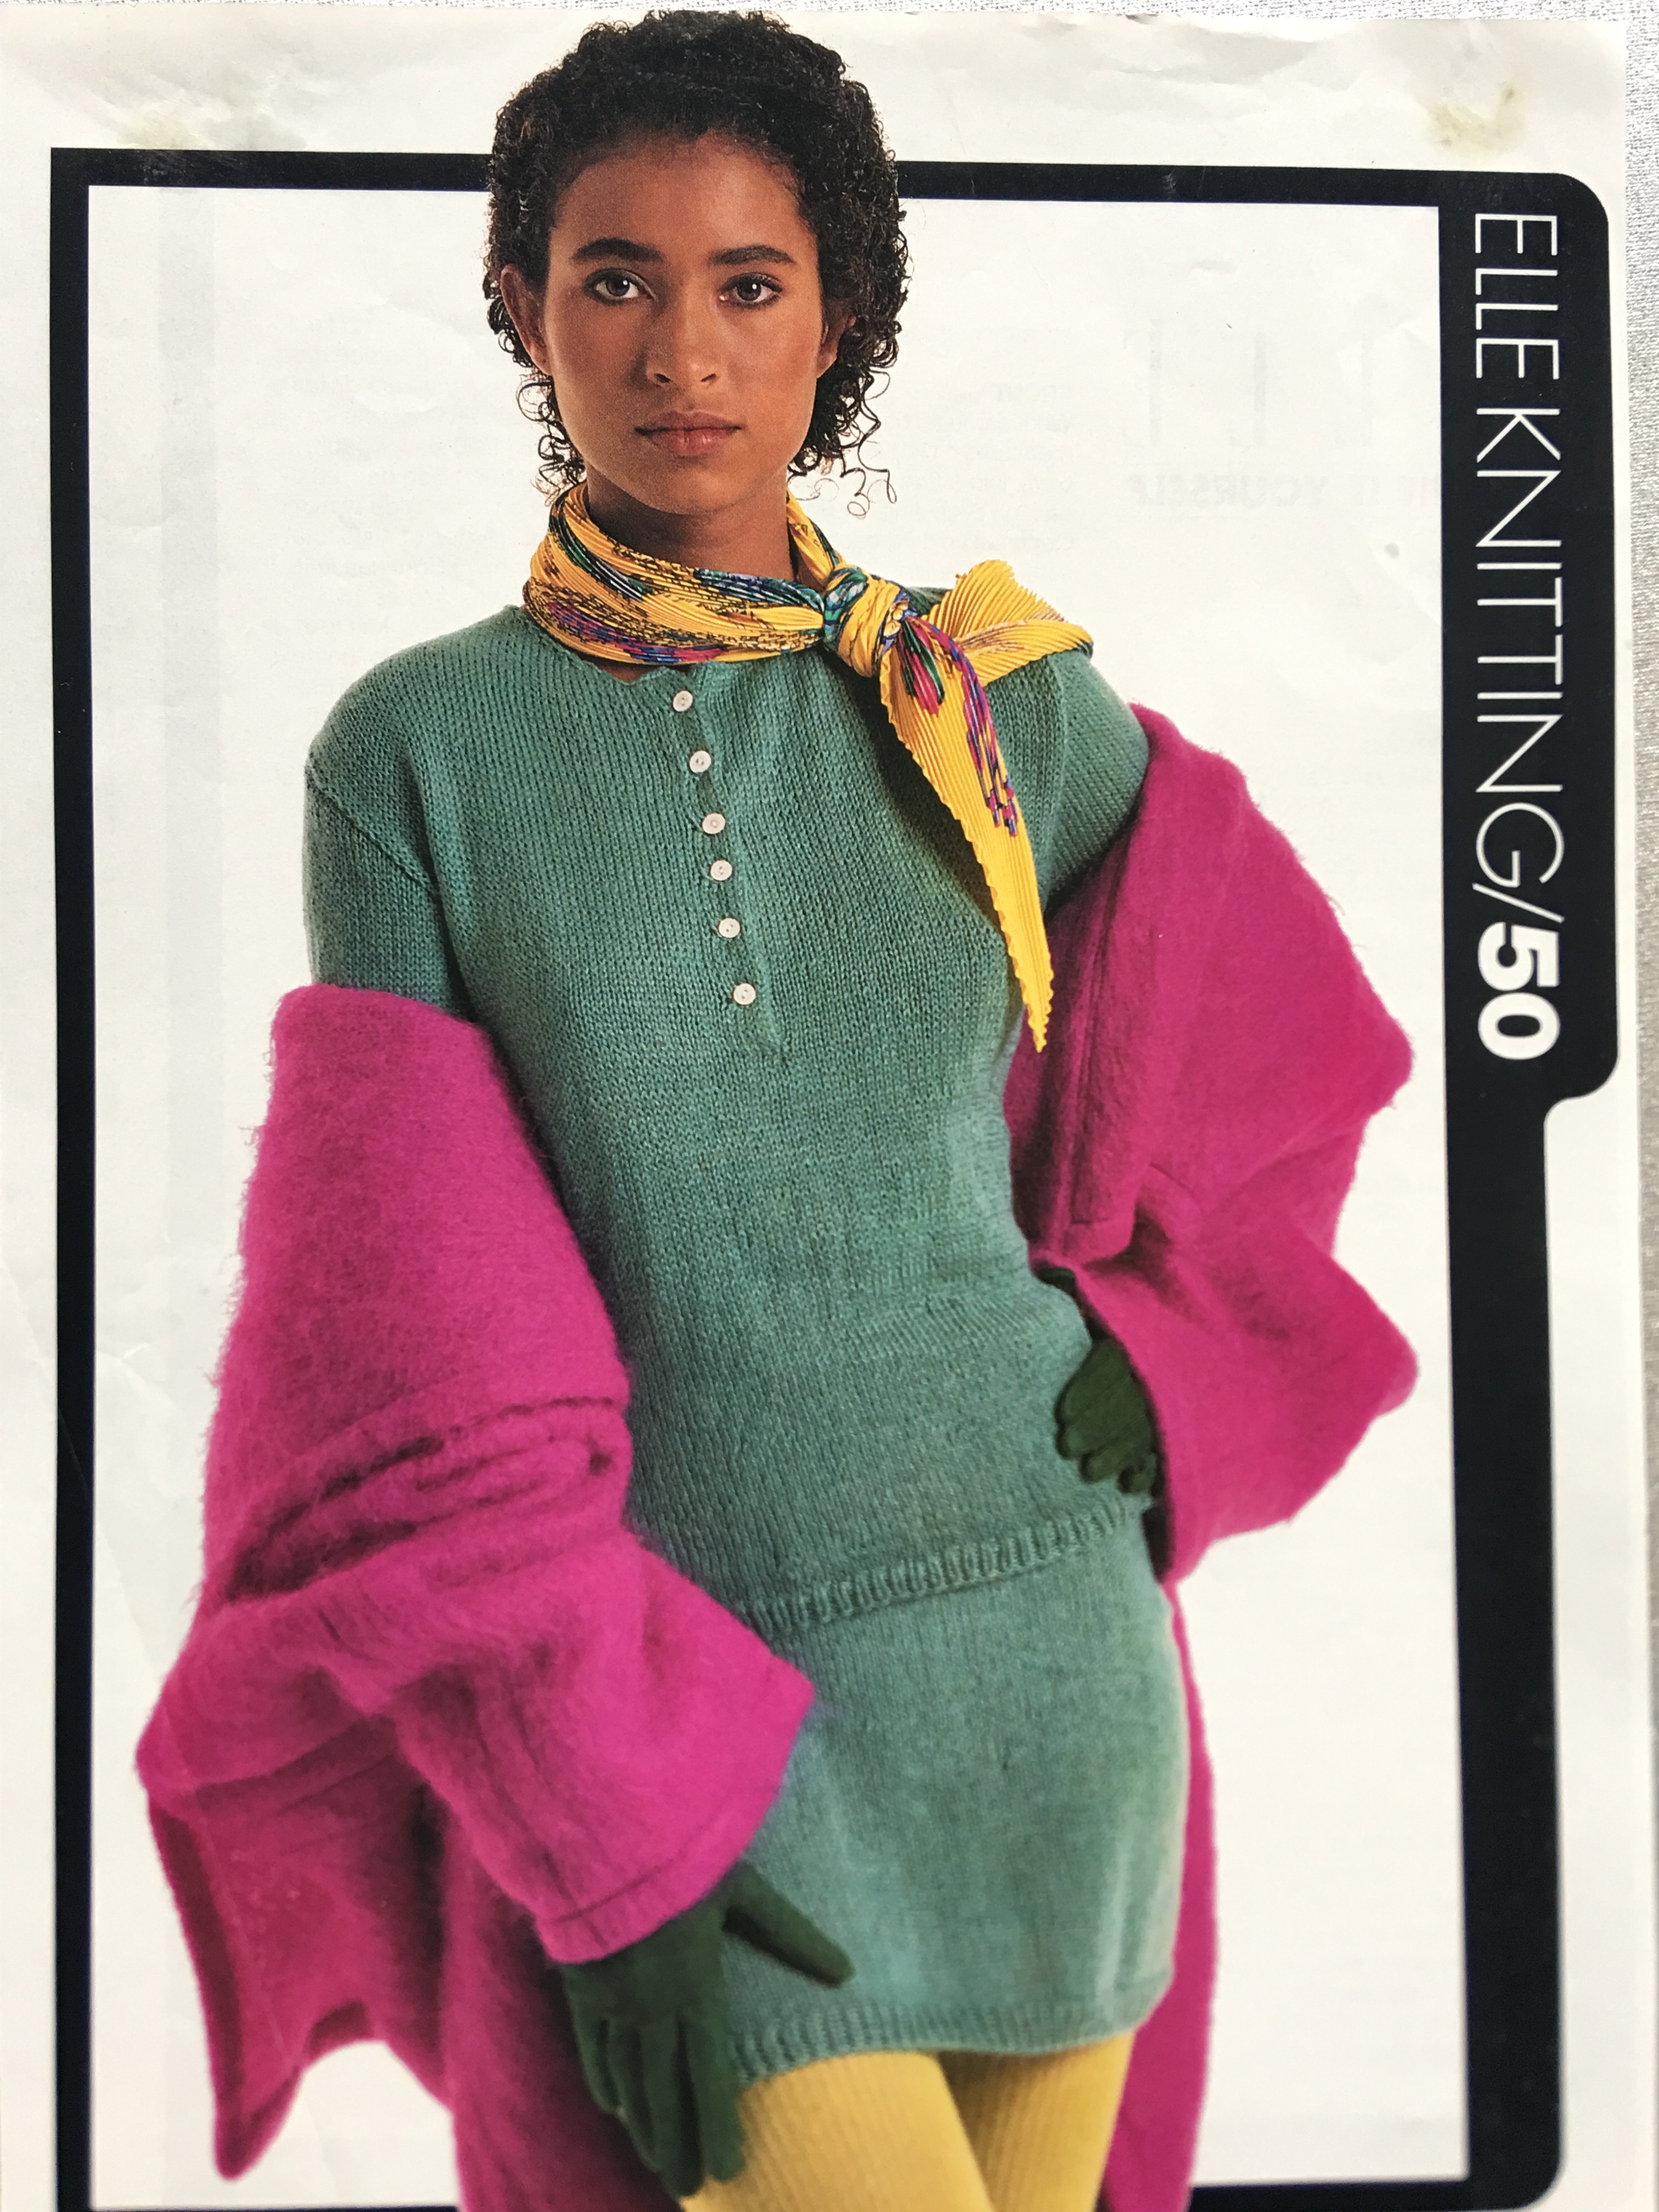
Because of my conversation with Anna, I reflected on the past (almost) forty years now, when I began my studies at Parsons School of Design and now, when I am learning everything I can about quilting, quilts, dyeing, and manipulating fabric in different ways to create an image, a feeling, an idea…
Another of my knit designs for Elle MagazineAn early design ensemble from my days at Parsons School of Design
All of which led me to a recurring topic – finding one’s artistic voice. How does one find it? How can it be nurtured, cultivated, encouraged?
While listening to a podcast a few weeks ago, two musicians were discussing this very idea and one of them repeated something they’d been told by another artist friend, who basically said – the only way to find your voice is by doing, and in the doing, you will not only find your voice, but it will make itself heard.
I love that! And it aligns with what I have learned through my experiences designing, whether that was fashion, knits, jewelry or quilts and fabric art.
A few months ago I decided I needed to learn how to piece. In quilting terms this is the ability to make something that looks like this: (This hen block was designed by Janet Nesbitt of One Sister.)
I have had a number of design ideas, such as combining pieced blocks with appliqué blocks and overlapping design elements that I cannot realize because there are some pretty basic things I do not know how to do. Piecing was one of them. I’m working on two quilts at the moment that cover all of these things, but in order to do them, and do them well, I need to learn how and then to practice, practice, practice.
So I signed up for Sarah Fielke’s 2019 BOM and began making Janet Nesbitt’s Half Crazy Quilt (which the pieced hen shown above is part of). In addition I joined a craftsy, now Bluprint class – Learn To Quilt with Amy Gibson. And while most of that class I was able to fast forward through, there were a couple of key take-aways that have helped me, such as getting seams to meet up perfectly and squaring up.
With each of these projects I’m learning and in learning how others do it, I am practicing and expanding what I can design, and hopefully my own voice will become clearer and more refined.
I think about art all the time: the process, the way life impacts it… Wondering about how other people will see it, whether they will approve, like or dislike it, is the biggest buzz kill to creativity that I know of. But, I find, silencing those worries often difficult. The best steps I know to do is to dive in head first, and just go for it.
This last year has been one of exploration, diving in head first and going for it. If any of you are on Instagram, I post my works in progress almost daily. Below are three projects I finished this past year. I have four more in the works, but nowhere near completion.
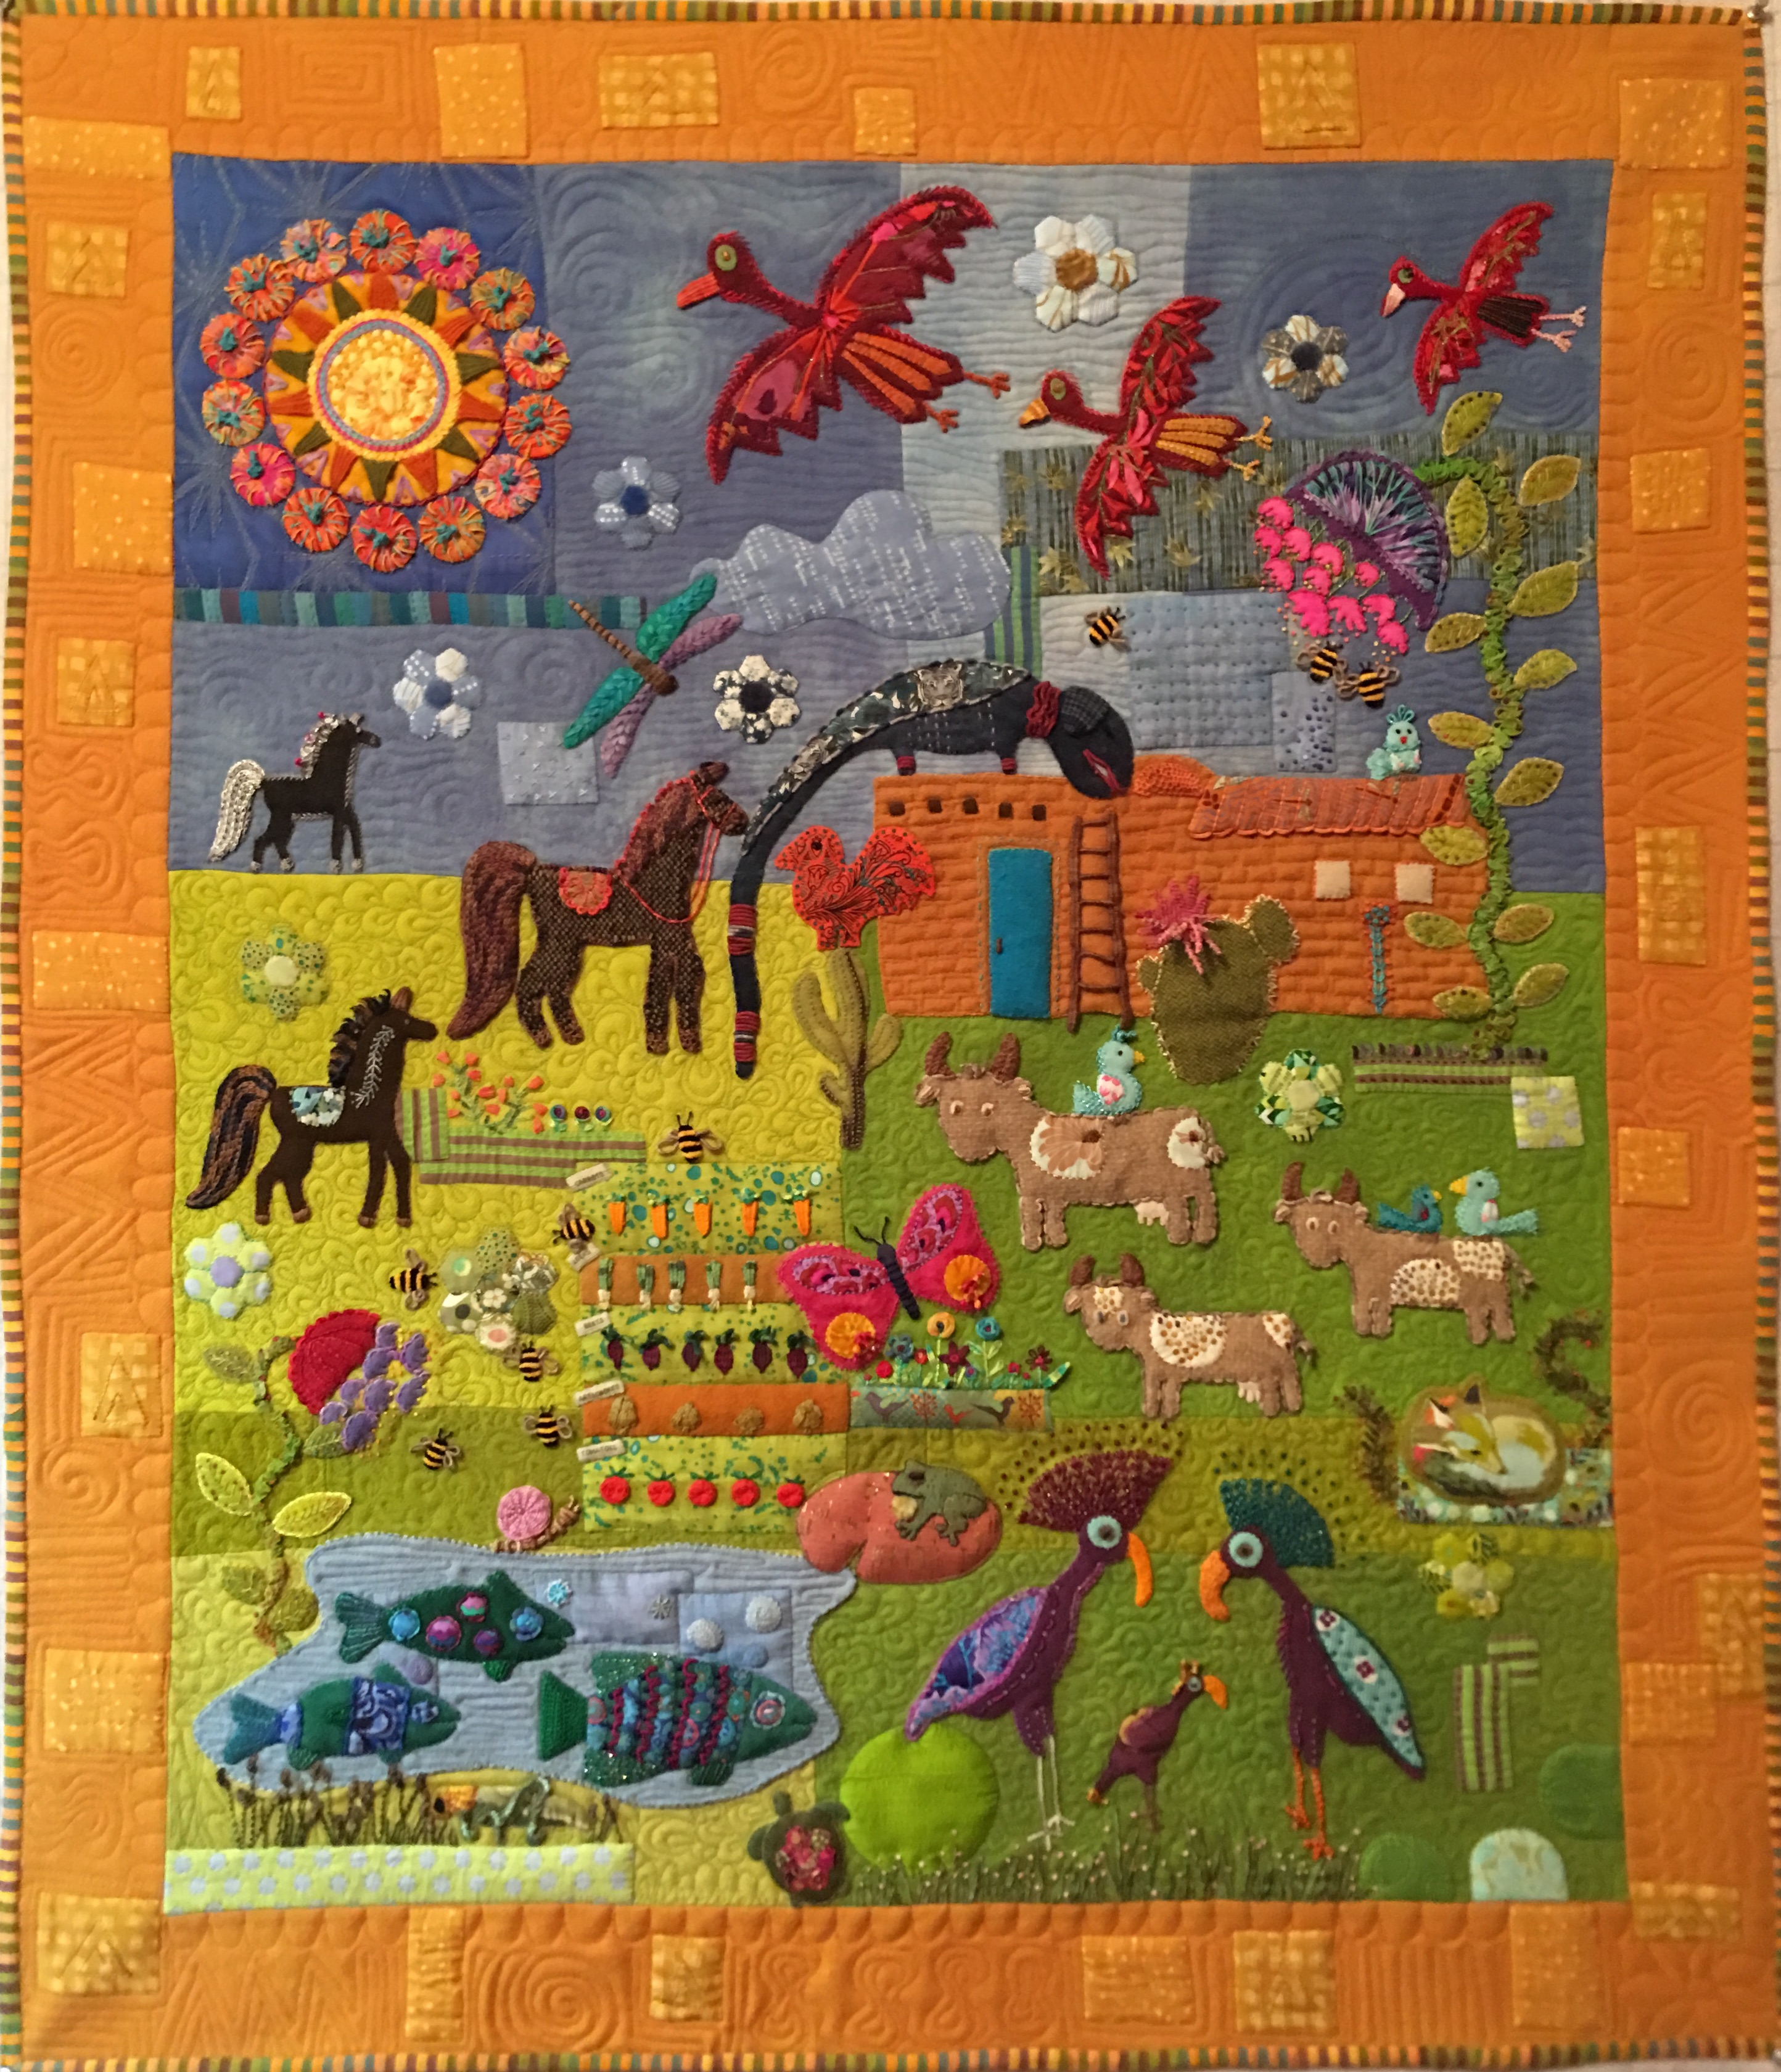
This first is titled: Wandering Through the Past and was inspired by the International Folk Art Museum in Santa Fe, New Mexico where I went for one of Sue Spargo’s fabulous workshops put on by Madeline Island School of the Arts. As I wandered through the museum much of the work felt oddly familiar. I remembered that my grandparents had honeymooned in Santa Fe & much of the furniture in their Colorado home came from that part of the world. As I designed this quilt, I began adding things from my childhood spent in Northern California with parents who collected modern & primitive art. Wandering Through the Past was thus born using wool, cotton, velvet & silk, & embellished with a wide variety of threads and stitches.
Wandering Through the Past
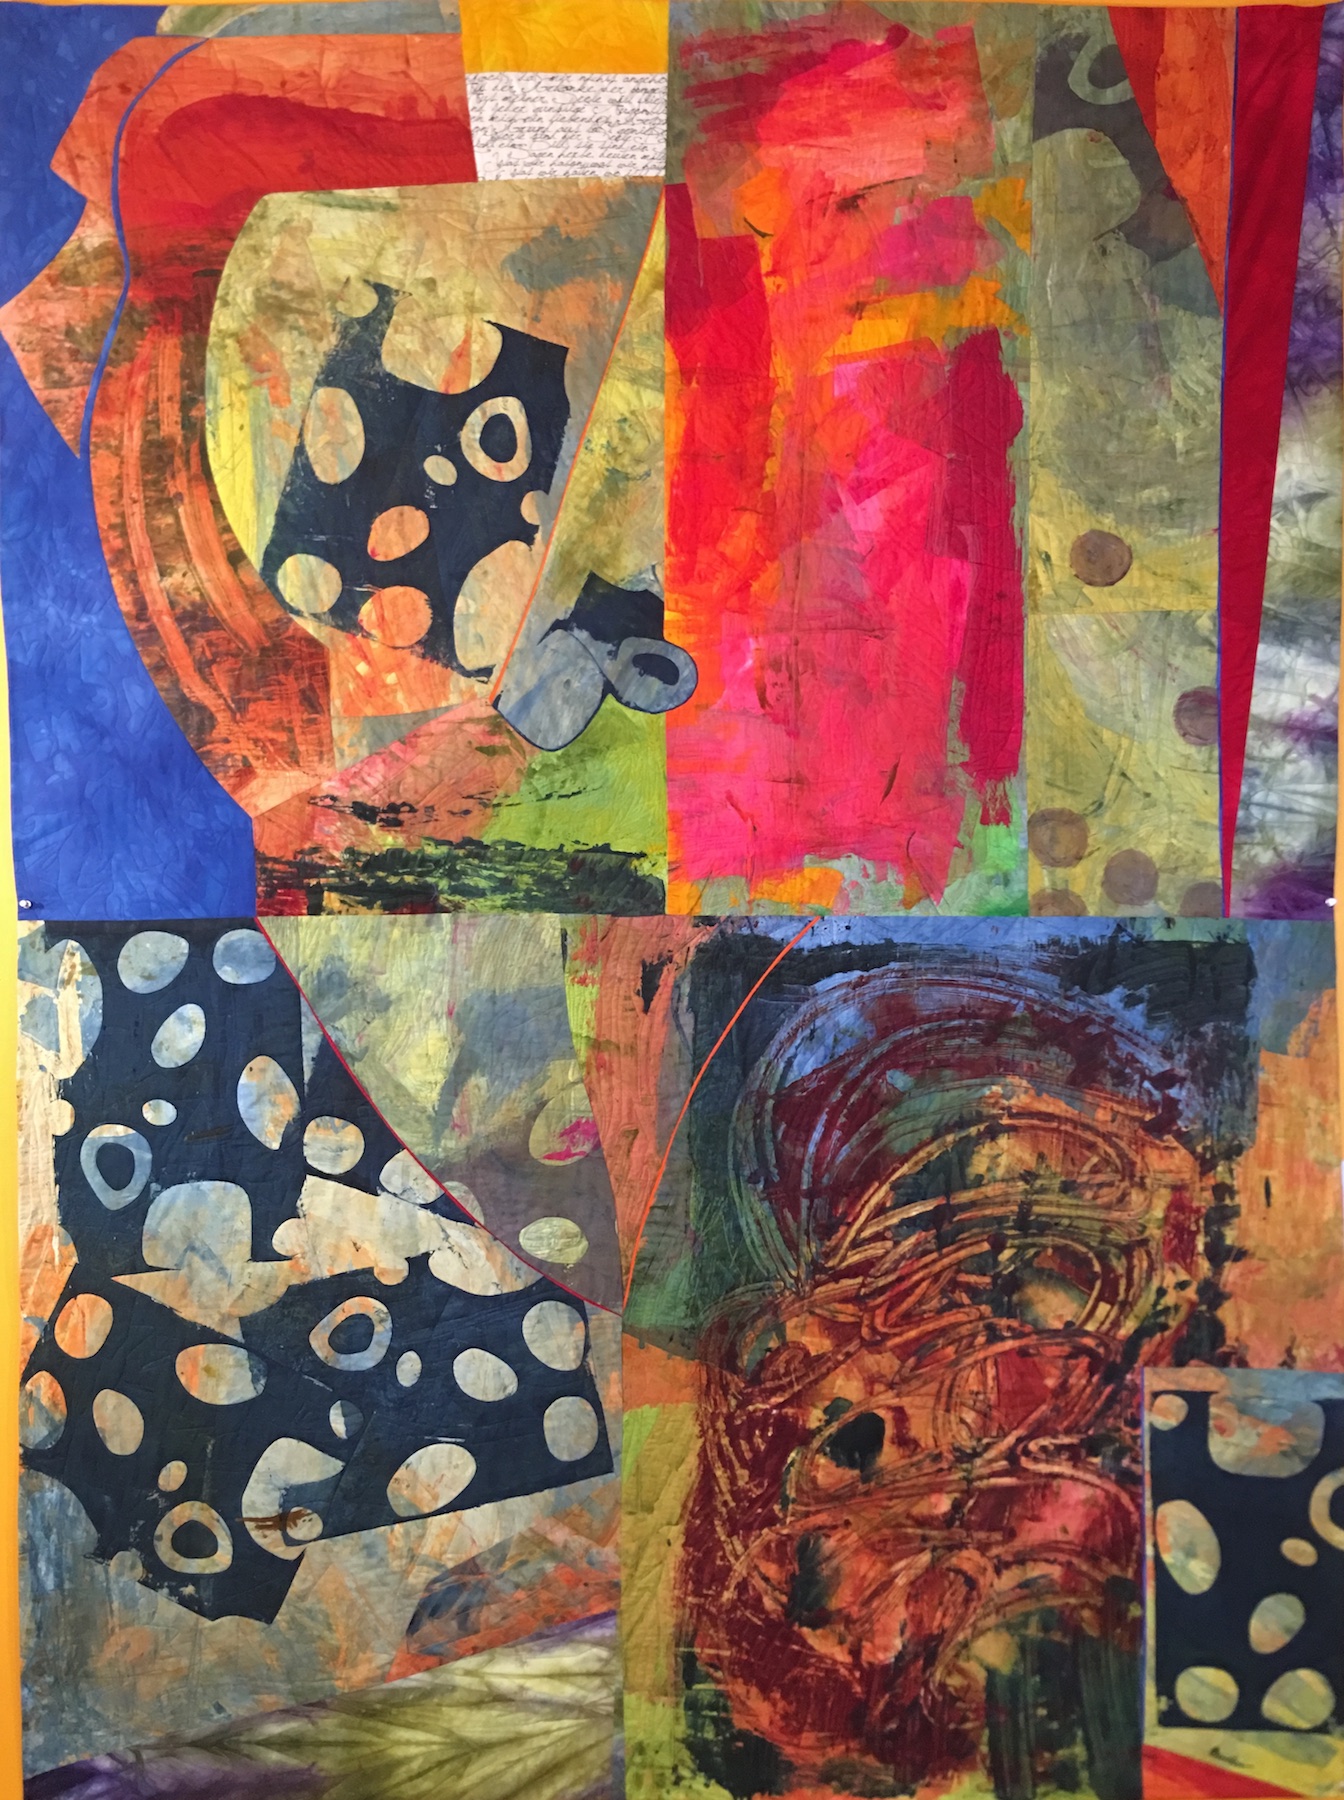
The next one is a complete departure from the one above in that most of the fabrics were hand dyed, hand painted, using stencils, screen printing and mono printing, and is not representational. All techniques I learned from the talented Pat Pauly in a workshop I took last April at the Pro Chem studio. It was the first time I’d ever tried my hand at improvisational piecing. I free motion quilted it following the general shapes and paint strokes.
Reflections
And this last one I began designing with the idea that I would use an old skirt from my mother. After a few weeks of struggle, I pulled out some of my hand dyed, Shibori, stencil printed, wax resist, silk screen & low immersion dyed fabrics. The fabric from the old skirt was pushed aside to make way for my hand dyed fabrics, which I then began piecing together with a few commercial prints. “Hope” was very bossy right from the start; demanding I use this or that fabric, slashing & piecing, reconfiguring… Mostly I just had to get out of the way & listen to its demands.
Lest you, good readers, misread the above and think this is going to be about a metaphoric death resulting from an existential crisis, let me set you straight, it’s not. This is about dyes, dyeing fabric and design. Now if you’re like me, you might be thinking – oh who has time for all that? – but let me tell you, there’s so much more to dyeing than you think. Get it? Trying not to laugh, really, really trying… It’s impossible to write a post about dyeing and not keep thinking of all the puns one makes without even trying… This is just too easy. You might dye of laughing… hee-hee!
Ahem.
Okay.
Seriously.
I never thought I’d enjoy dyeing fabric. I always felt there’s so much great fabric out there, why would I want to dye my own? Well… it turns out, not only was I wrong, but what a beautiful world it is once you begin dyeing! Before I get ahead of myself, this all began because I was looking for blogs by quilters who are also artists. As I was looking around I found the extremely talented artist Elizabeth Barton, and her blog, Art and Quilts, Cogitations Thereon. What a find! I read this post, The Proliferation of Online Classes, which I then felt compelled to comment on, which in turn led me to investigate the classes Elizabeth teaches and in particular one that began a week ago Friday, which I promptly signed up for. Her five week online class, given through The Academy of Quilting, is titled – Dyeing to Design. Love that.
Dyeing has never called to me, but I enjoyed reading Elizabeth’s blog, really like her work, and this class had the most immediate starting date and I’m impatient, so I thought – Why not? This is one of the many wonderful things about being new to something, it never hurts to try something you’ve never done before and the worst that can happen is you discover it’s not for you and you move on. On the other hand, you might fall in love with whatever it is, become totally obsessed and that is a indescribable joy unlike any other. The latter pretty much describes my experience with quilting and fiber art. And so it was again, with dyeing and this class, now in its second week. What a fantastic class. I cannot recommend it, and Elizabeth Barton, more highly!!
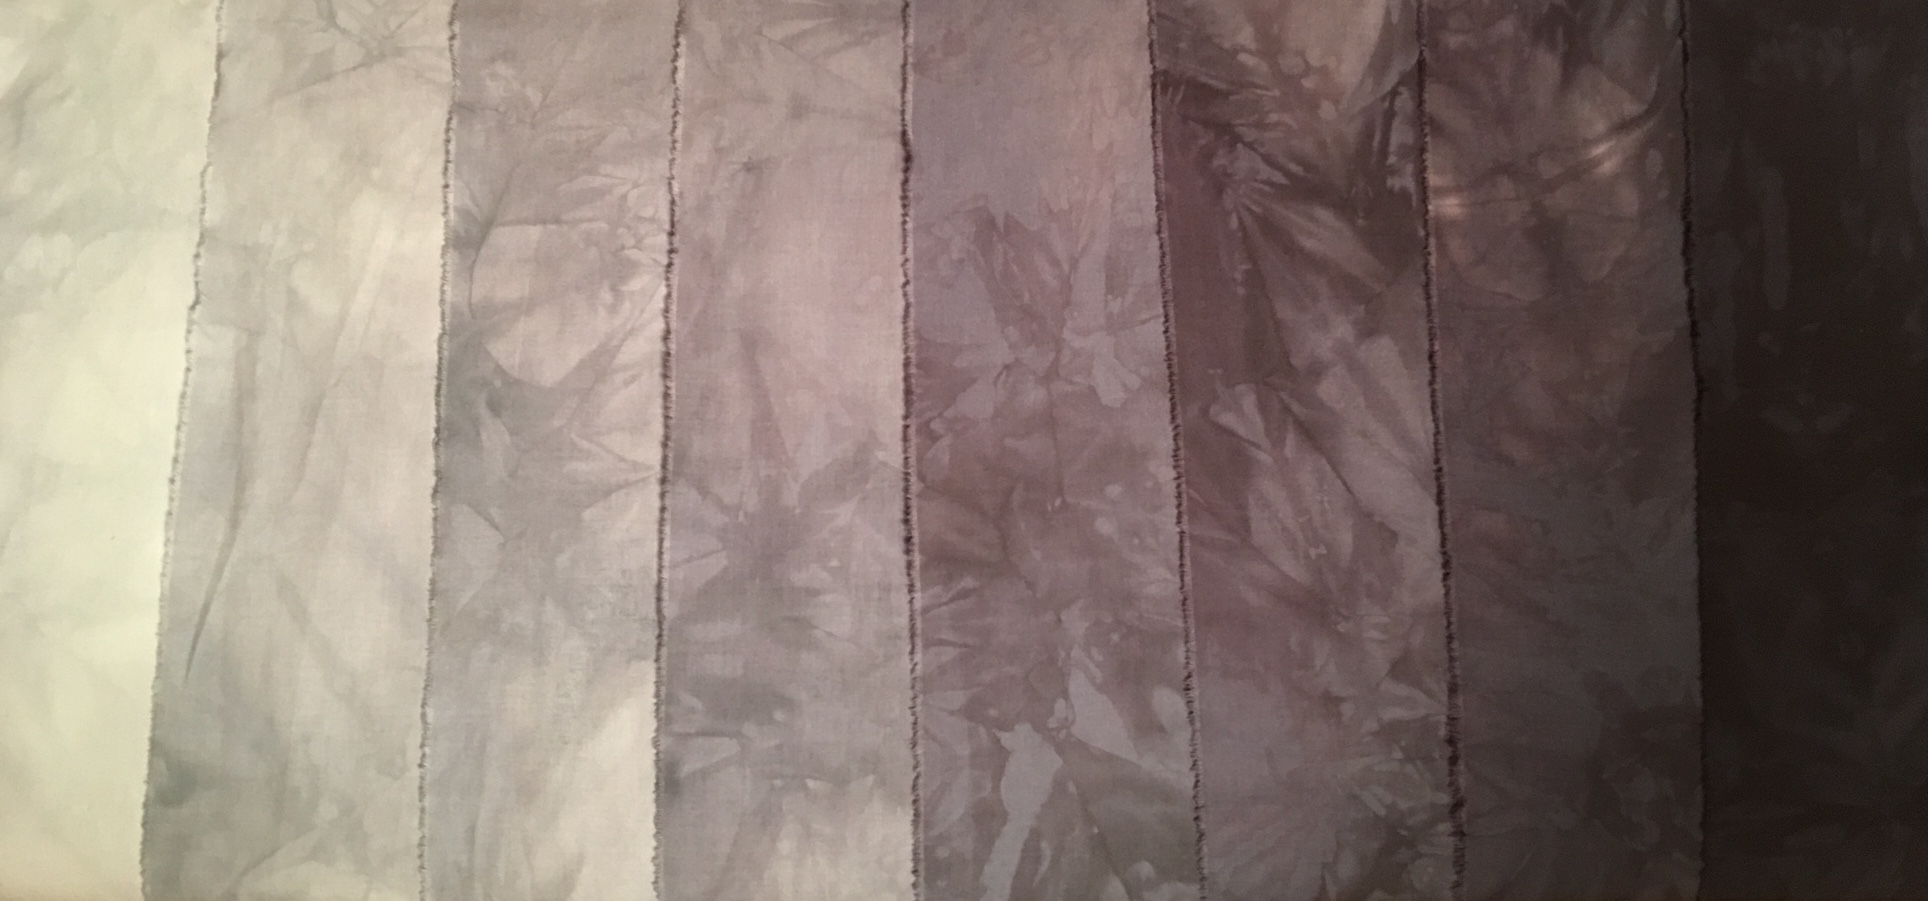
It helps that Elizabeth is a terrific instructor, very responsive and thorough, has a great eye, and gives excellent feedback. She writes extensive instructions with good explanations and examples of her own work to illustrate what she’s talking about. The first week we dove right in mixing all our various dyes for the next five weeks and did this – gradations of black (photograph below.) You’ll notice the mottled effect, which I think is so beautiful and striking. As we were working with black and since there’s no such thing, the blues, pinks and greens can be seen in different areas. The organic look to the fabric also appeals to my sense of design and so I was hooked. Totally fell in love. Completely. Dramatically. In. Love. Designing a piece using these gradations was next. I had a couple ideas and with Elizabeth’s encouragement settled on this one, which also happened to be the first idea I came up with.
I decided I would cut the fabric into 2.5″ squares, which meant that after they’d been sewn together they would be 2″ squares, gradating from light to dark, but a little unevenly to keep things interesting. This is how it looked positioned on my design wall.
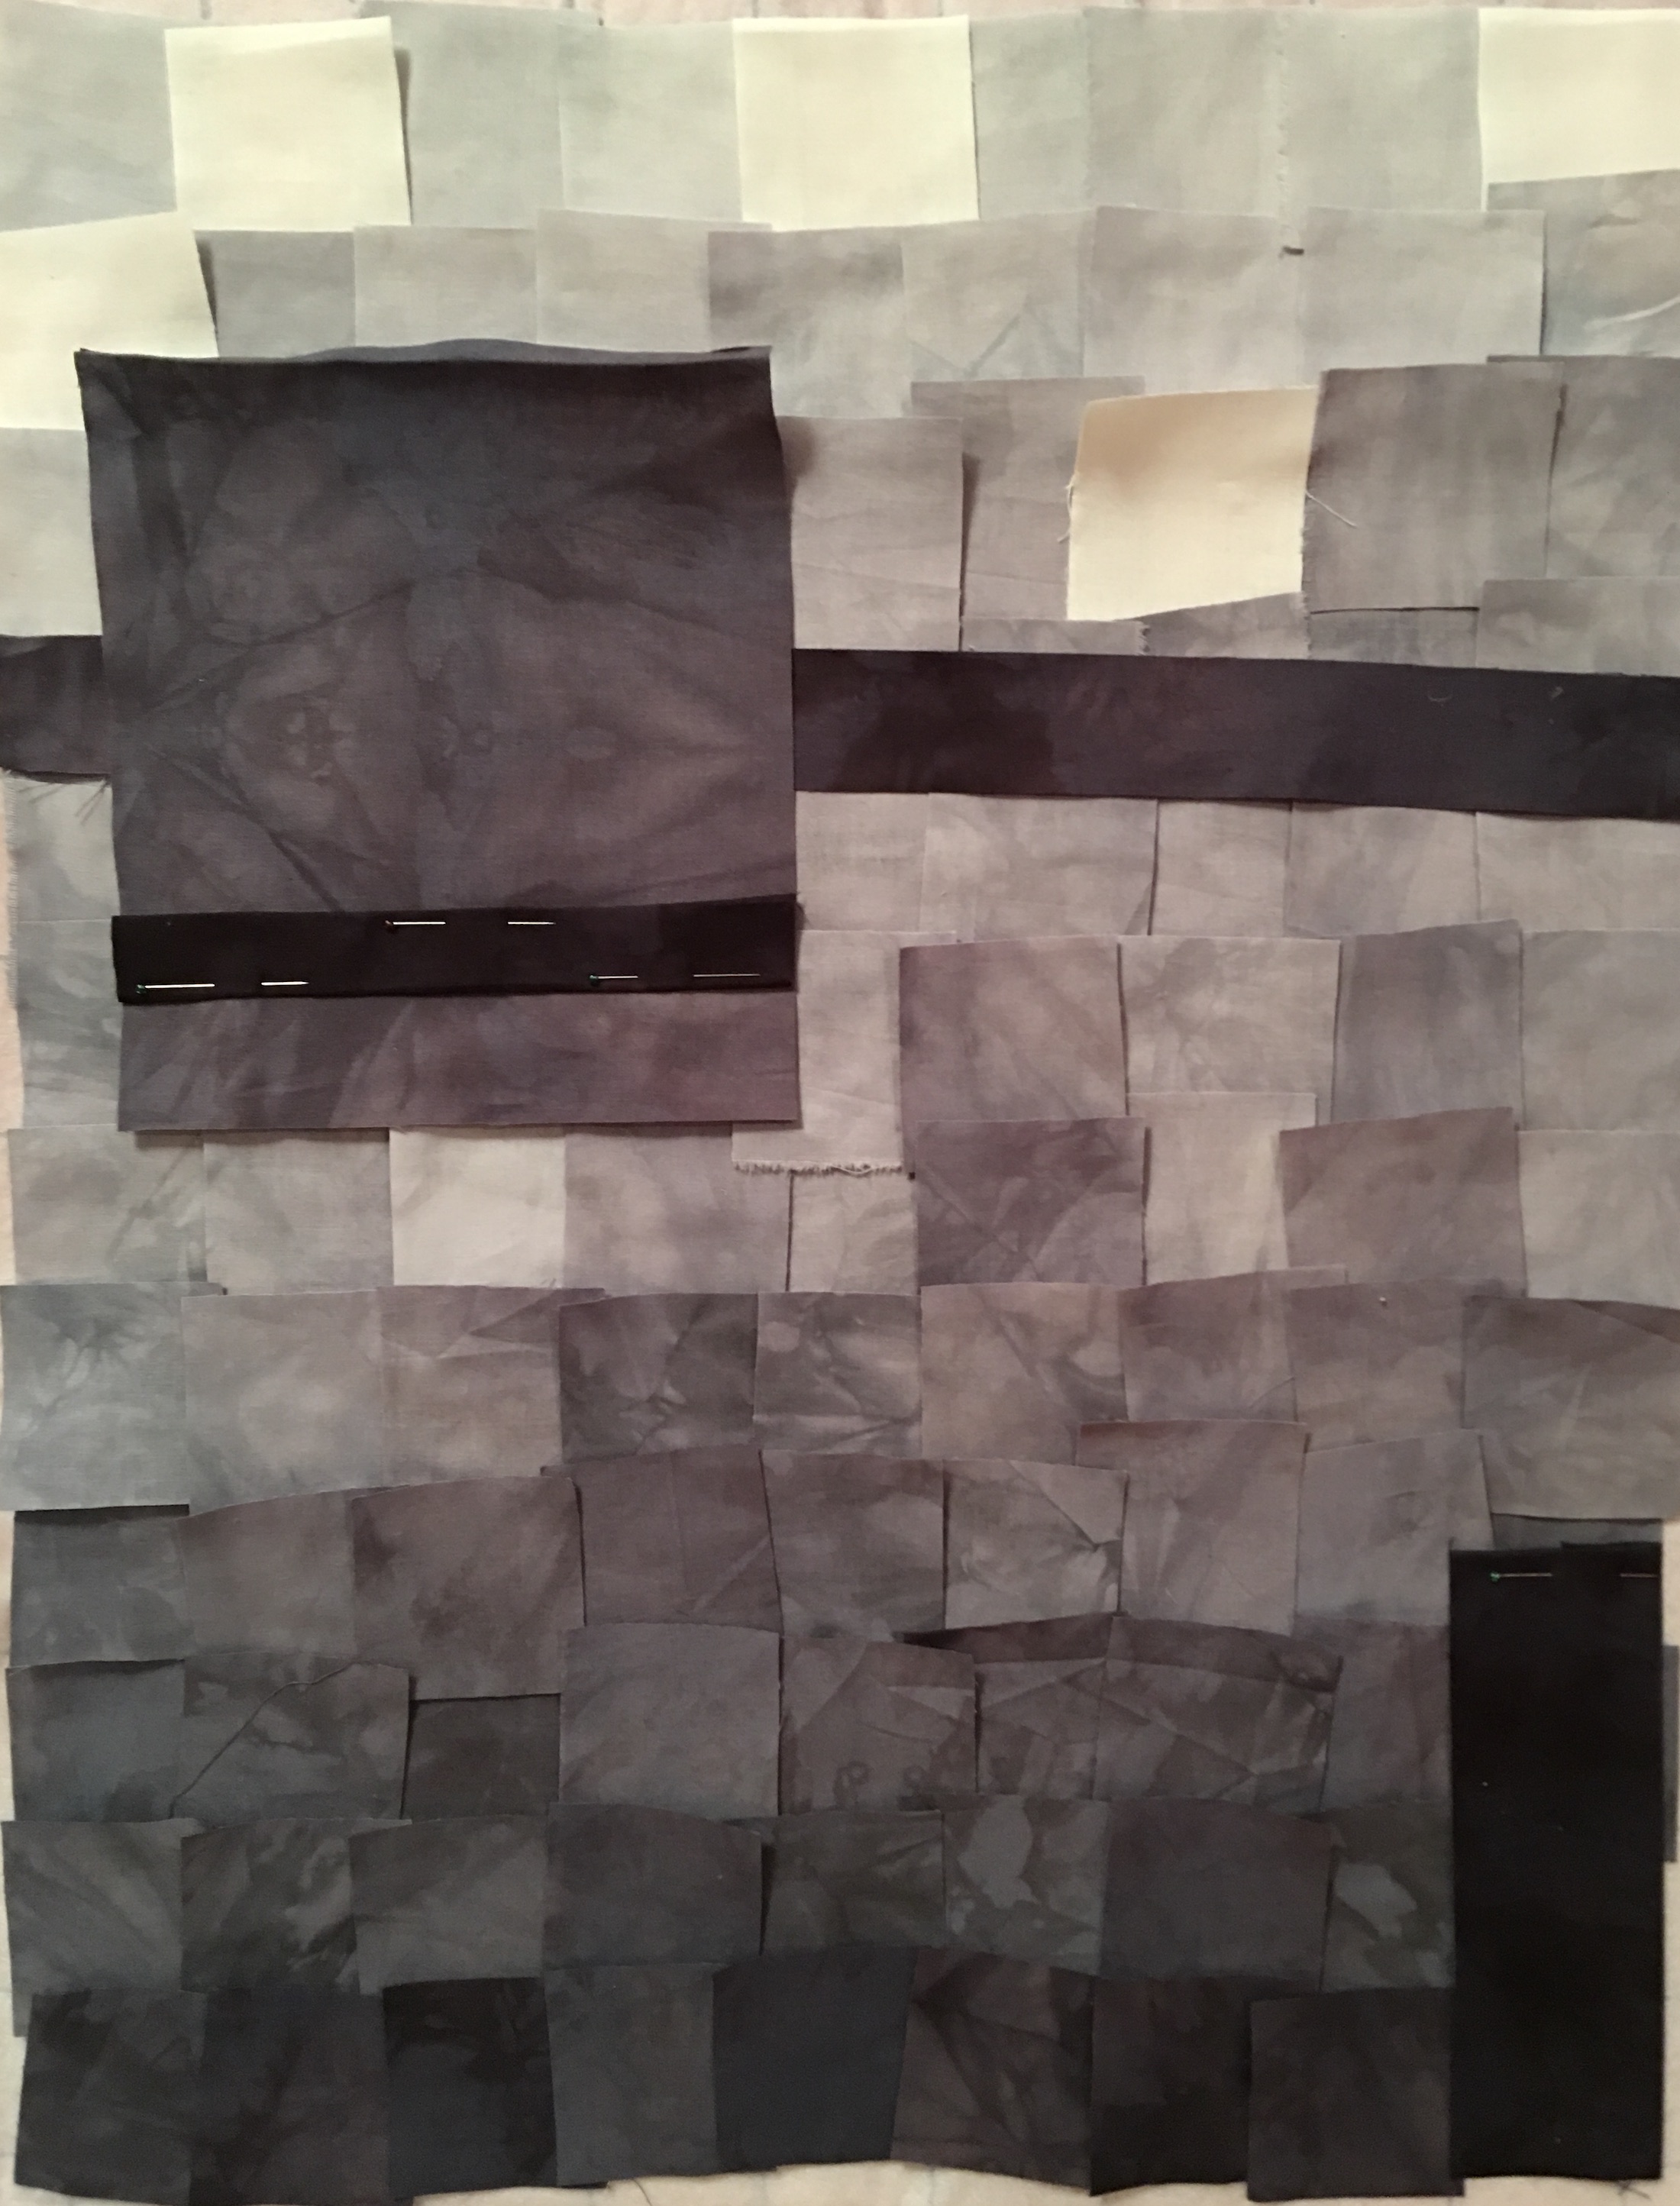
Emboldened by Elizabeth’s helpful suggestions, I made a few adjustments and began sewing all those squares together. That’s a whole lot of squares… After consulting Elizabeth (again), she suggested linear and horizontal stitching, I began quilting, but left the larger square alone as I wasn’t sure what to do with it. I wanted to do something, but couldn’t figure out what.
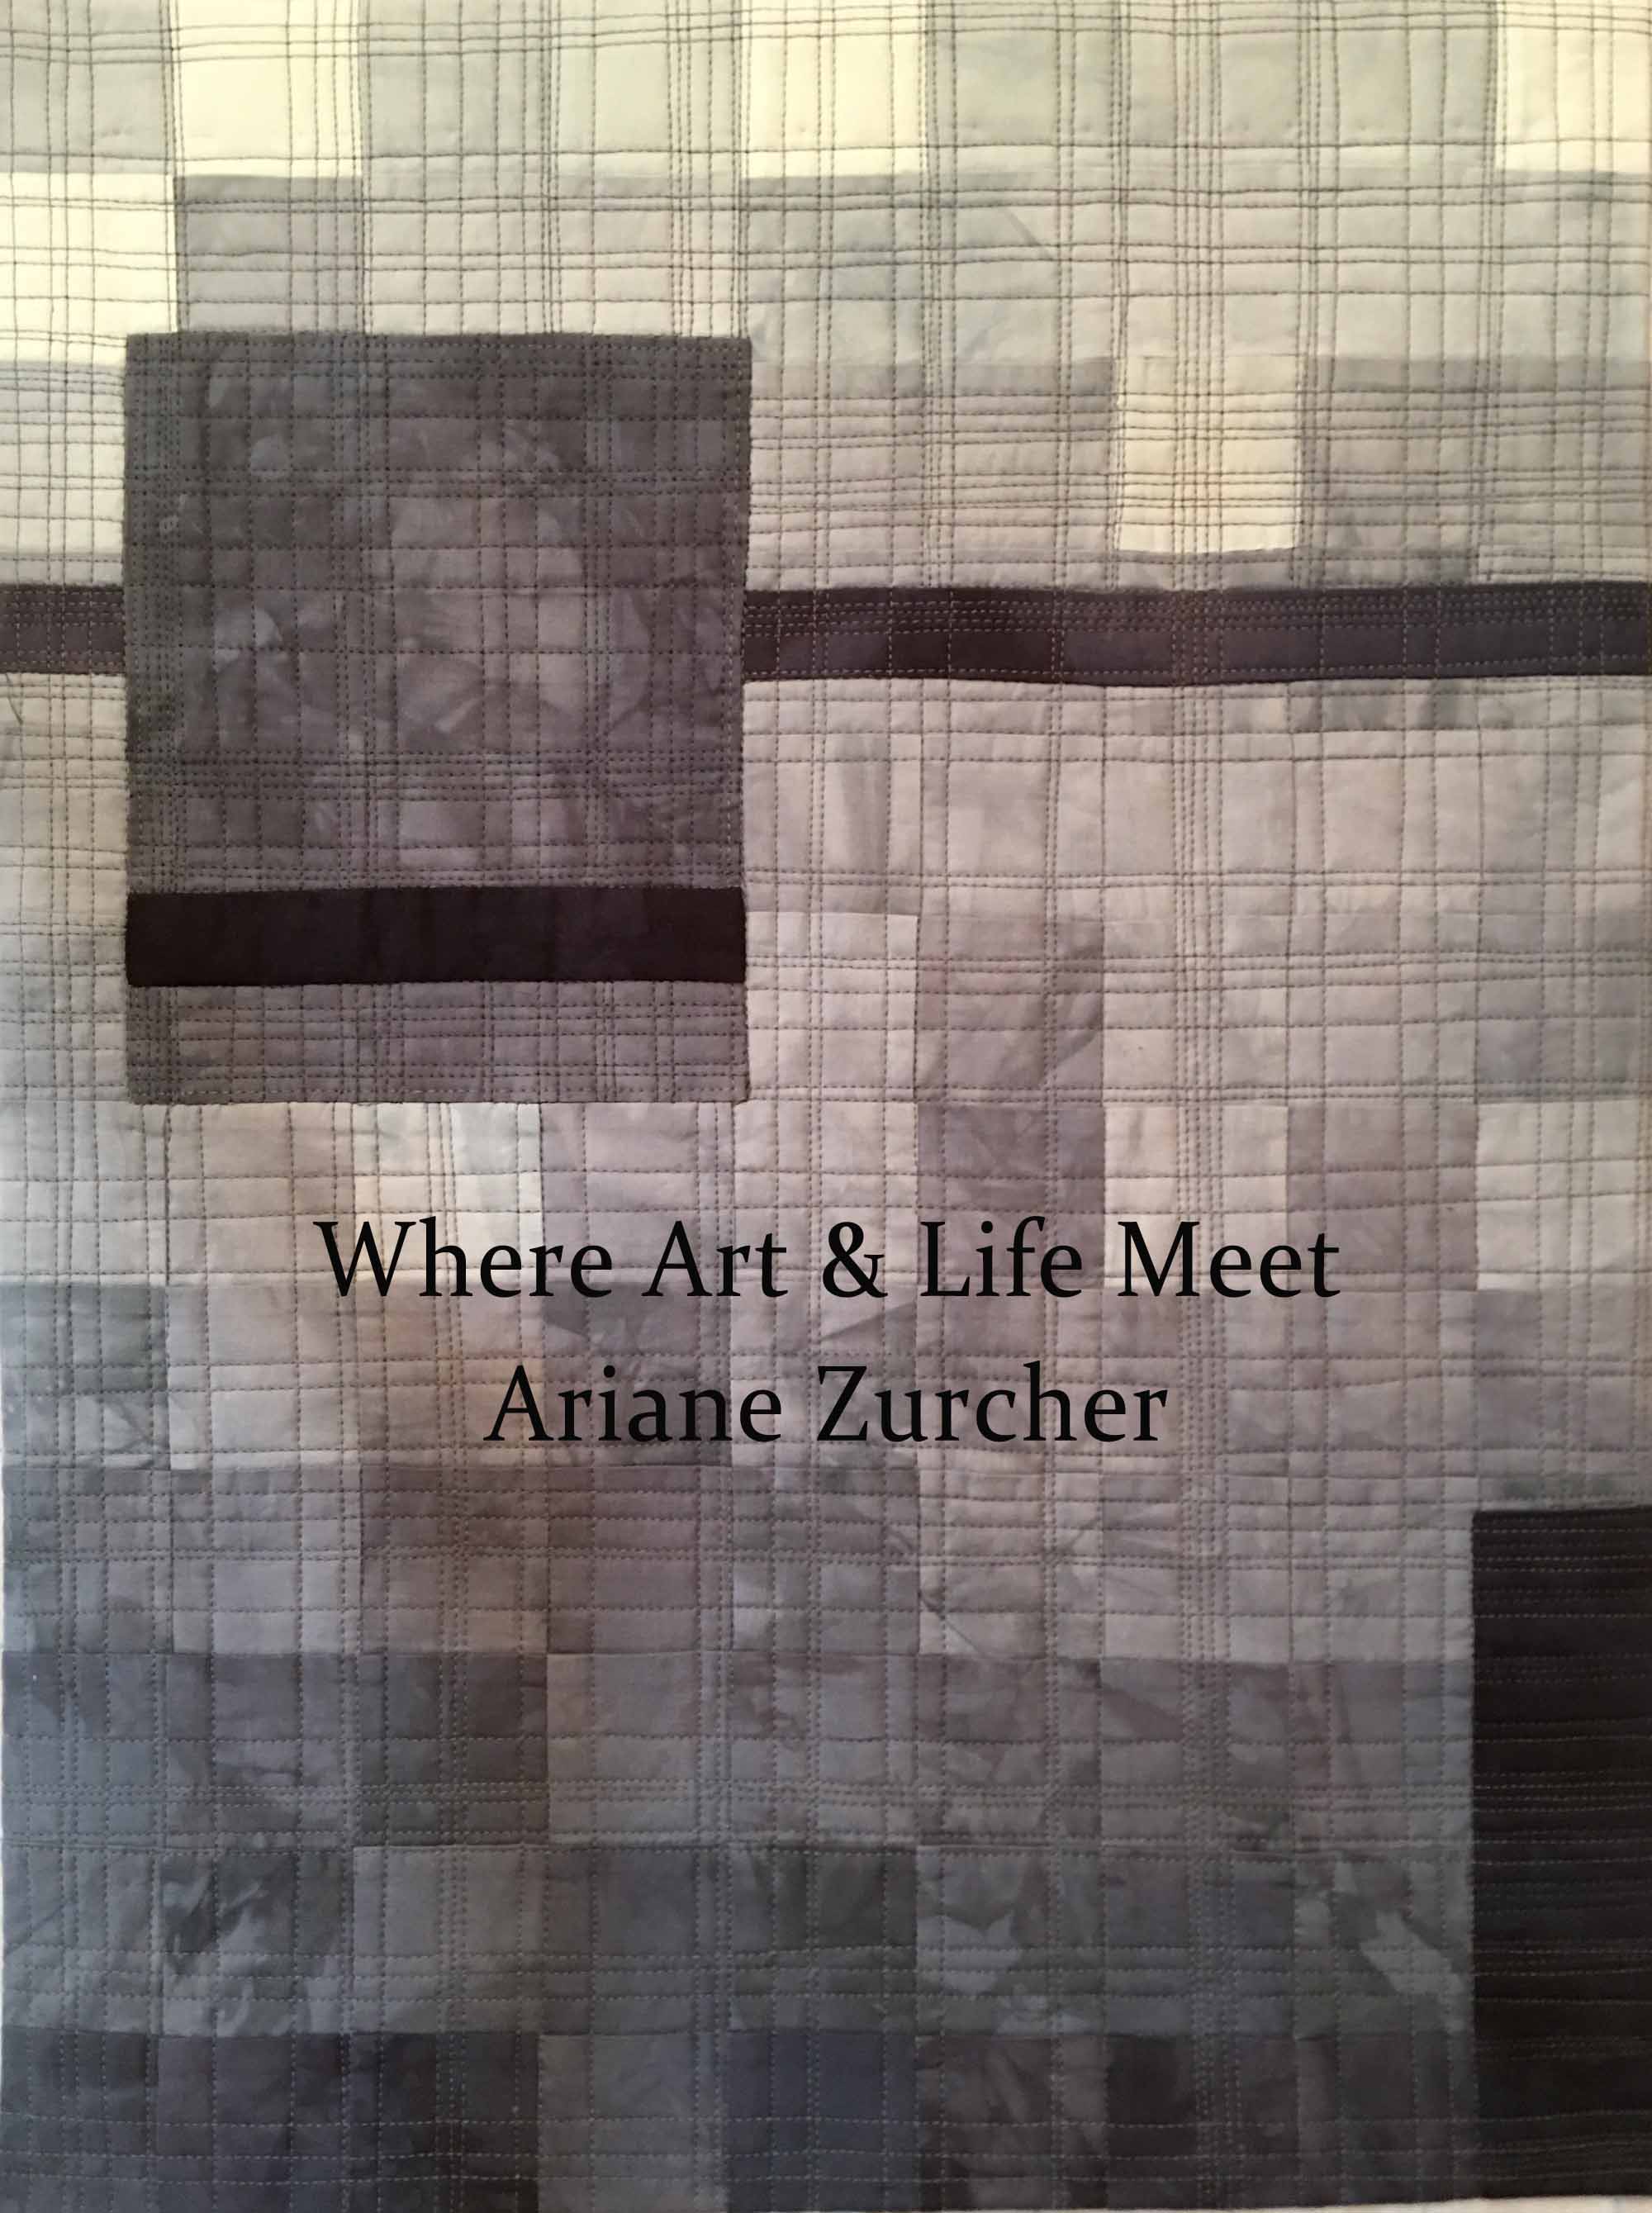
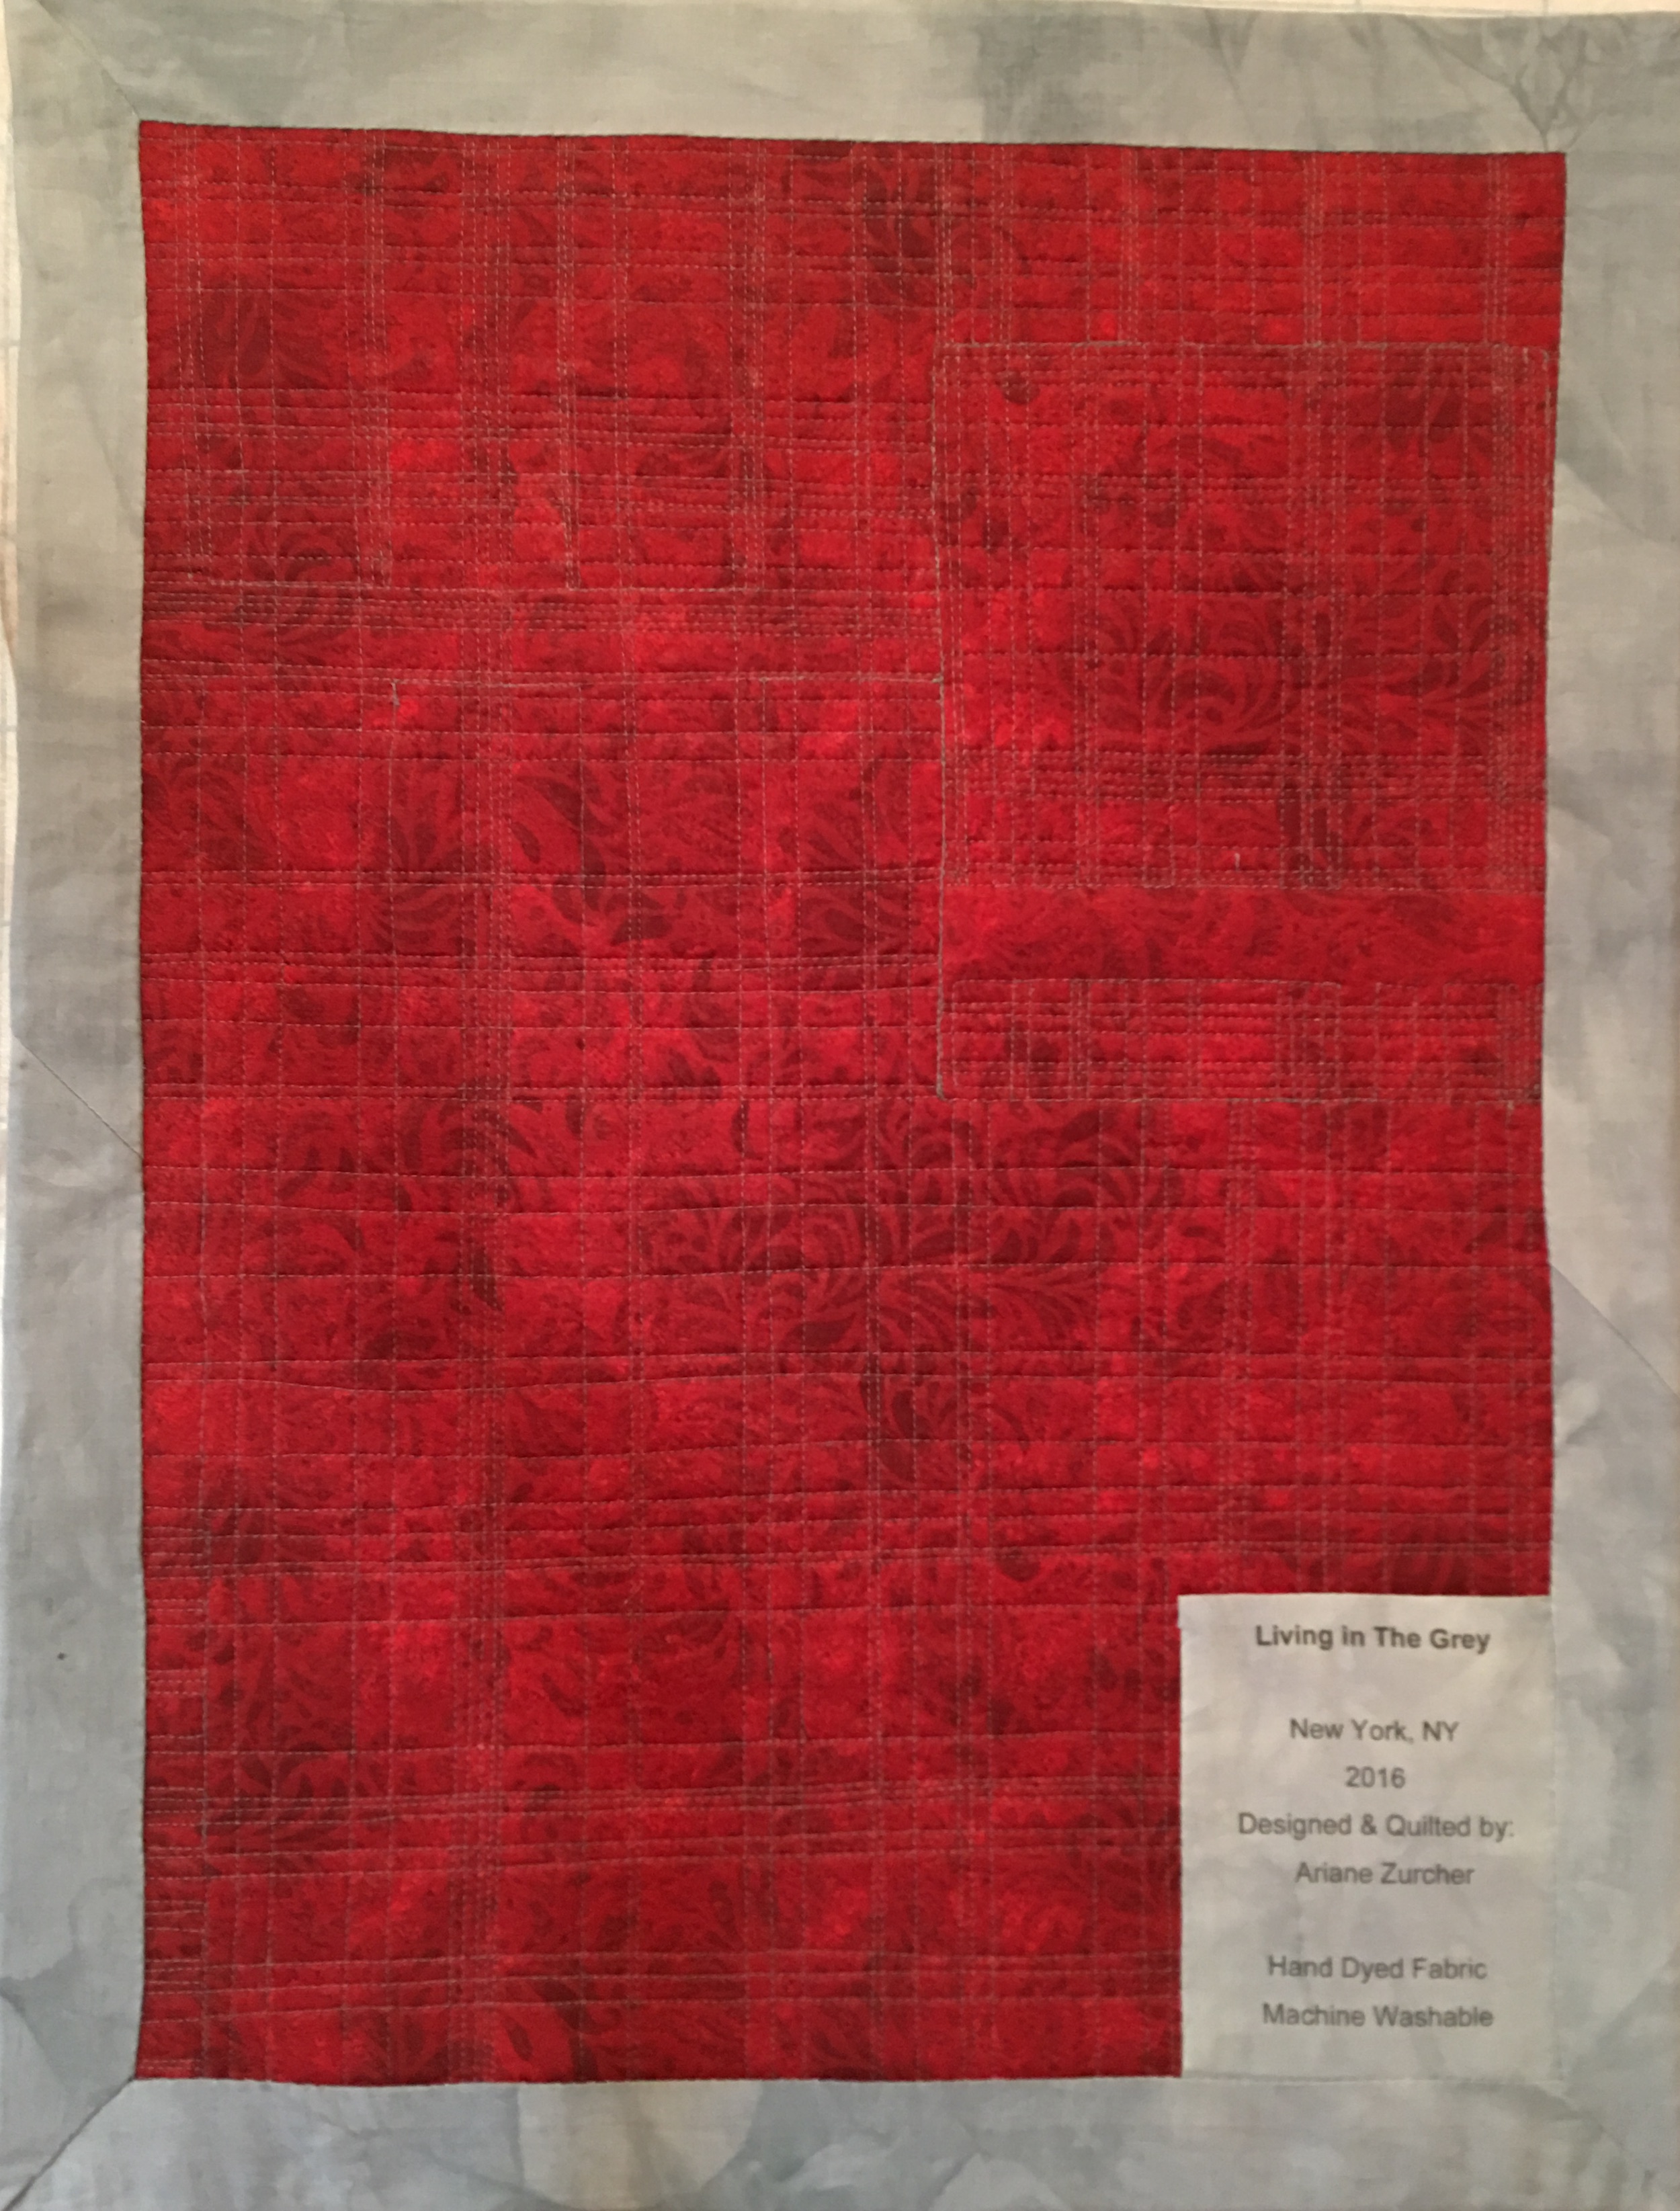
Back to Elizabeth who gave me more excellent feedback, suggesting a different color thread and syncopating the stitches so they didn’t meet with the other lines from the larger piece, and off I went to finish it. I decided against a binding, instead made a facing out of my lightest grey and backed it with a piece of red fabric I had. I made a label, again from one of the light greys and voila! This piece, entitled Living in the Grey, is 17″X 23.5″.
The thing about dyeing your own fabric is how utterly seductive it is. You can mix any color you want by tweaking the proportions of your primary colors. The mottled effect enhances the overall feel of the fabric, making it completely unique and like no other.
We are now in Week Two and are dyeing as many colors as we have the time, inclination and material for. Of course I went totally nuts with dyeing all the possibilities. I admit – I’ve now dyed every color including varying intensities and am eager to start experimenting with the subtler, more nuanced shades of each, but ran out of fabric, dye and other materials I need, so will have to wait until all the things I’ve ordered arrive. Here’s a sneak peak of a few of the colors I dyed over the weekend, (and stayed up until 3 or 4am, I can’t remember now, to do so!) getting ready for my next design using colors. Lots and lots of colors. You could even say… colors to dye for. Oh behave yourself!
I’m just dyeing to read your comments. Okay, okay, I’ll stop.
No, really.
I promise.
You have no idea how hard I’m restraining myself right now.
After I finished the QFM – Quilt For Mom – I felt at a loss. It’s the same feeling I experience after finishing a wonderful book. Elated, but also sad it’s over and wondering what’s next. I knew I wanted to design my own quilt, but am still so new to this form and didn’t want to be too ambitious. Things were in limbo.
My life is busy, I homeschool our daughter, as well as, like and need to, spend time with my eldest and then of course there’s FH (fabulous husband) and did I mention I have my own business? All of this means I have a full, albeit hectic, and at times, overwhelming life, and I desperately need time to design and create without worrying about how to promote it, the cost basis, manufacturing, orders, etc. When I don’t have the time or when other things make it impossible, I feel off, am more easily stressed, saddened and even depressed by things that happen in the world and in my life. I worry more. I feel more sensitive, raw and fragile. These same things don’t have as devastating an impact on me when I carve out time for my artistic pursuits. Because of all this, I knew I had to start a new project, and given all that is happening in the world and my life right now, the sooner, the better!
Out came my sketch book. I began doodling. From those doodles I found a few shapes I kept coming back to and slowly a design came into focus.
This is my Ode To Matisse.
The Sketch
After I finished the first sketch, I photocopied it several times and began mapping out the measurements. I knew the sketch was going to be skewed and out of proportion because I wanted the quilt to end up being 80″ by 105″, which is big enough to drape down on either side of a twin sized bed or even skimpily cover a queen sized bed and long enough to allow for folding over pillows. This will be the quilt I take with me to my retreat at Quilting by the Lake next summer where we stay in air-conditioned (last summer I was FREEZING) dorm rooms, which have twin-sized beds!
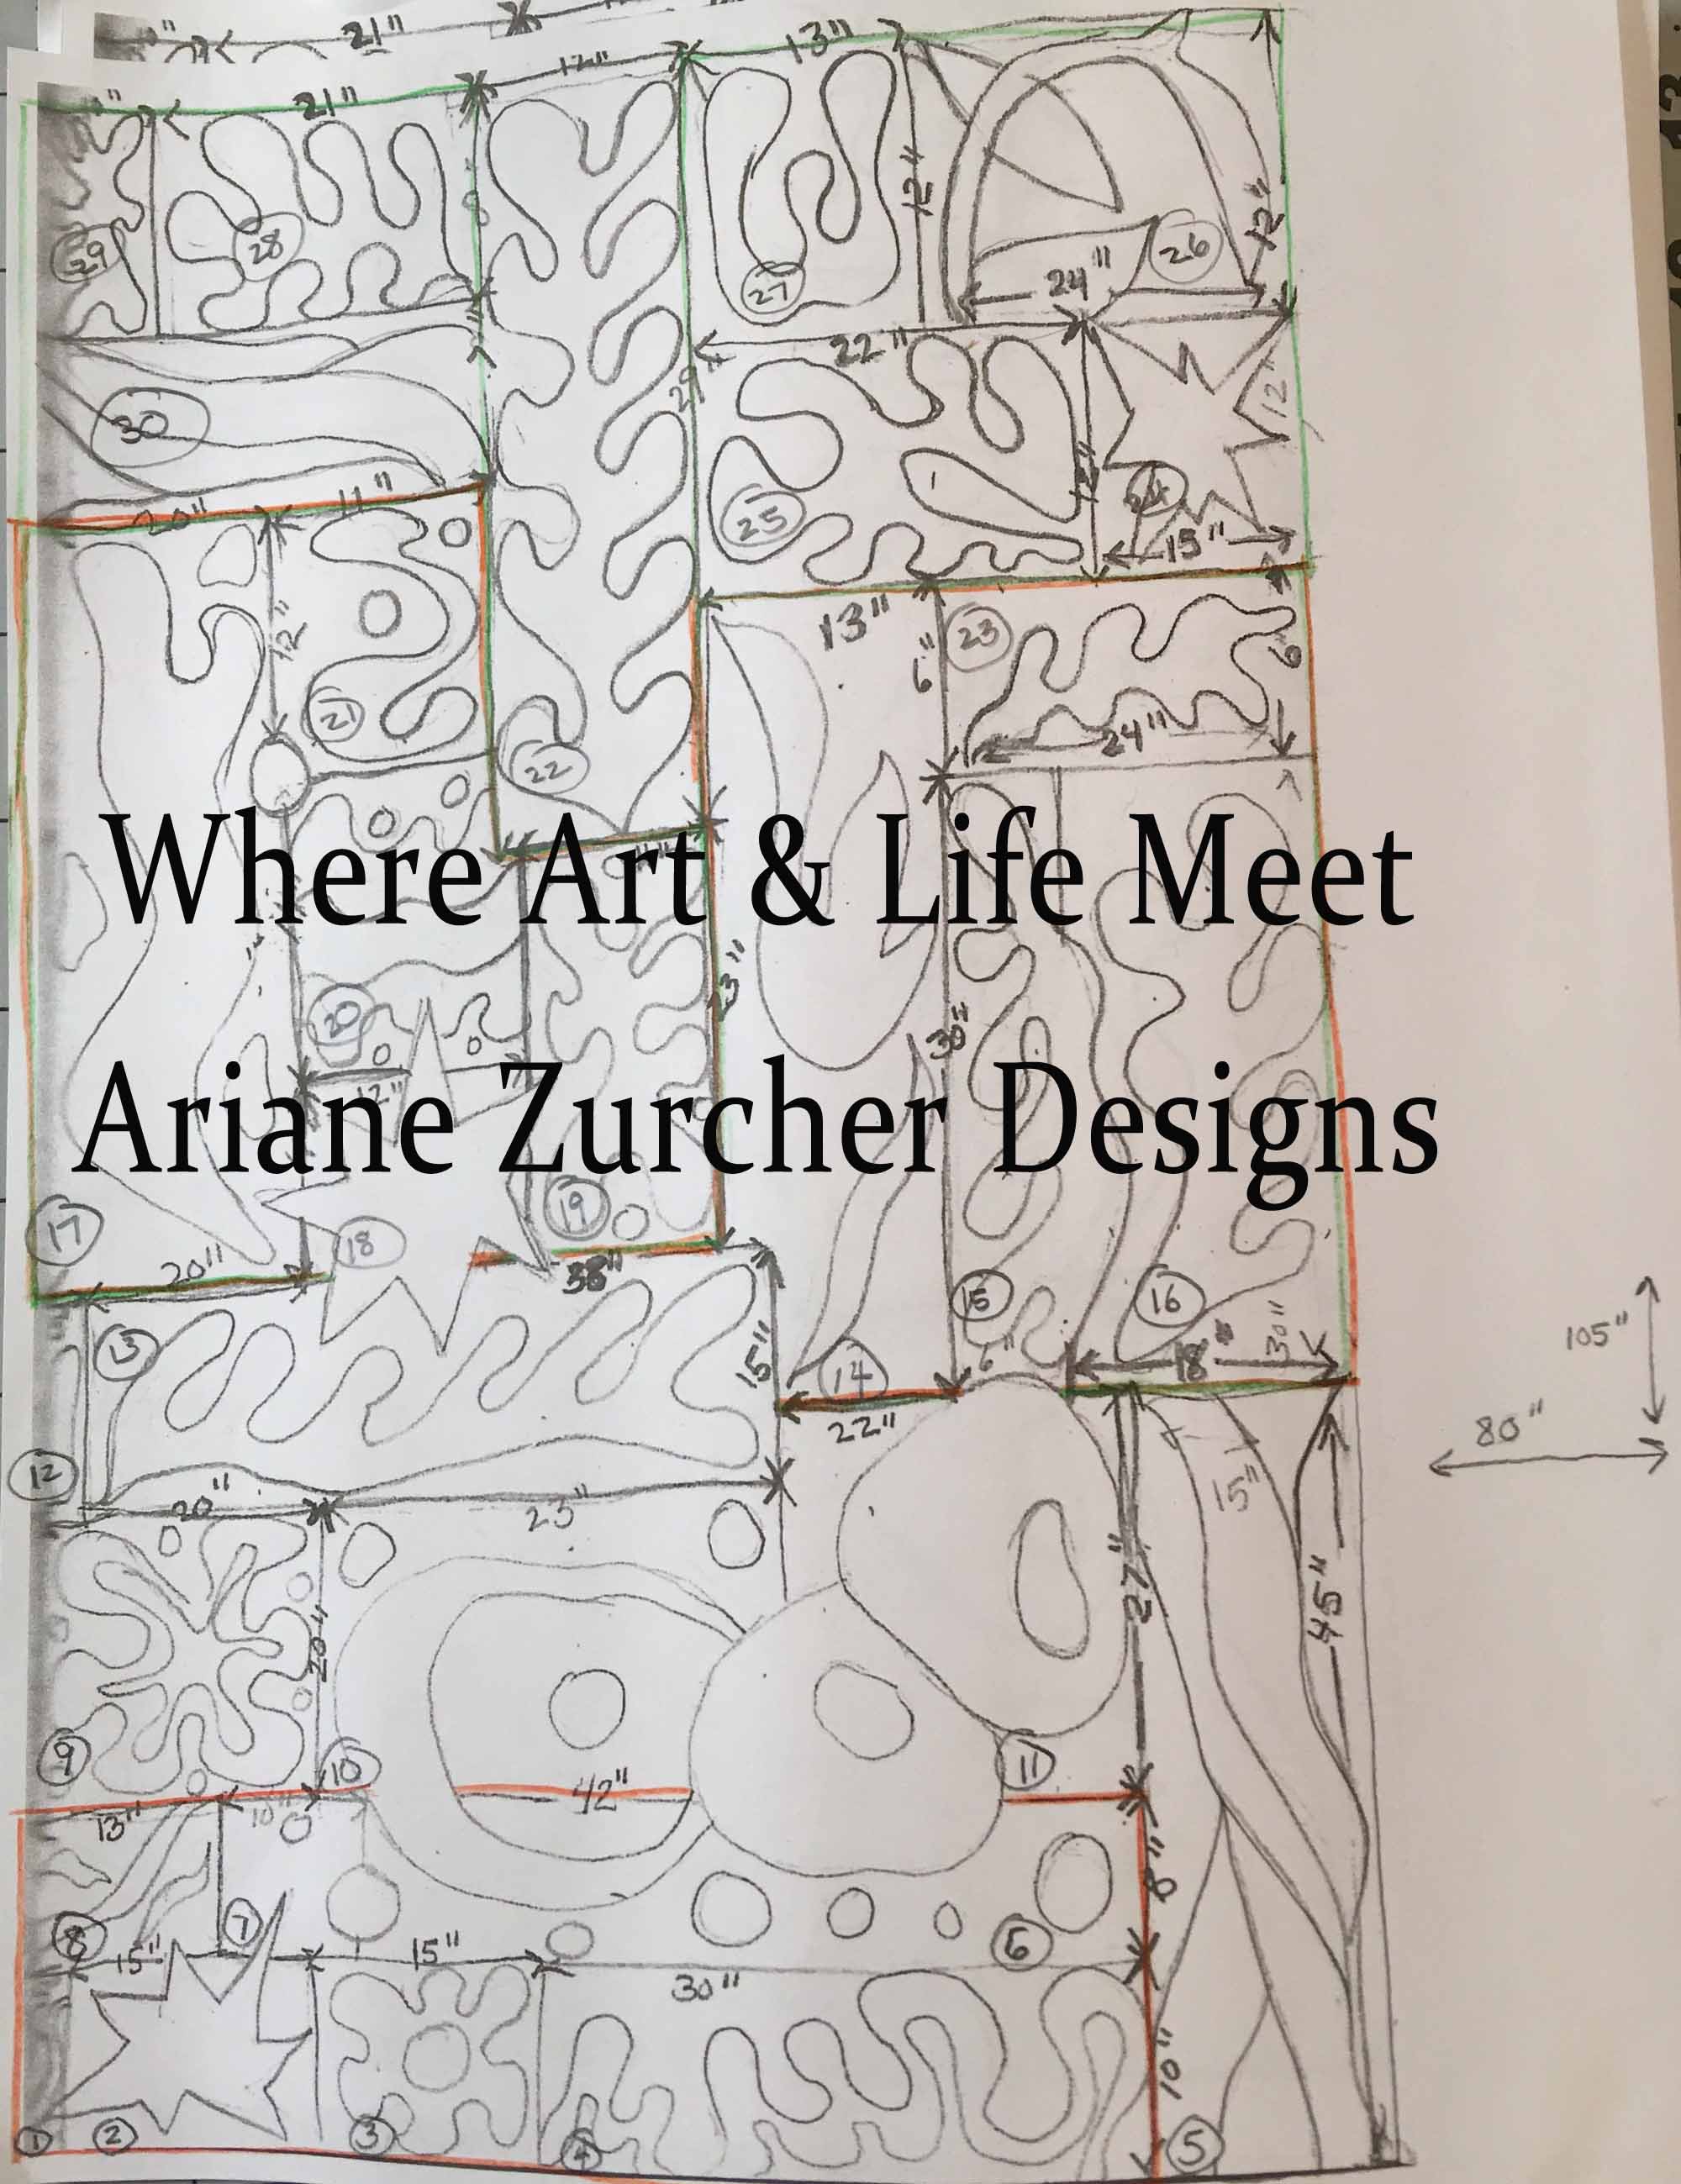
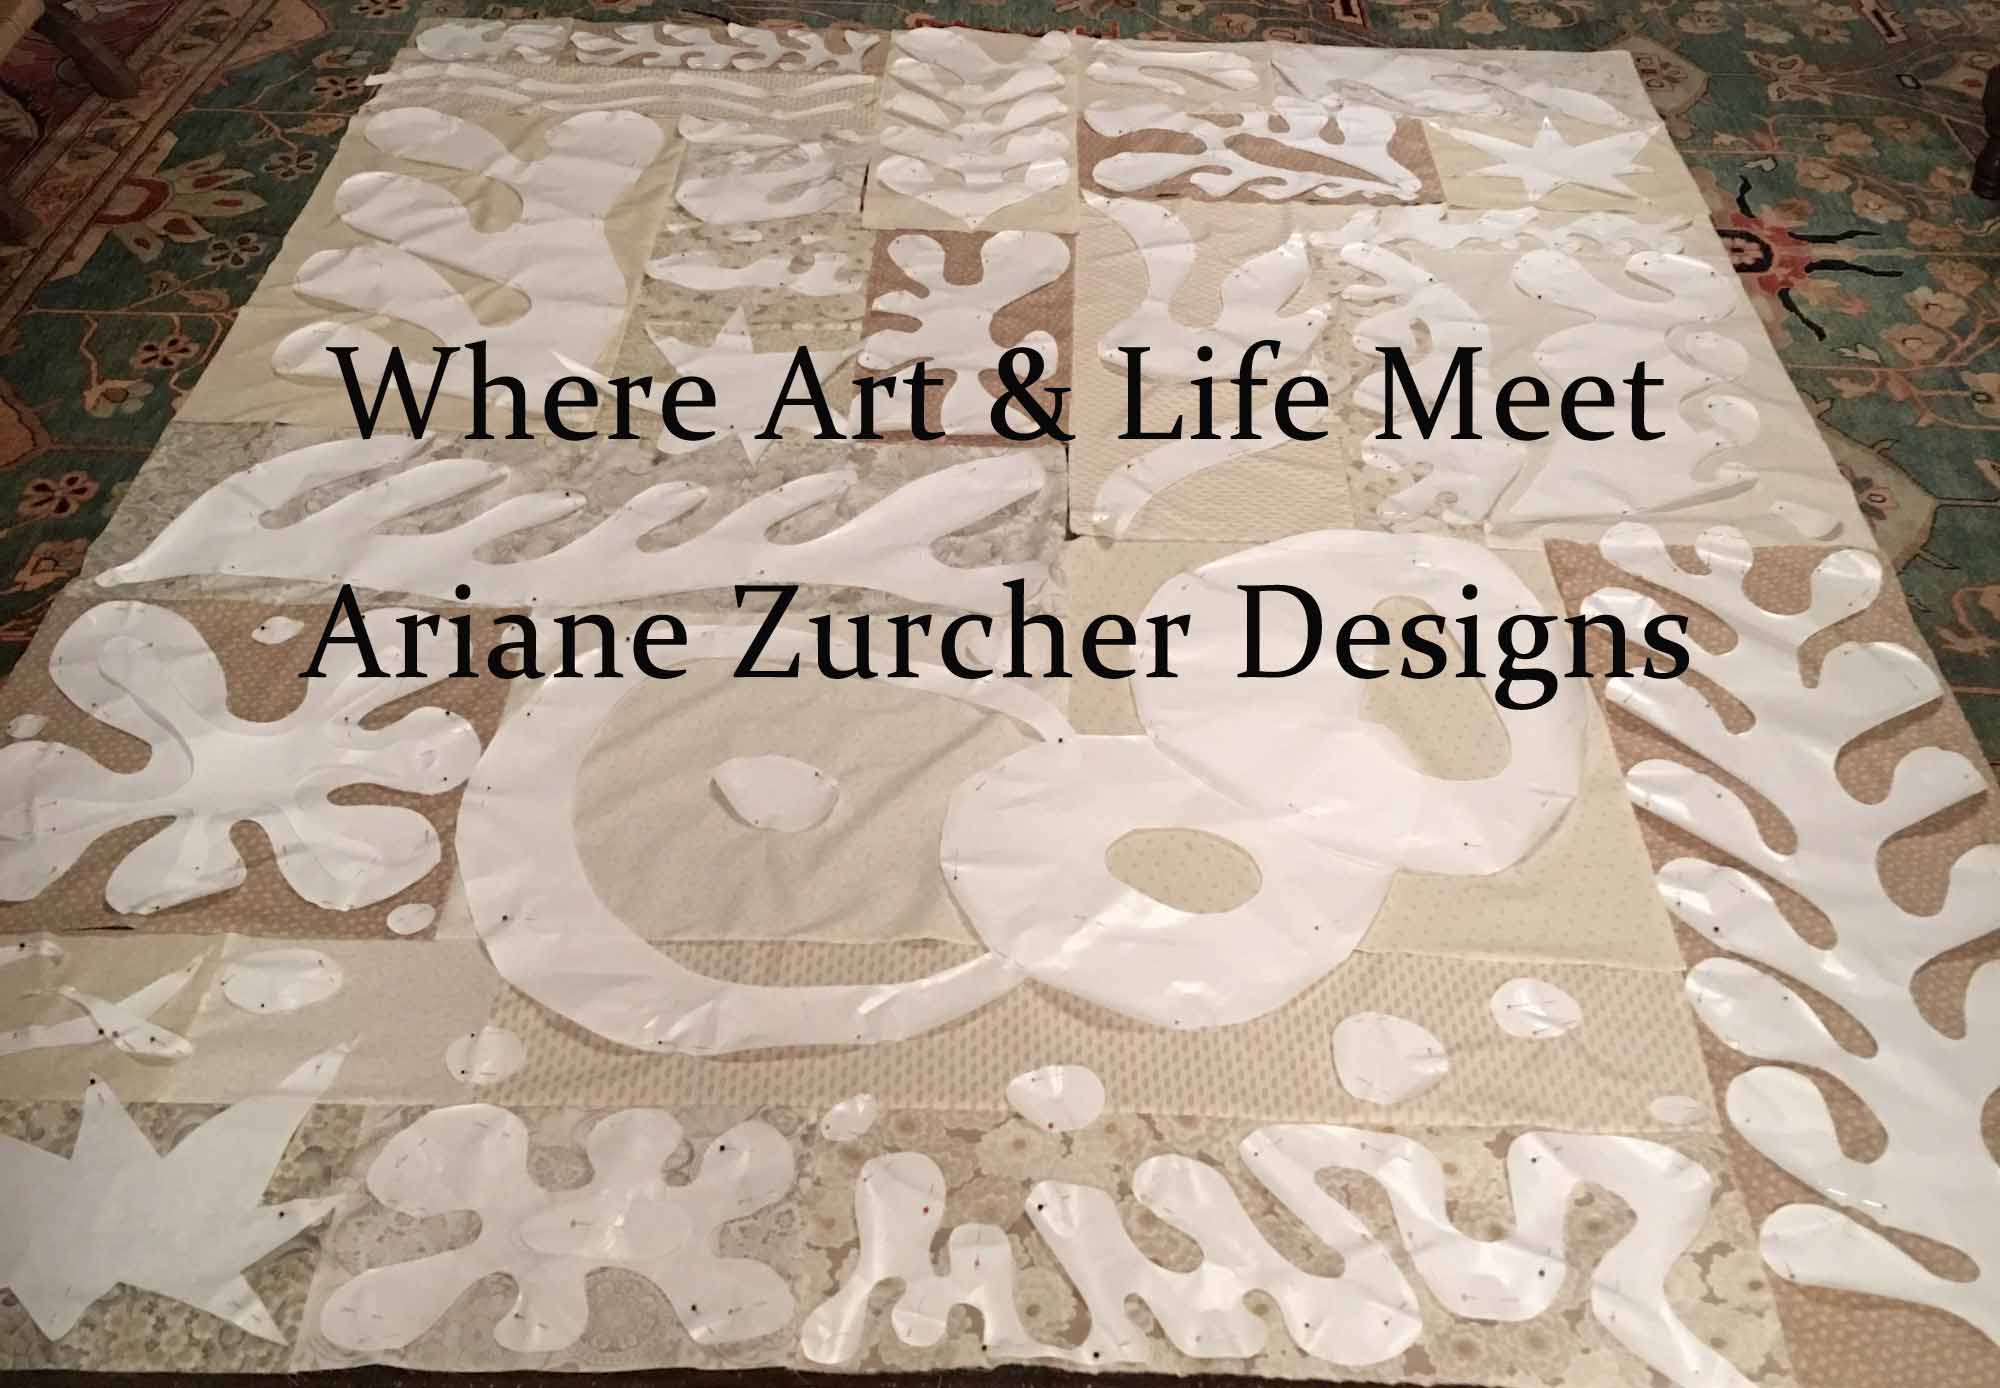
I needed to figure out how I was going to block it, in other words how I would divide it up as I envisioned several different background fabrics, all beiges. With colored pencils I marked out my blocks, with approximate measurements and numbered the blocks.
Blocking out the Sketch
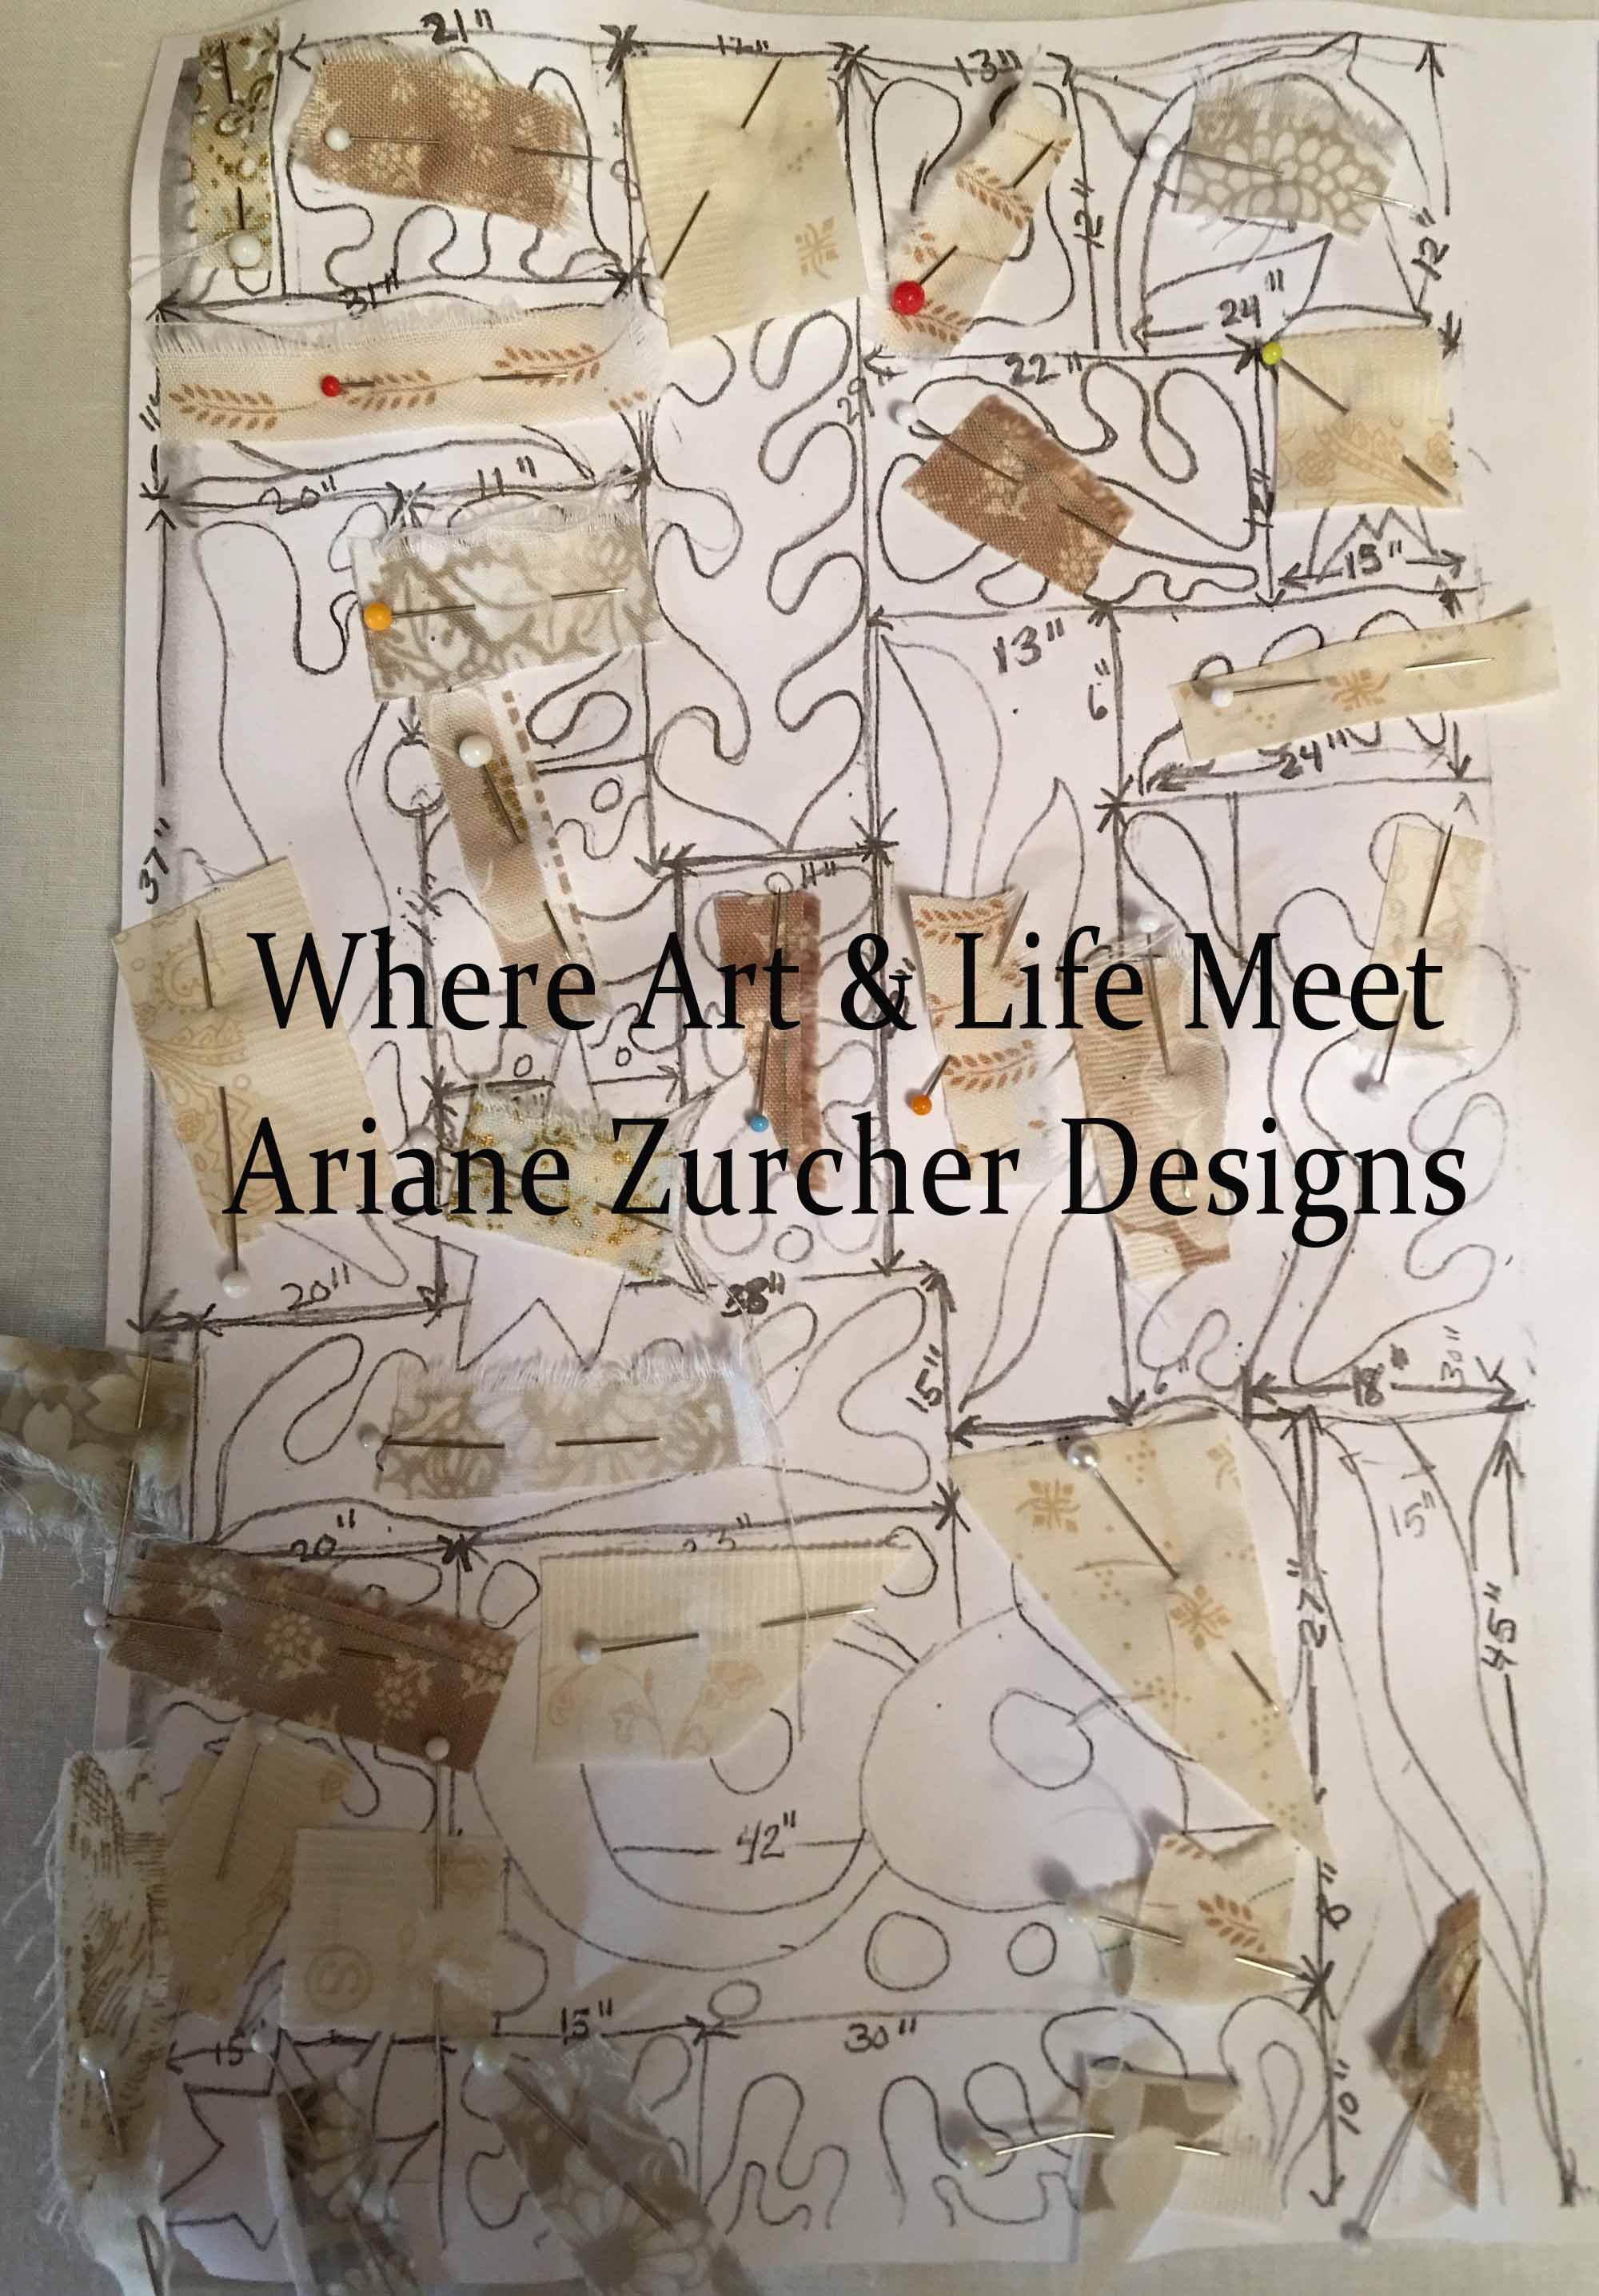
I then went to my stash and began pulling background fabrics. After a trip to the fabric store, I decided on eight different fabrics, all beiges/cream of some kind.
Placing the Background Fabrics
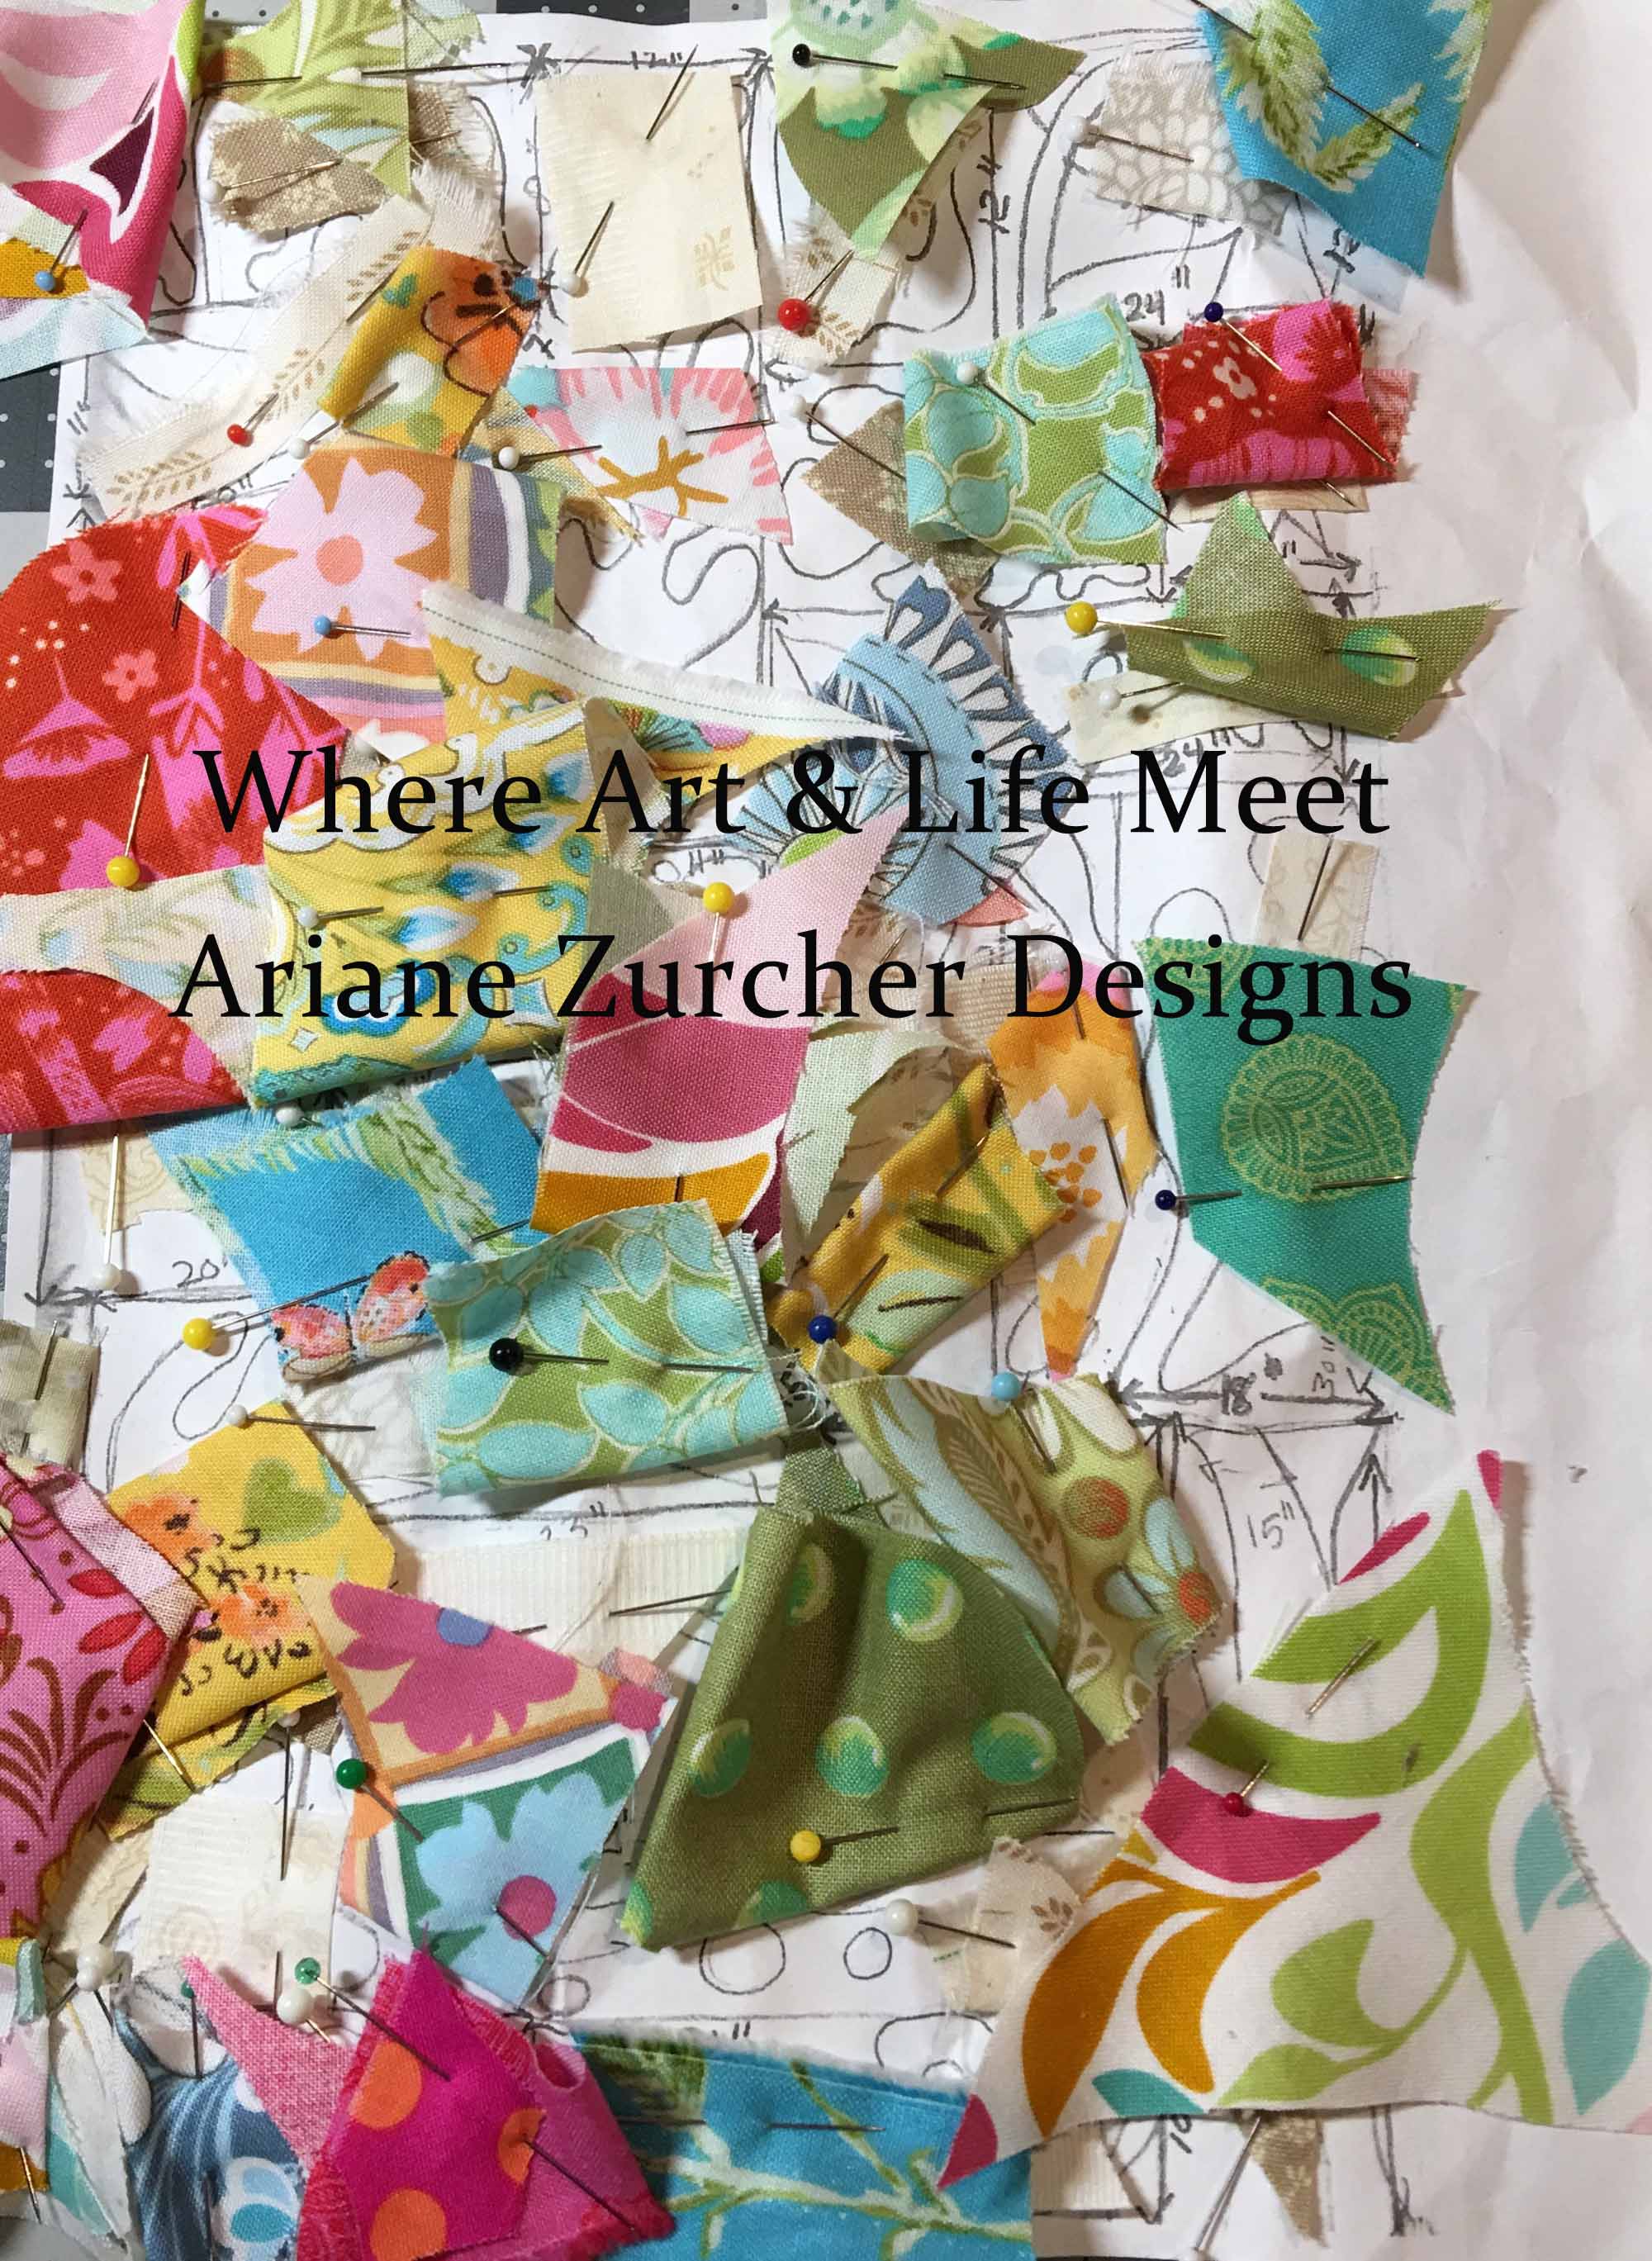
Next up was working out the colors for the shapes. This process took over the floor of our bedroom for a couple days. I wanted bright, cheerful colors, that reminded me of spring and summer and I wanted them to stay close to the colors Matisse used when he created these kinds of organic shapes.
Deciding on Fabric for the shapes
Finally I was ready to cut out the shapes, using freezer paper first to lay them out, tweak when necessary and rearrange if needed. This is what I came up with… Still not convinced the three round shapes in the lower portion of the quilt are working as well as they could. I might need to move them all the way over to the left side and take the shapes on the left and put them to the right end of that block or maybe reduce the size of the skinny large circle on the left and make the flower shape at the edge larger…
Freezer Paper Matisse
Even though I have a few reservations with the design, I’m going ahead with it and will see how I feel as I go. I’m also not sure if I will add other fabrics and hand stitching as I did with the QFM or if I’ll just appliqué and then free motion quilt this one, giving it the versatility to be thrown in a washing machine and dryer, unlike the QFM, which must be dry cleaned because of all the beading, wool, velvet and hand stitching I did. Also I need this quilt to be finished no later than July, so I’ll see what I end up having time for.
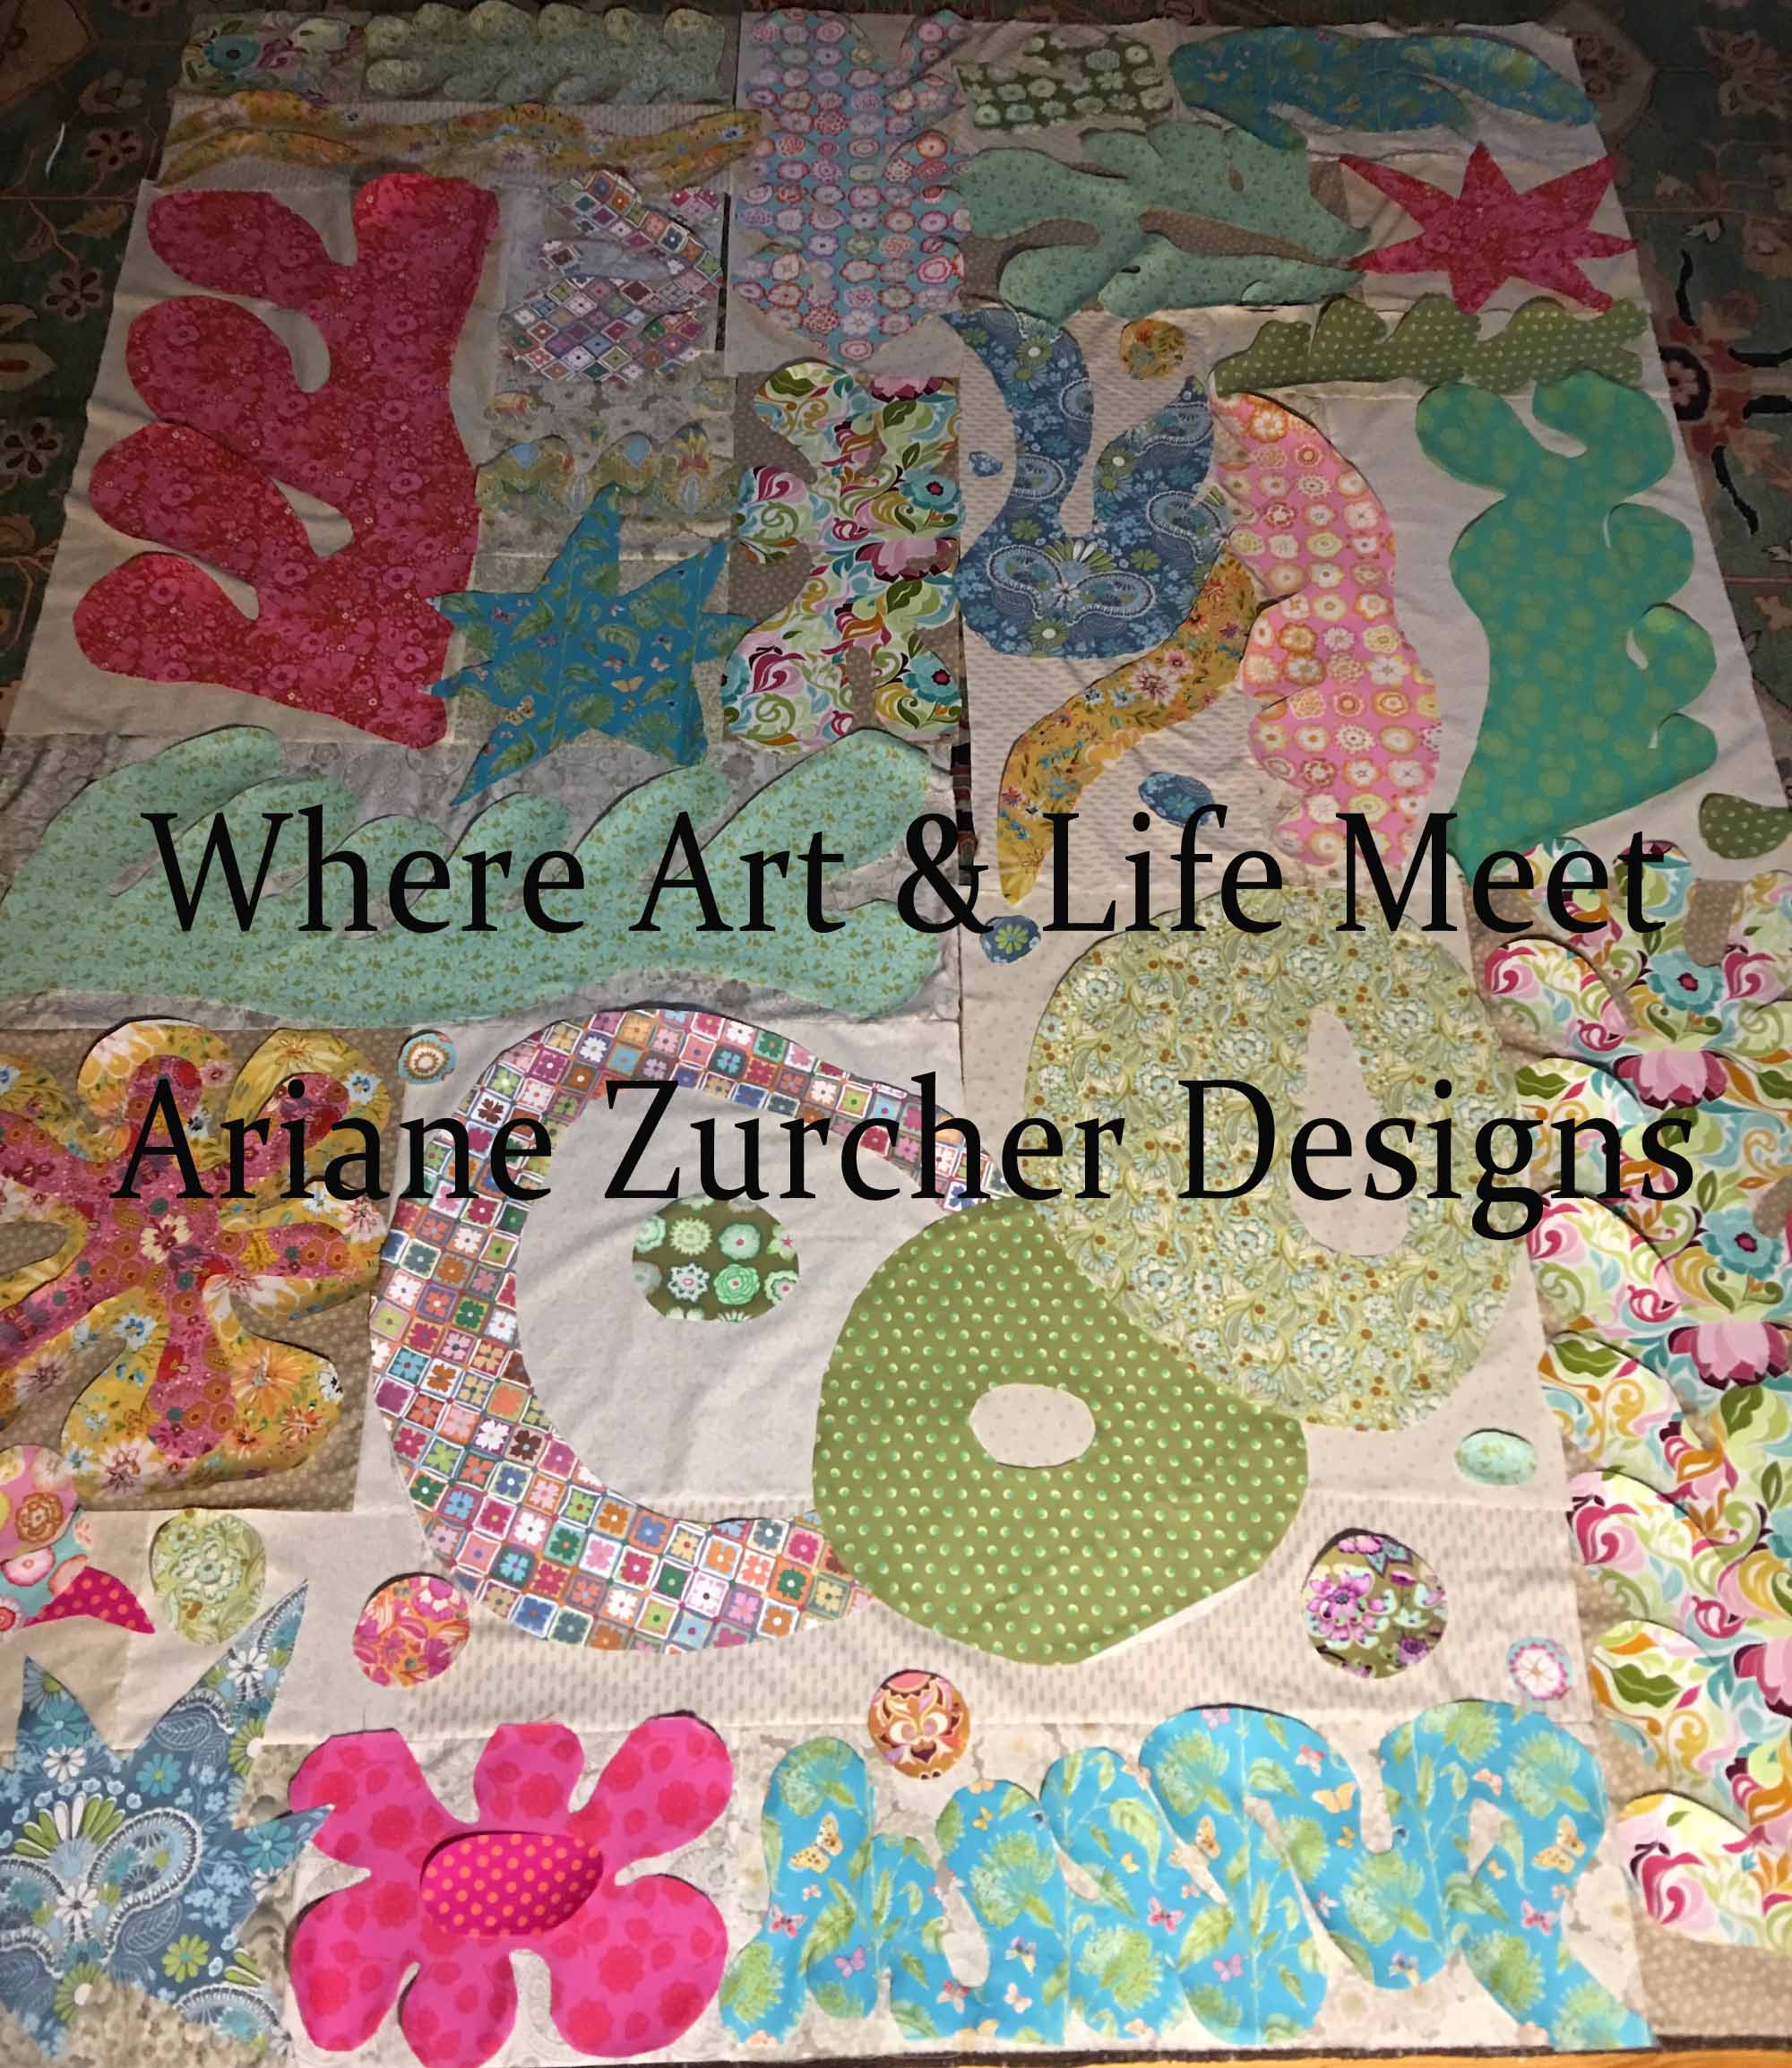
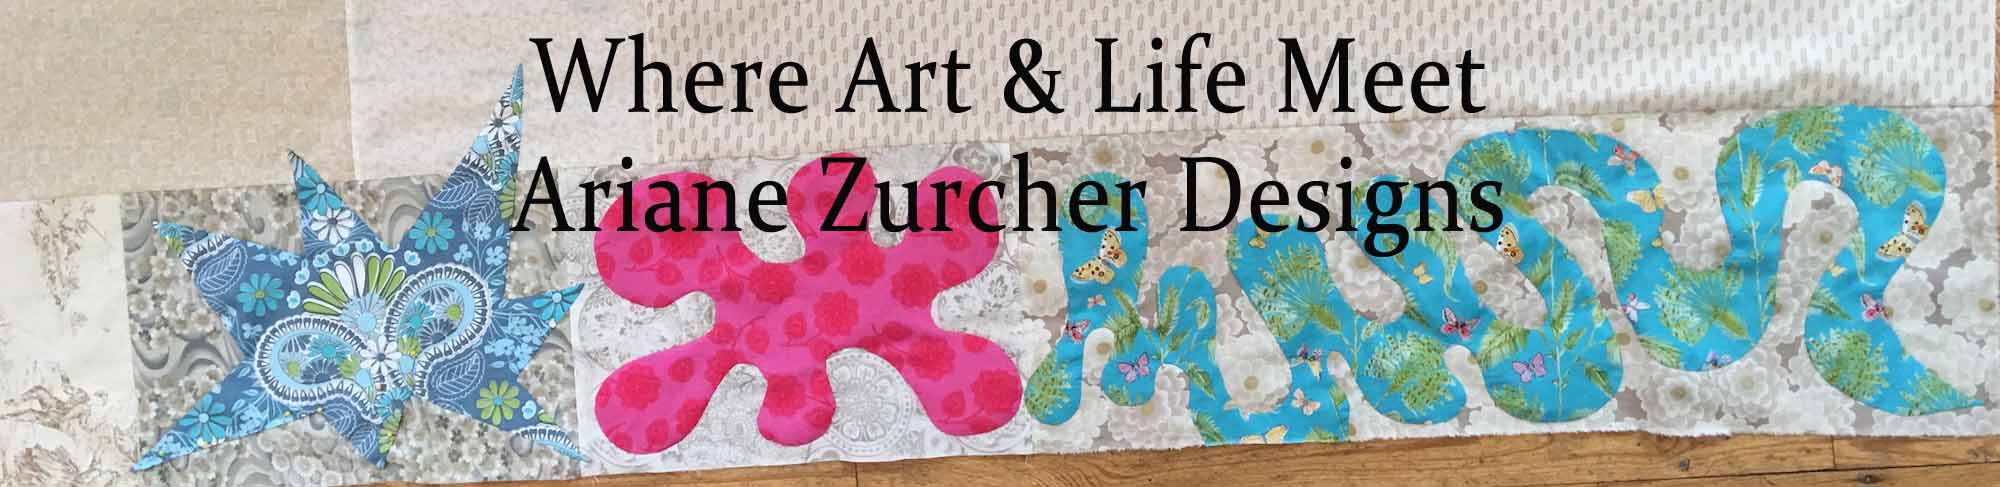
An Ode To Matisse
I’ve started on the bottom block and am almost finished appliquéing all the shapes down.
I would have gotten more done by now, but got a little way laid as I also signed up for a five week online class with the talented artist Elizabeth Barton at Academy of Quilting. We are supposed to produce a small quilt each week. Yikes!!! More on that later…


 Designing a piece using these gradations was next. I had a couple ideas and with Elizabeth’s encouragement settled on this one, which also happened to be the first idea I came up with.
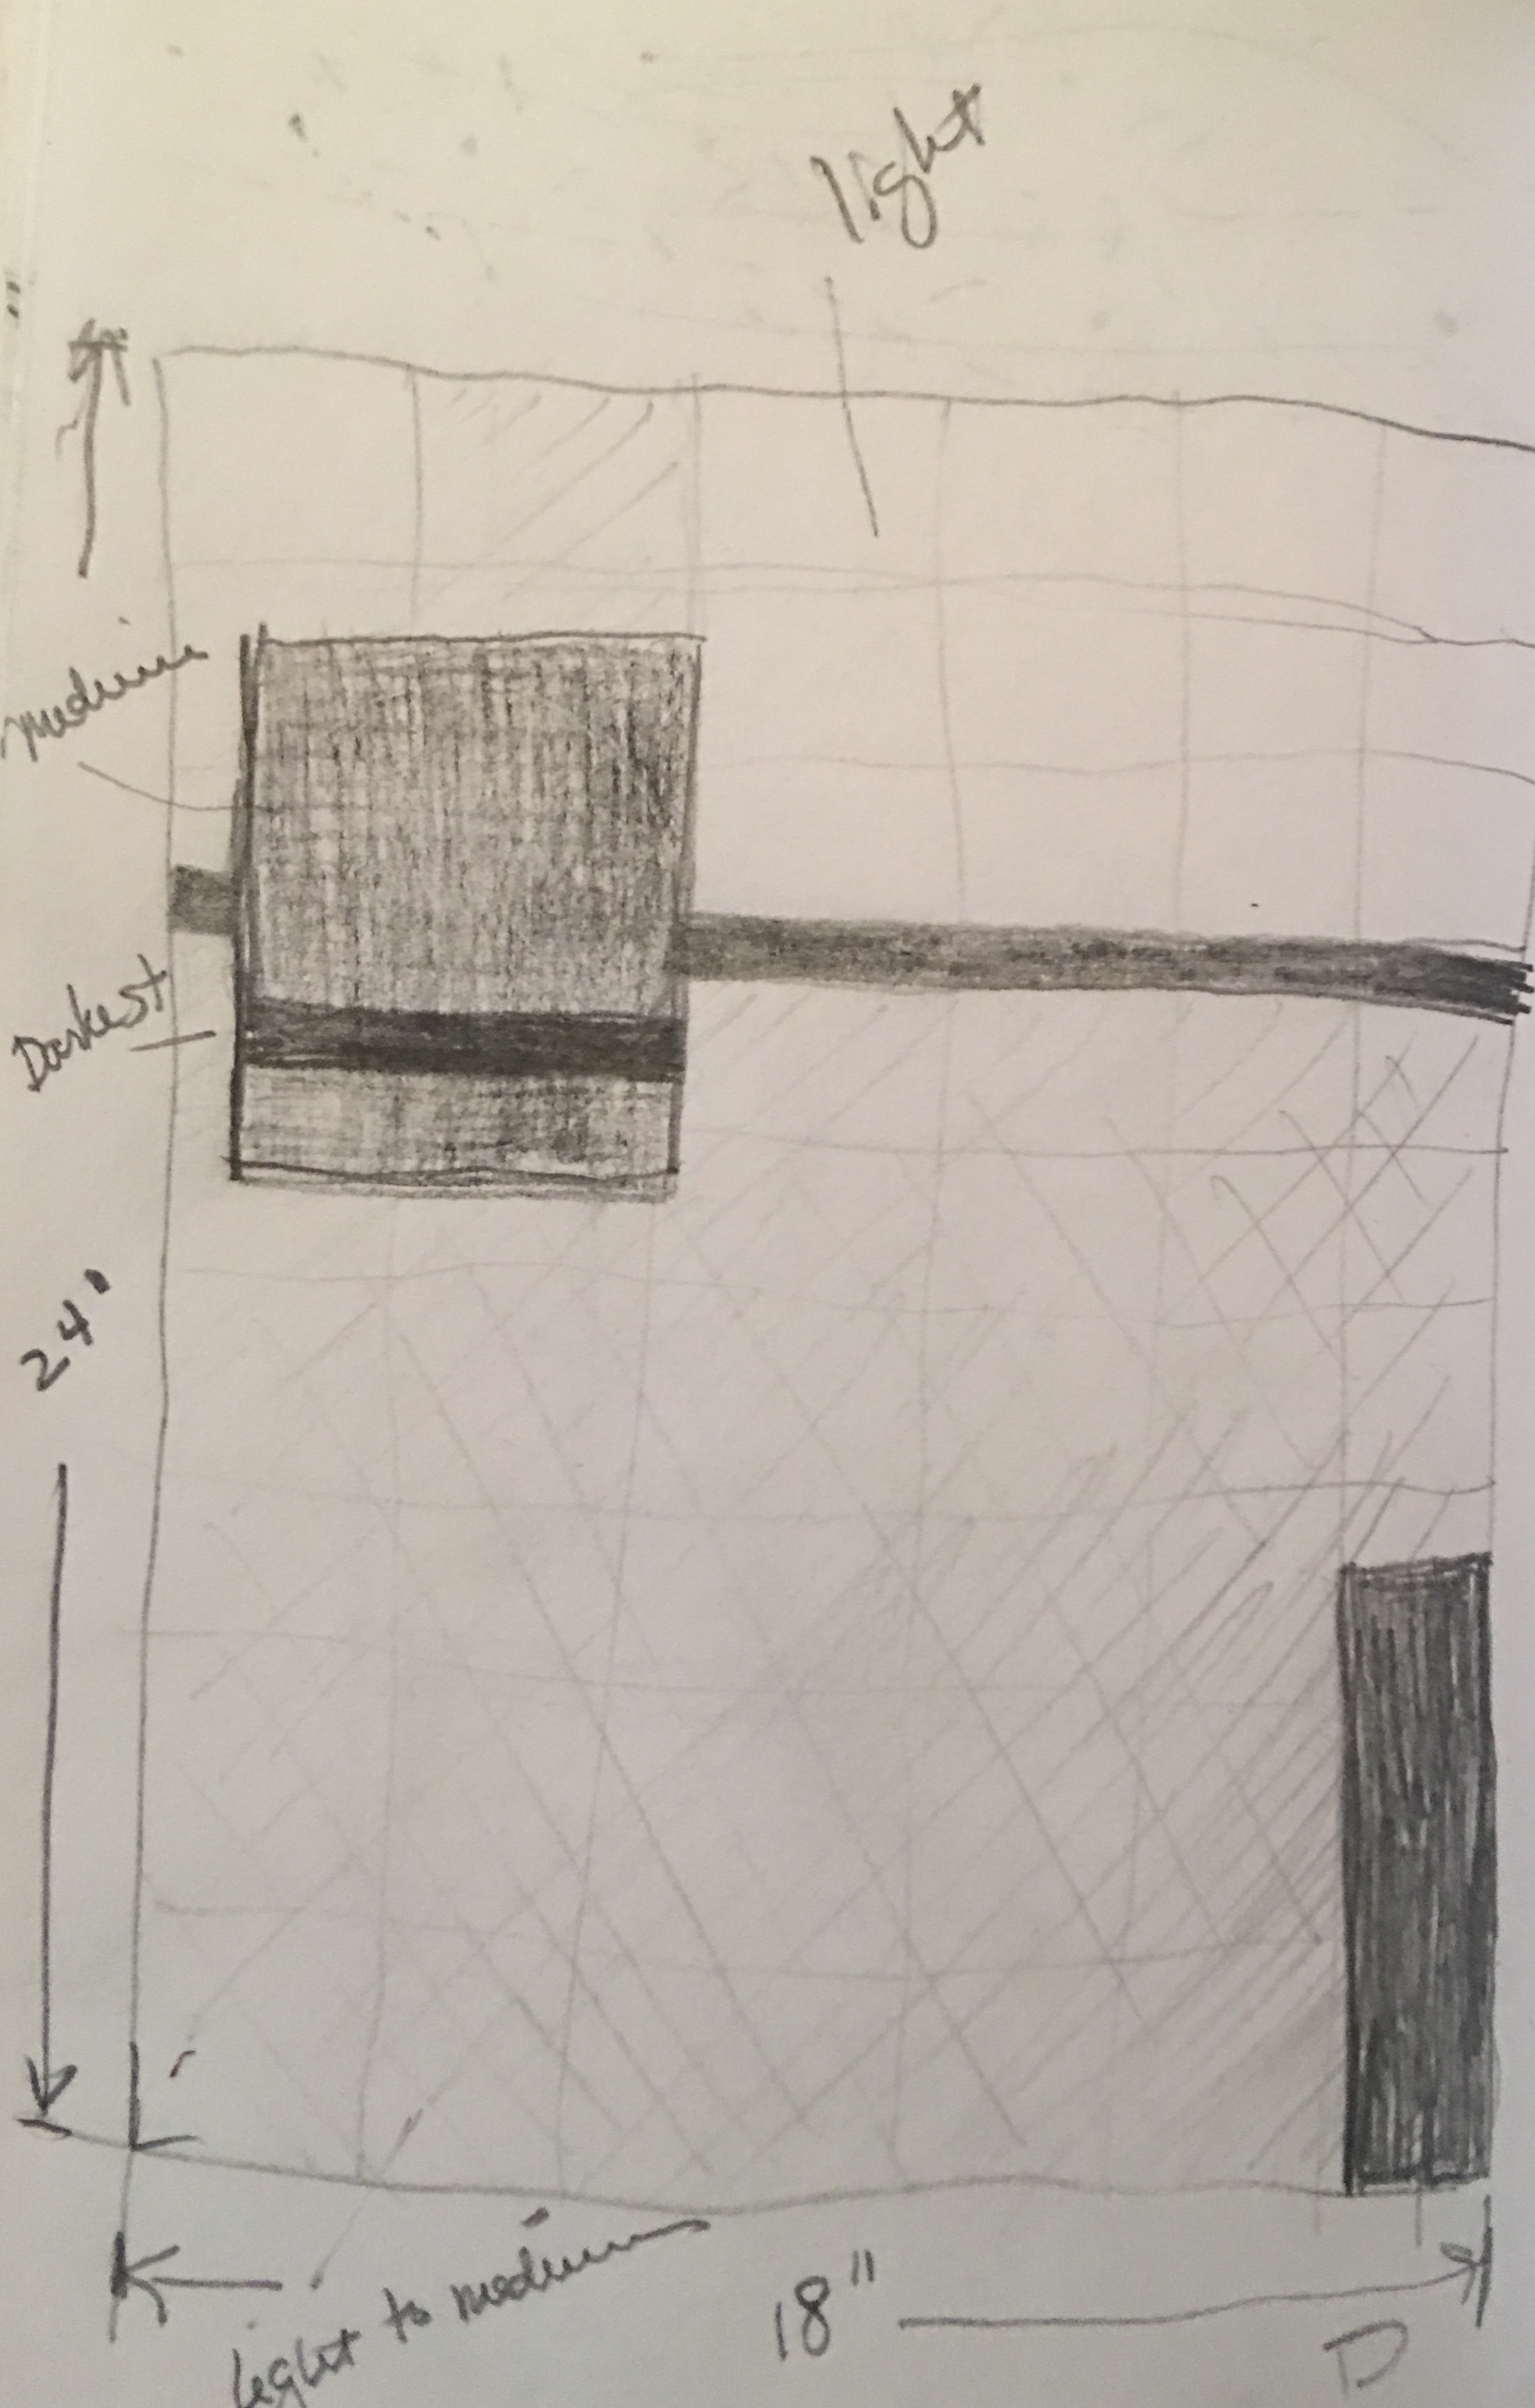
 After consulting Elizabeth (again), she suggested linear and horizontal stitching, I began quilting, but left the larger square alone as I wasn’t sure what to do with it. I wanted to do something, but couldn’t figure out what.
 The thing about dyeing your own fabric is how utterly seductive it is. You can mix any color you want by tweaking the proportions of your primary colors. The mottled effect enhances the overall feel of the fabric, making it completely unique and like no other.
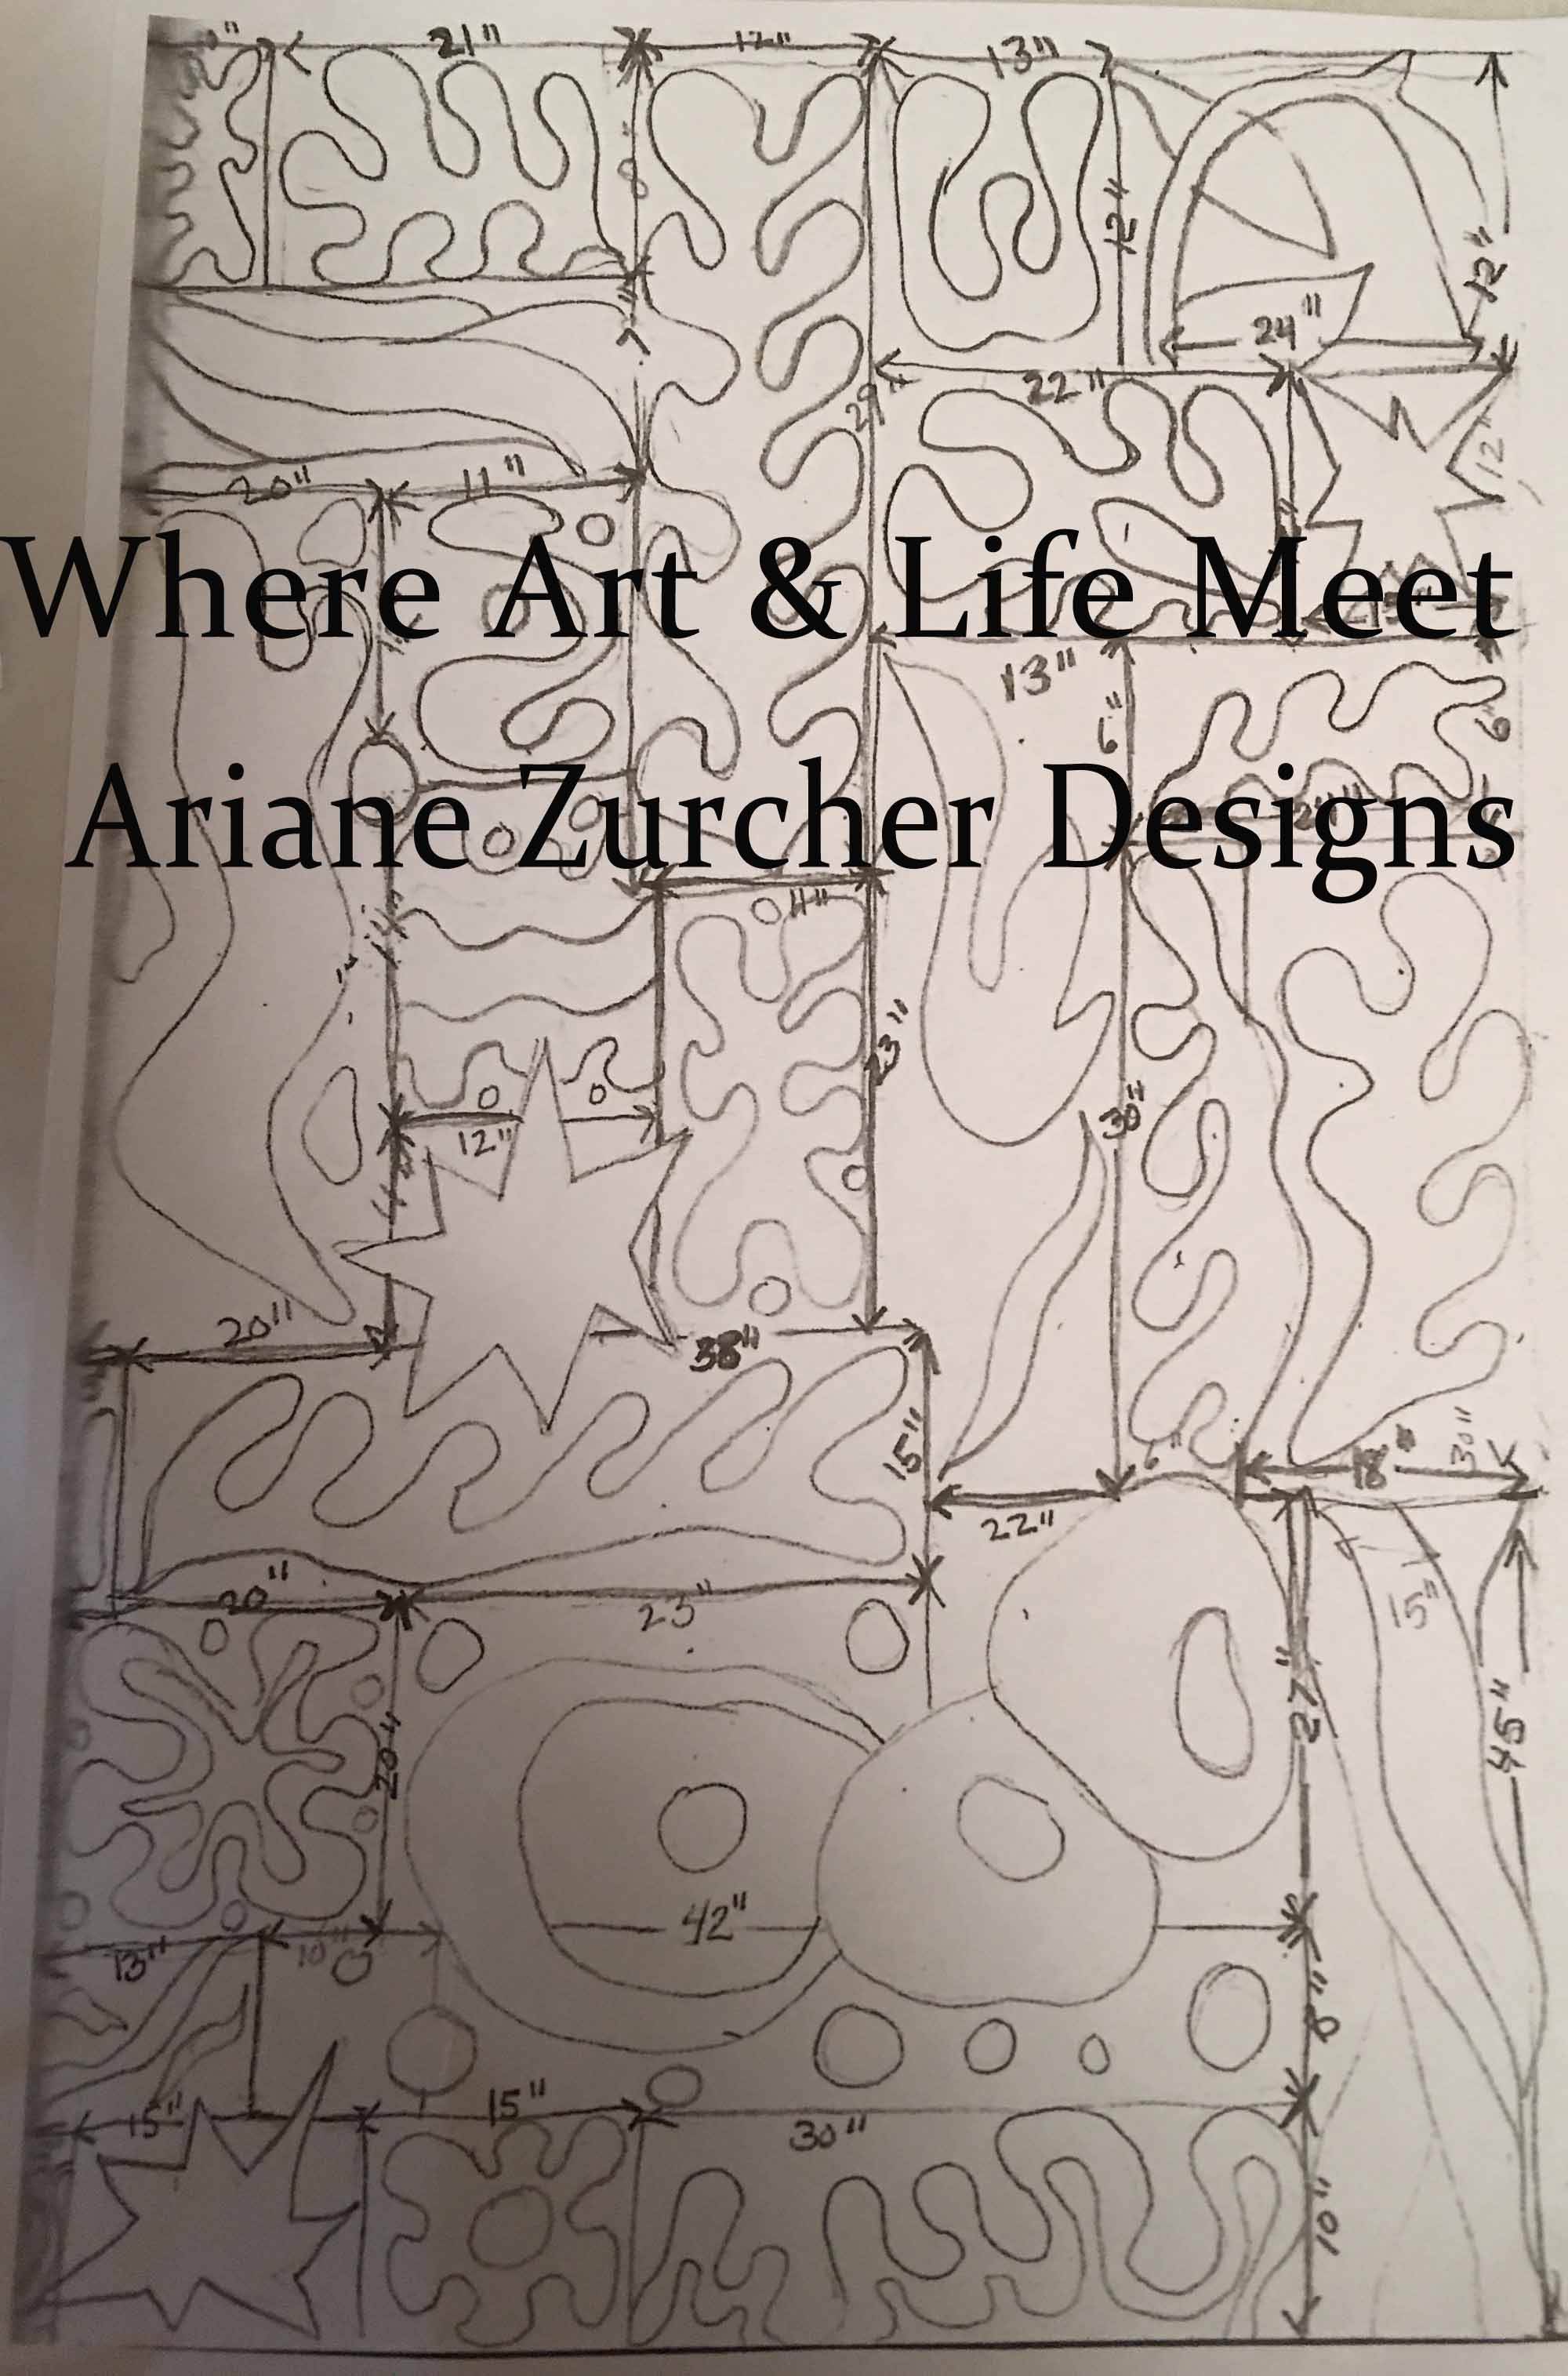
Recent comments