I almost didn’t post this today as it’s Election Day and figured many of us would be out voting or thinking about voting or waiting in anxiety for the presidential election’s outcome and then I thought – a perfect time for some levity while waiting in line to vote or for those reading this from elsewhere… okay not sure where I’m going with this, so here it is…
“Dyeing to Design” is the title of the terrific five week online class I’m taking given by the talented artist Elizabeth Barton through the Academy of Quilting. I wrote about the first week ‘here‘ and promised to write about the second.
I started the second week by pretty much dyeing every bit of white cotton fabric I had. Seriously. I went through the ten yards that was suppose to last us the entire five weeks of the class. Restraint is not a strong suit. In addition I went through so much dye that I realized I was not going to have enough to get me through the rest of the course, which meant I had to order both fabric and dye. Waiting was excruciating. I was going to work in a pun using the word “dyeing”, but restrained myself. See. I try where and when I can. While I waited however, I had all these beautiful fabrics to look at and consider for my next design.
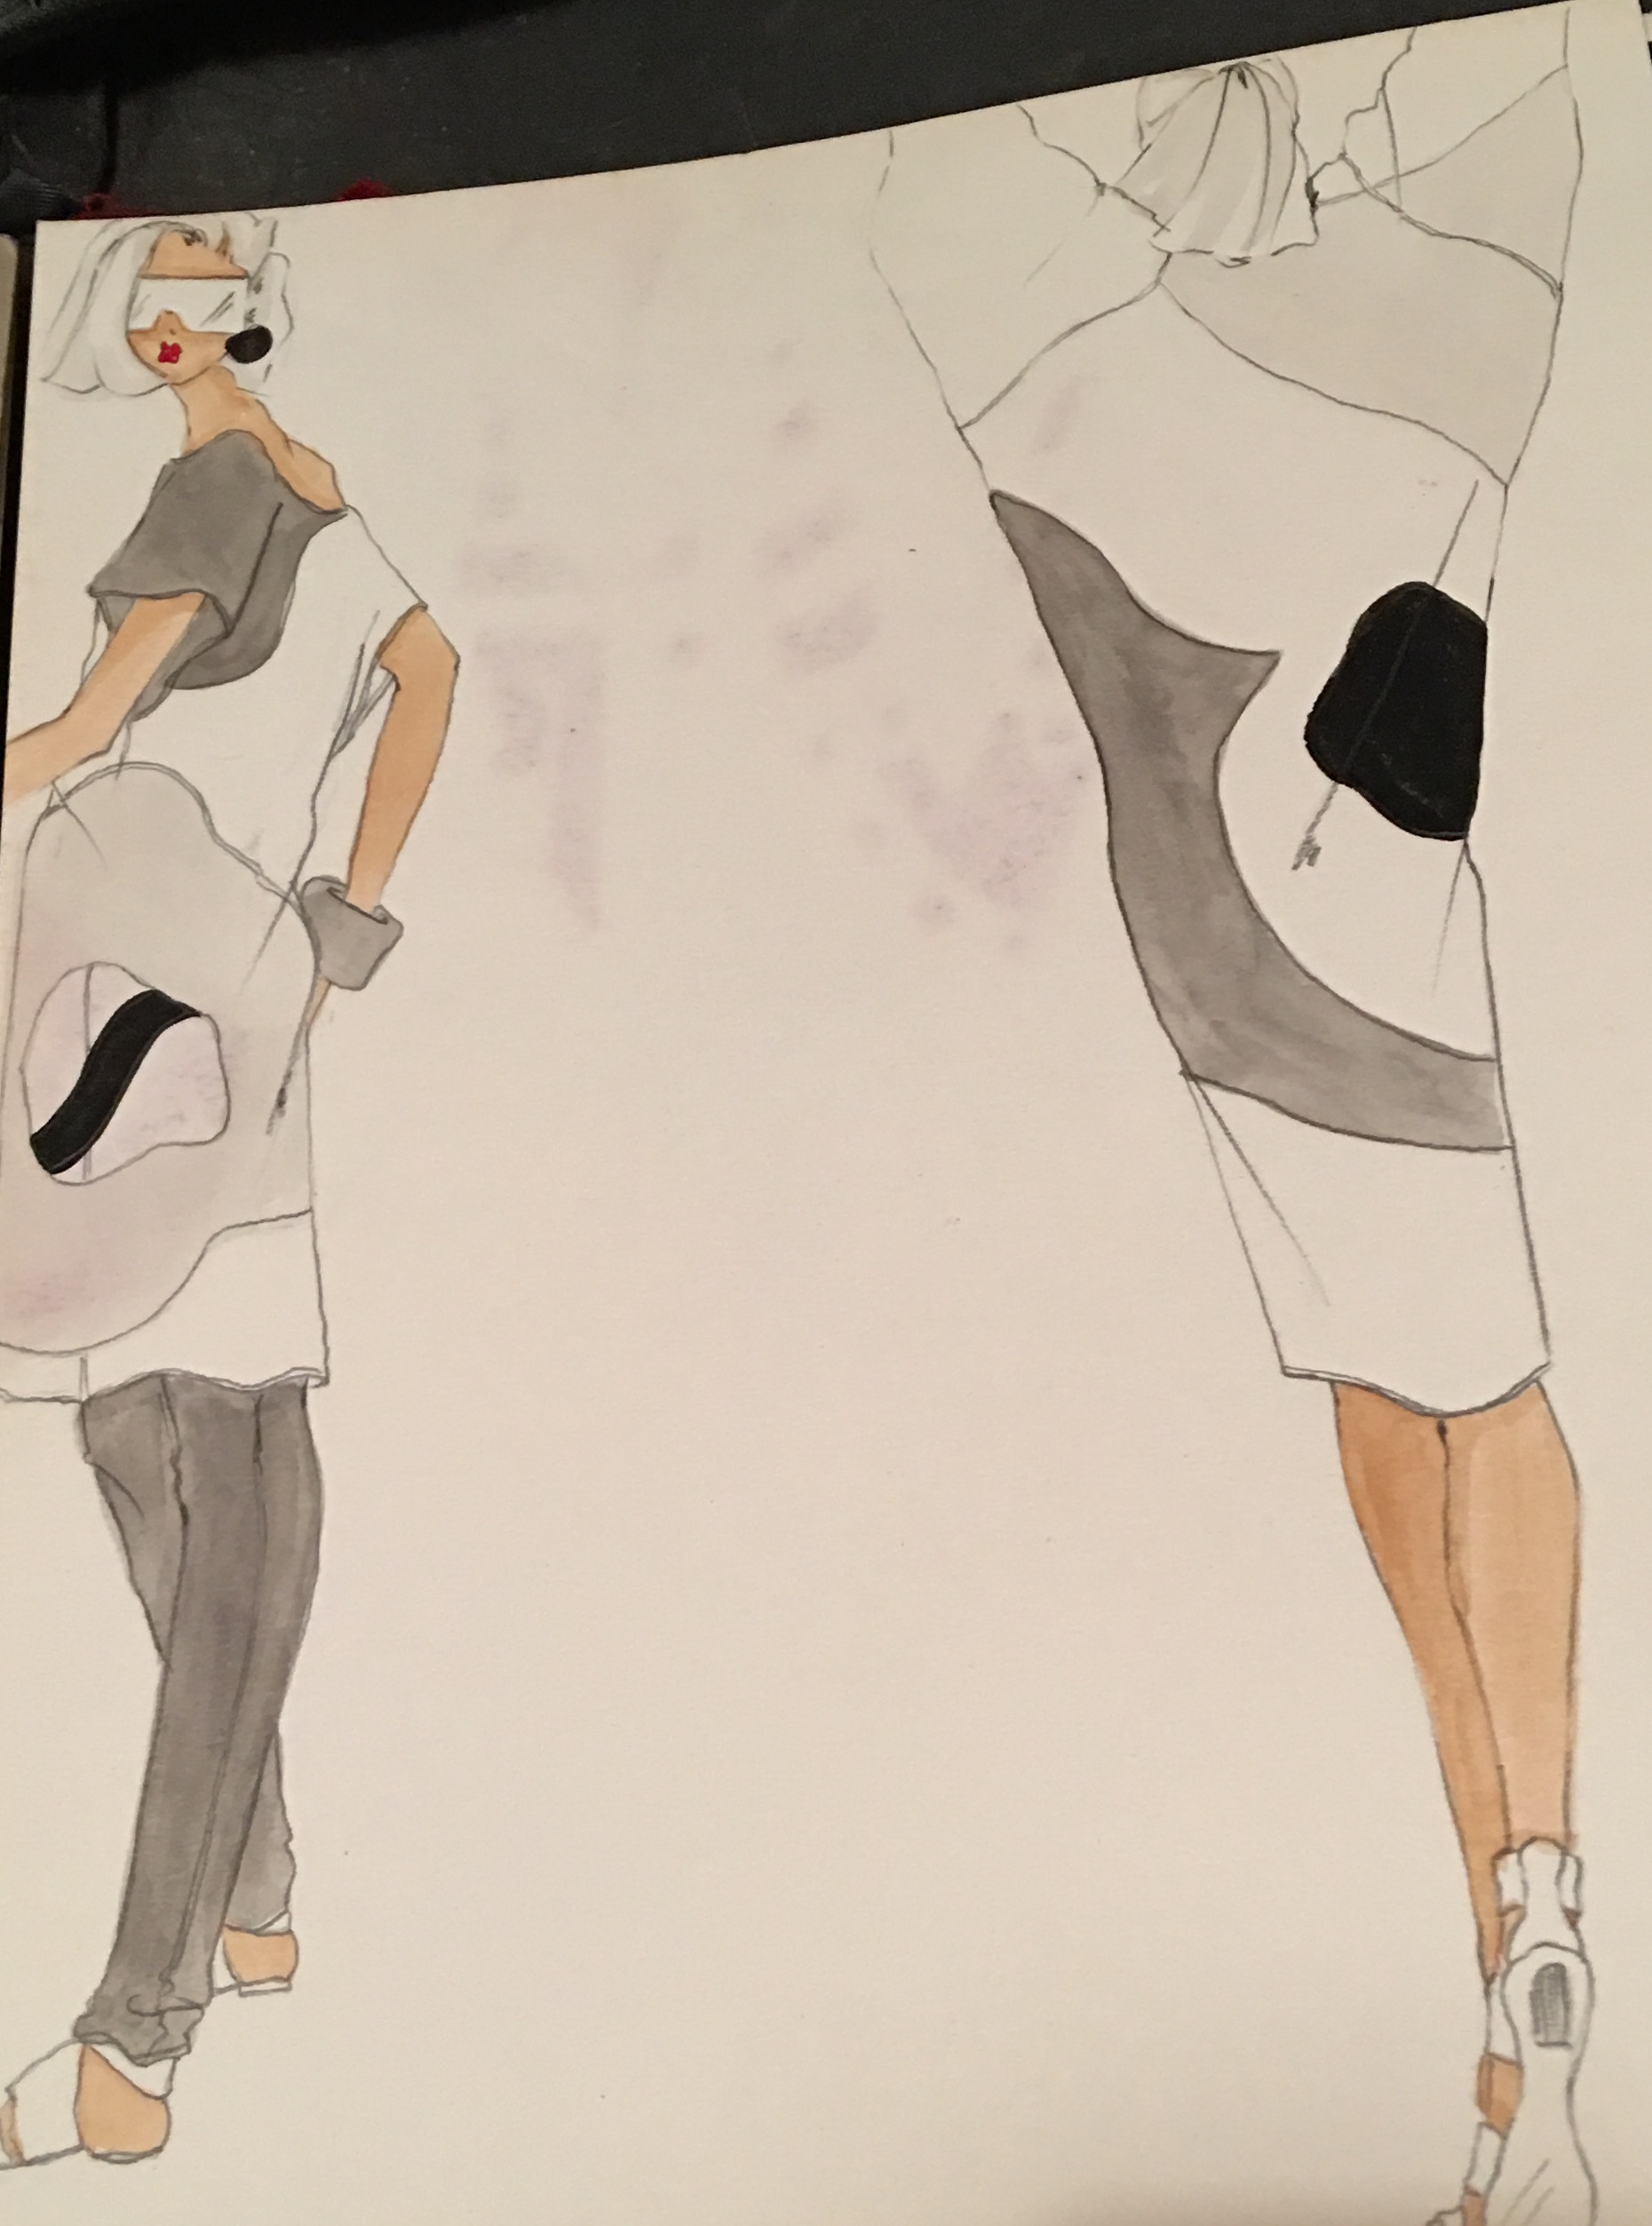
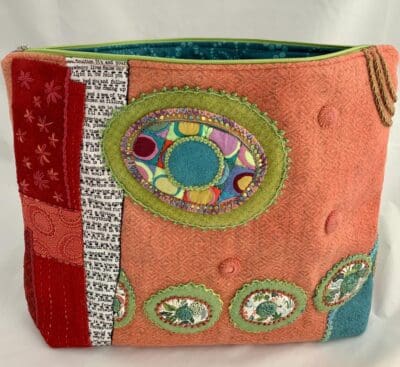
The design I decided to do used shapes I come back to again and again, long ago when I was a fashion designer, now still designing jewelry and again this past week while using my hand dyed fabrics. Let’s not spend any time analyzing this, yes?
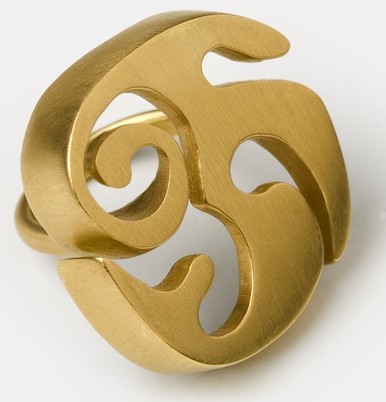
R17 – 18 Kt Brushed Gold
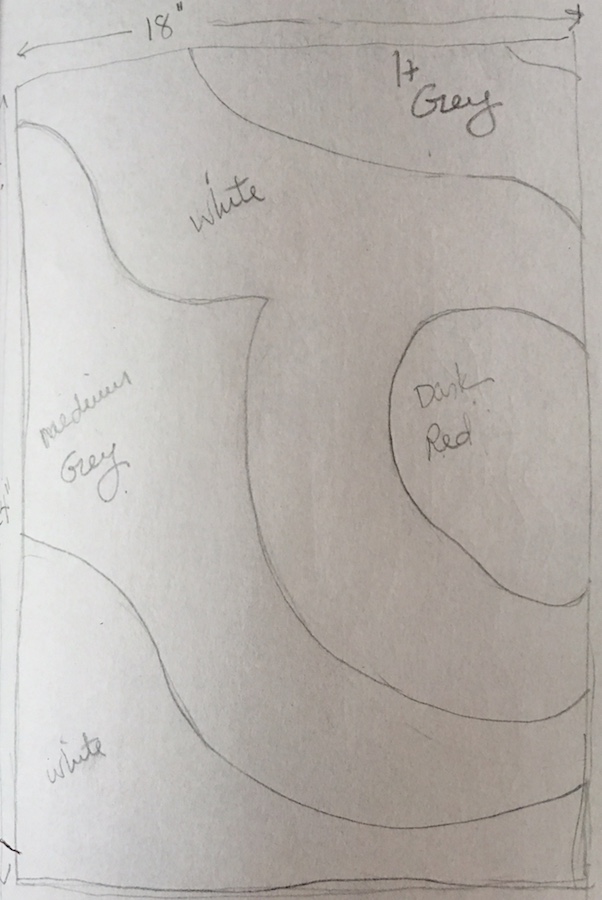
I chose two colors to work with, red and, with Elizabeth’s suggestion, an olive color. Elizabeth encouraged me to play with the olive color using it’s various gradations, which of course required more fabric that I didn’t have. Not easily thwarted, I pulled out some muslin and dyed that. It was at this point that the faucet in the kitchen sink suddenly stopped working. It was a drought. Nothing, but the slightest trickle of water, a whisper, really. However, we have a slop sink in the pantry. It was one of my brilliant ideas when we gutted the place; I envisioned our loft as a veritable greenhouse with furniture. Think Max’s bedroom when he falls asleep in Where the Wild Things Are. This vision of mine never came to fruition and so the slop sink became a receptacle for rags, cleaning supplies and other items no one knew what else to do with. And to add insult to injury underneath the sink we keep the kitty litter box. As we live in NYC our “pantry,” while sounding grand and spacious, is actually the size of a very, very small closet, combined with the kitty litter under foot, a stacked washer and dryer, the slop sink overflowing with assorted cleaning supplies… Let’s face it, it’s really really cramped.
I was determined to make it work, and while this made for some interesting maneuvering on my part, I did fall in love with my slop sink, but not so much that I didn’t call the plumber. He came a few days later and fixed the kitchen faucet, but in the meantime I washed all my dyed fabrics in my now beloved slop sink inside our closet, I mean pantry. It was all very Alice in Wonderlandish.
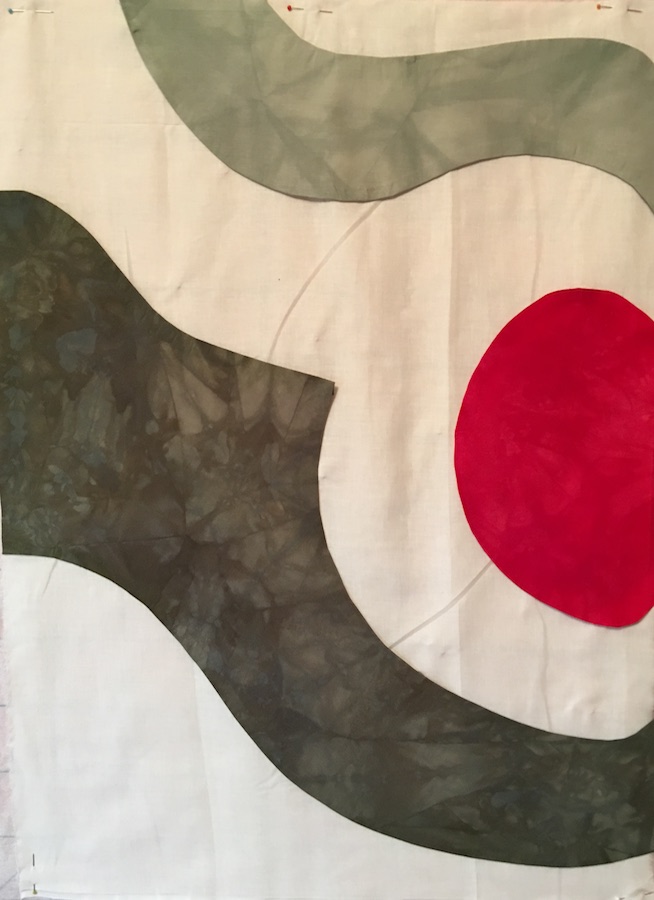
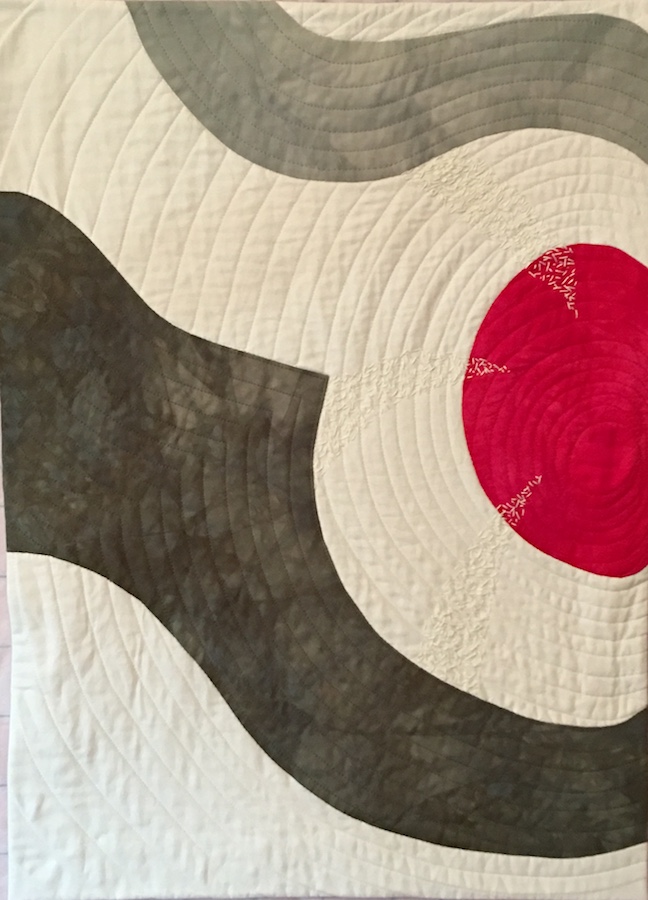
Two days later, after the sink was working again I came home to the smell of smoke and asked FH (fabulous husband) what happened. “Well,” FH said, and then after a lengthy pause and with a pained expression he finally added, “I think our washing machine blew up.” I would have suspected wild exaggeration on his part had it not been for the lingering evidence of noxious smoke wafting through our home. Evidently he was doing a load of laundry and heard a loud bang. He went over to investigate to find smoke billowing out of our front loader. You have no idea how happy I am that I was not there to witness. So for the next few weeks we are without a washing machine. But I digress… Here is the preliminary piece on my design wall.
Slowly it began to take shape and as everything seemed to be falling apart, exploding, going dry and whatever else, my sewing machine, not wanting to be left out of all the fun, decided it was no longer going to play nice with my walking foot, perhaps it was taking a cue from our presidential race, requiring me to spend more than five hours watching various you tube videos, reading the instructions over and over again to troubleshoot. There were a LOT of late, late nights. Eventually I was able to convince my sewing machine it was in its own best interest to get along and all is well. In actuality I realized that my walking foot was causing the automatic threader to jam. When I thread it manually everything works.
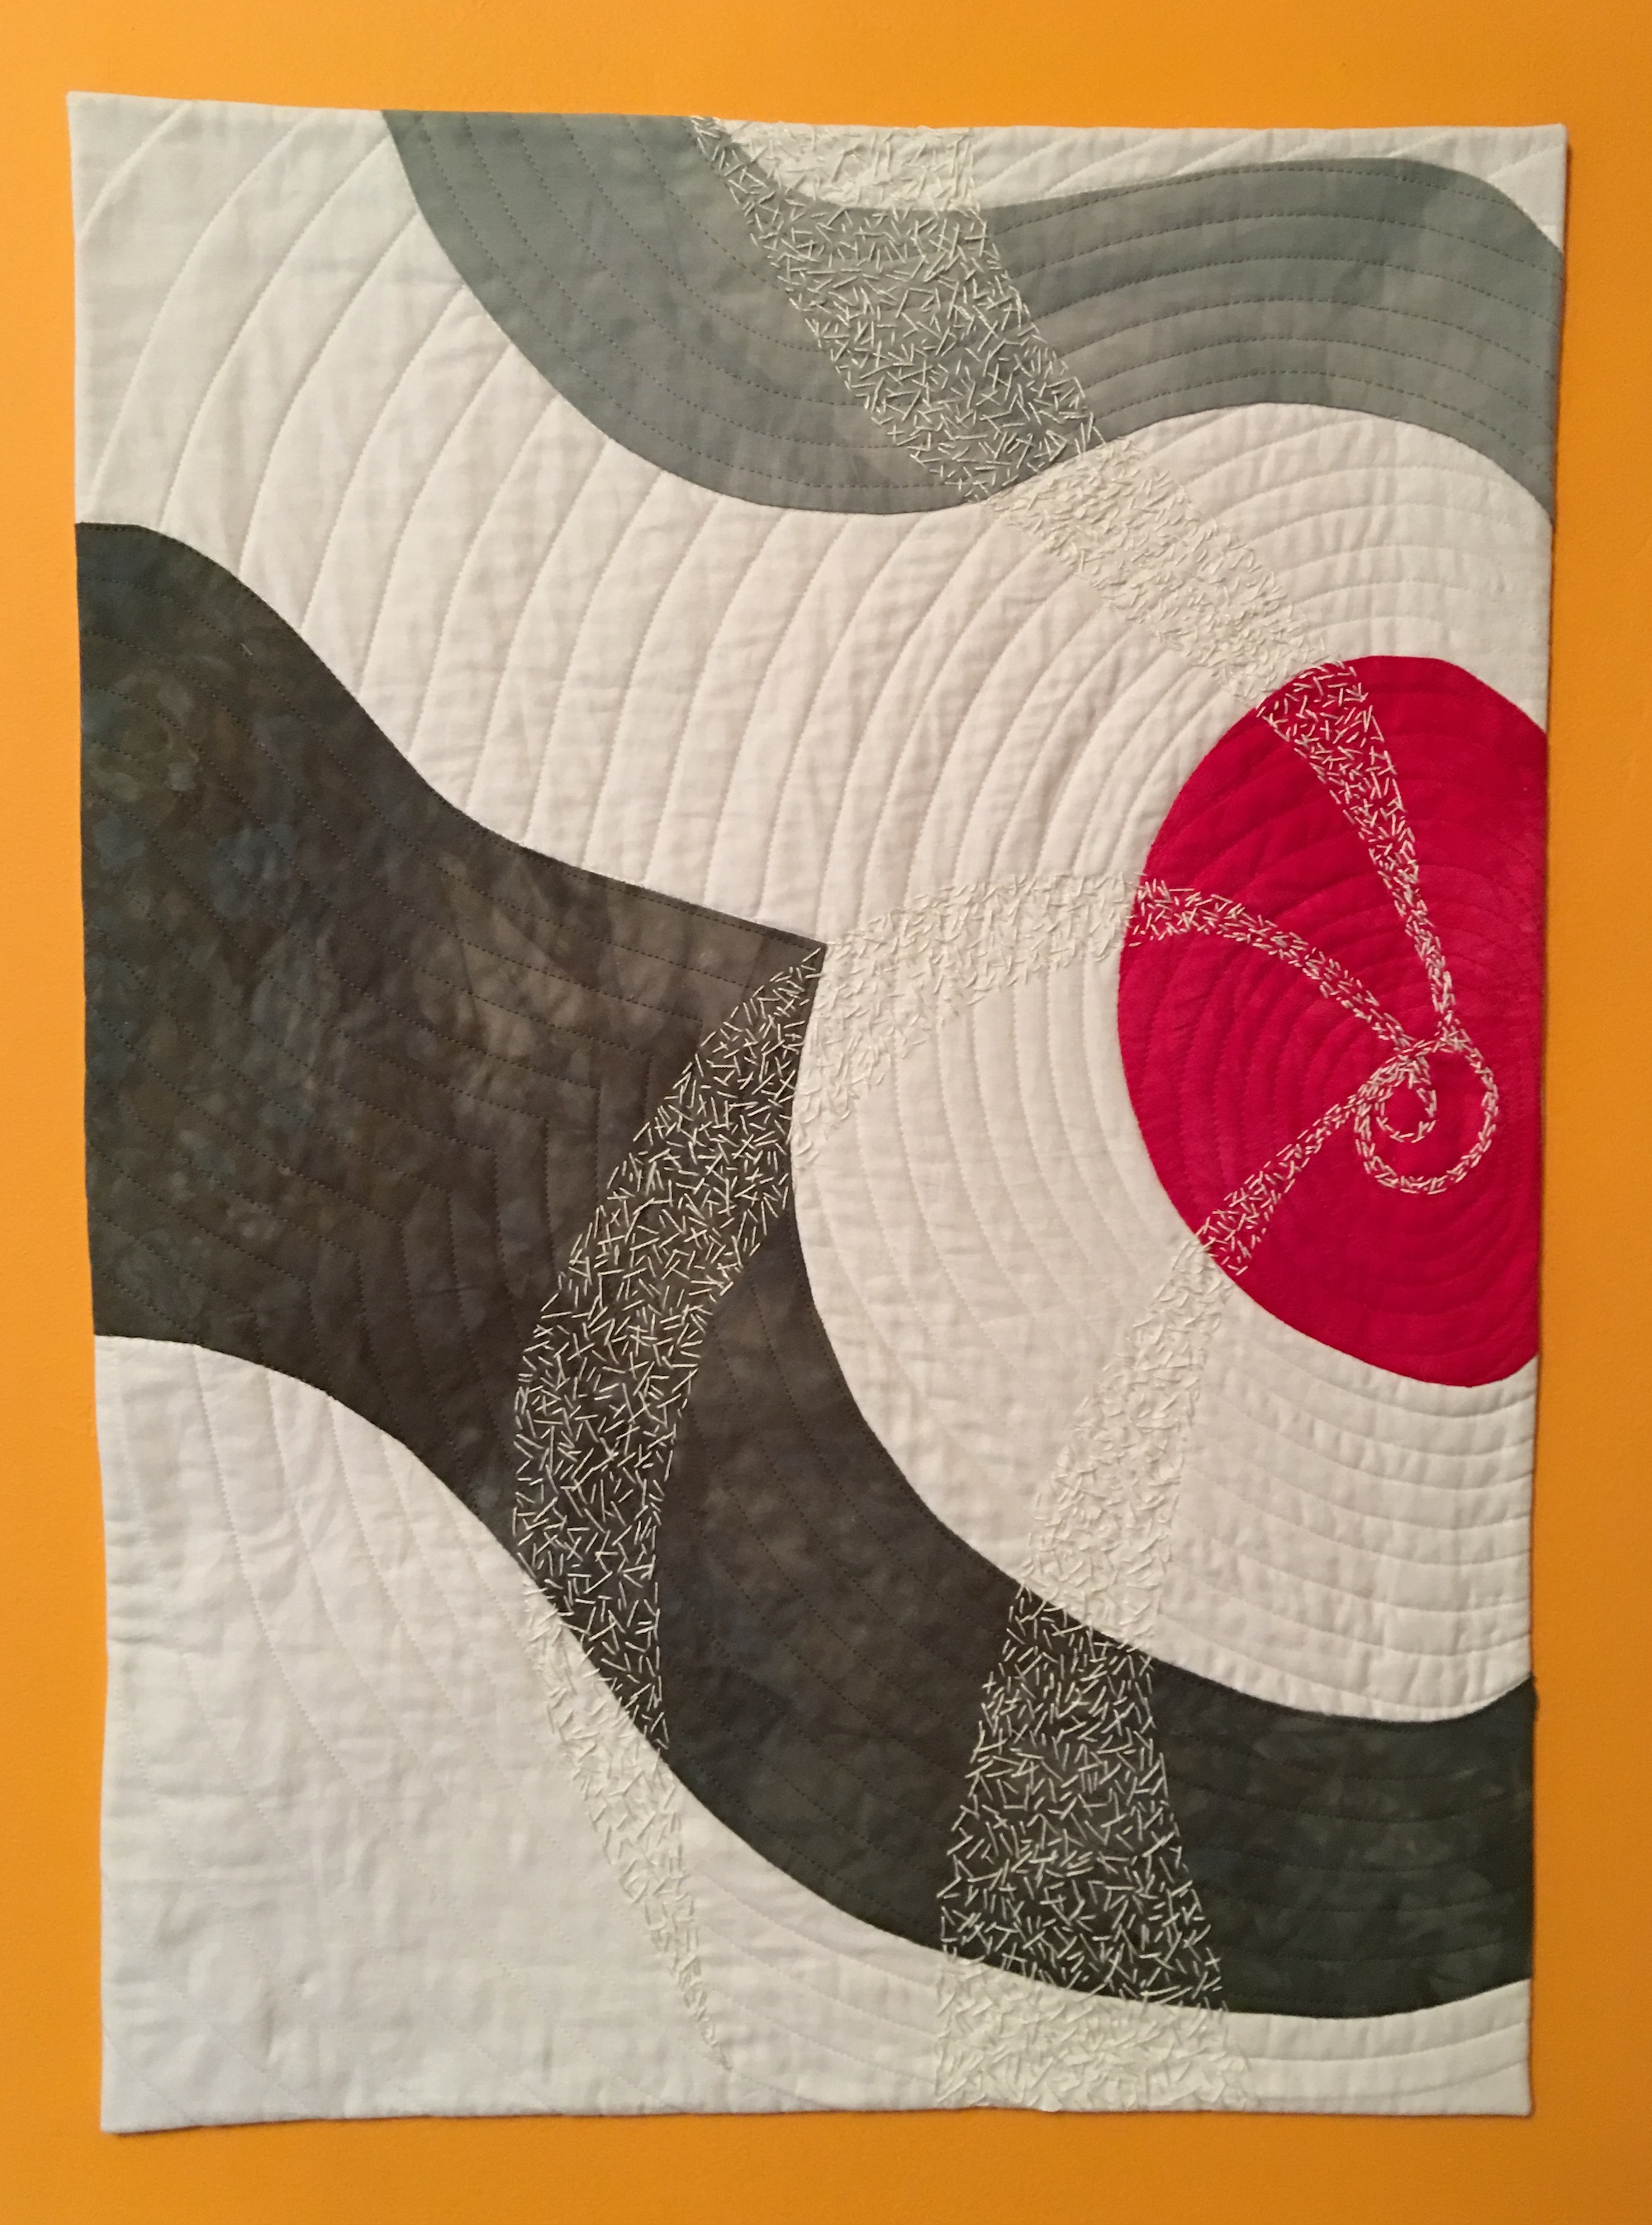
After I did the quilting I decided to add some hand stitching, but couldn’t decide whether to do more or take it all out. So what does one do when you’re not sure? Ask Elizabeth and others in the class for feedback, of course!
Which led to this…
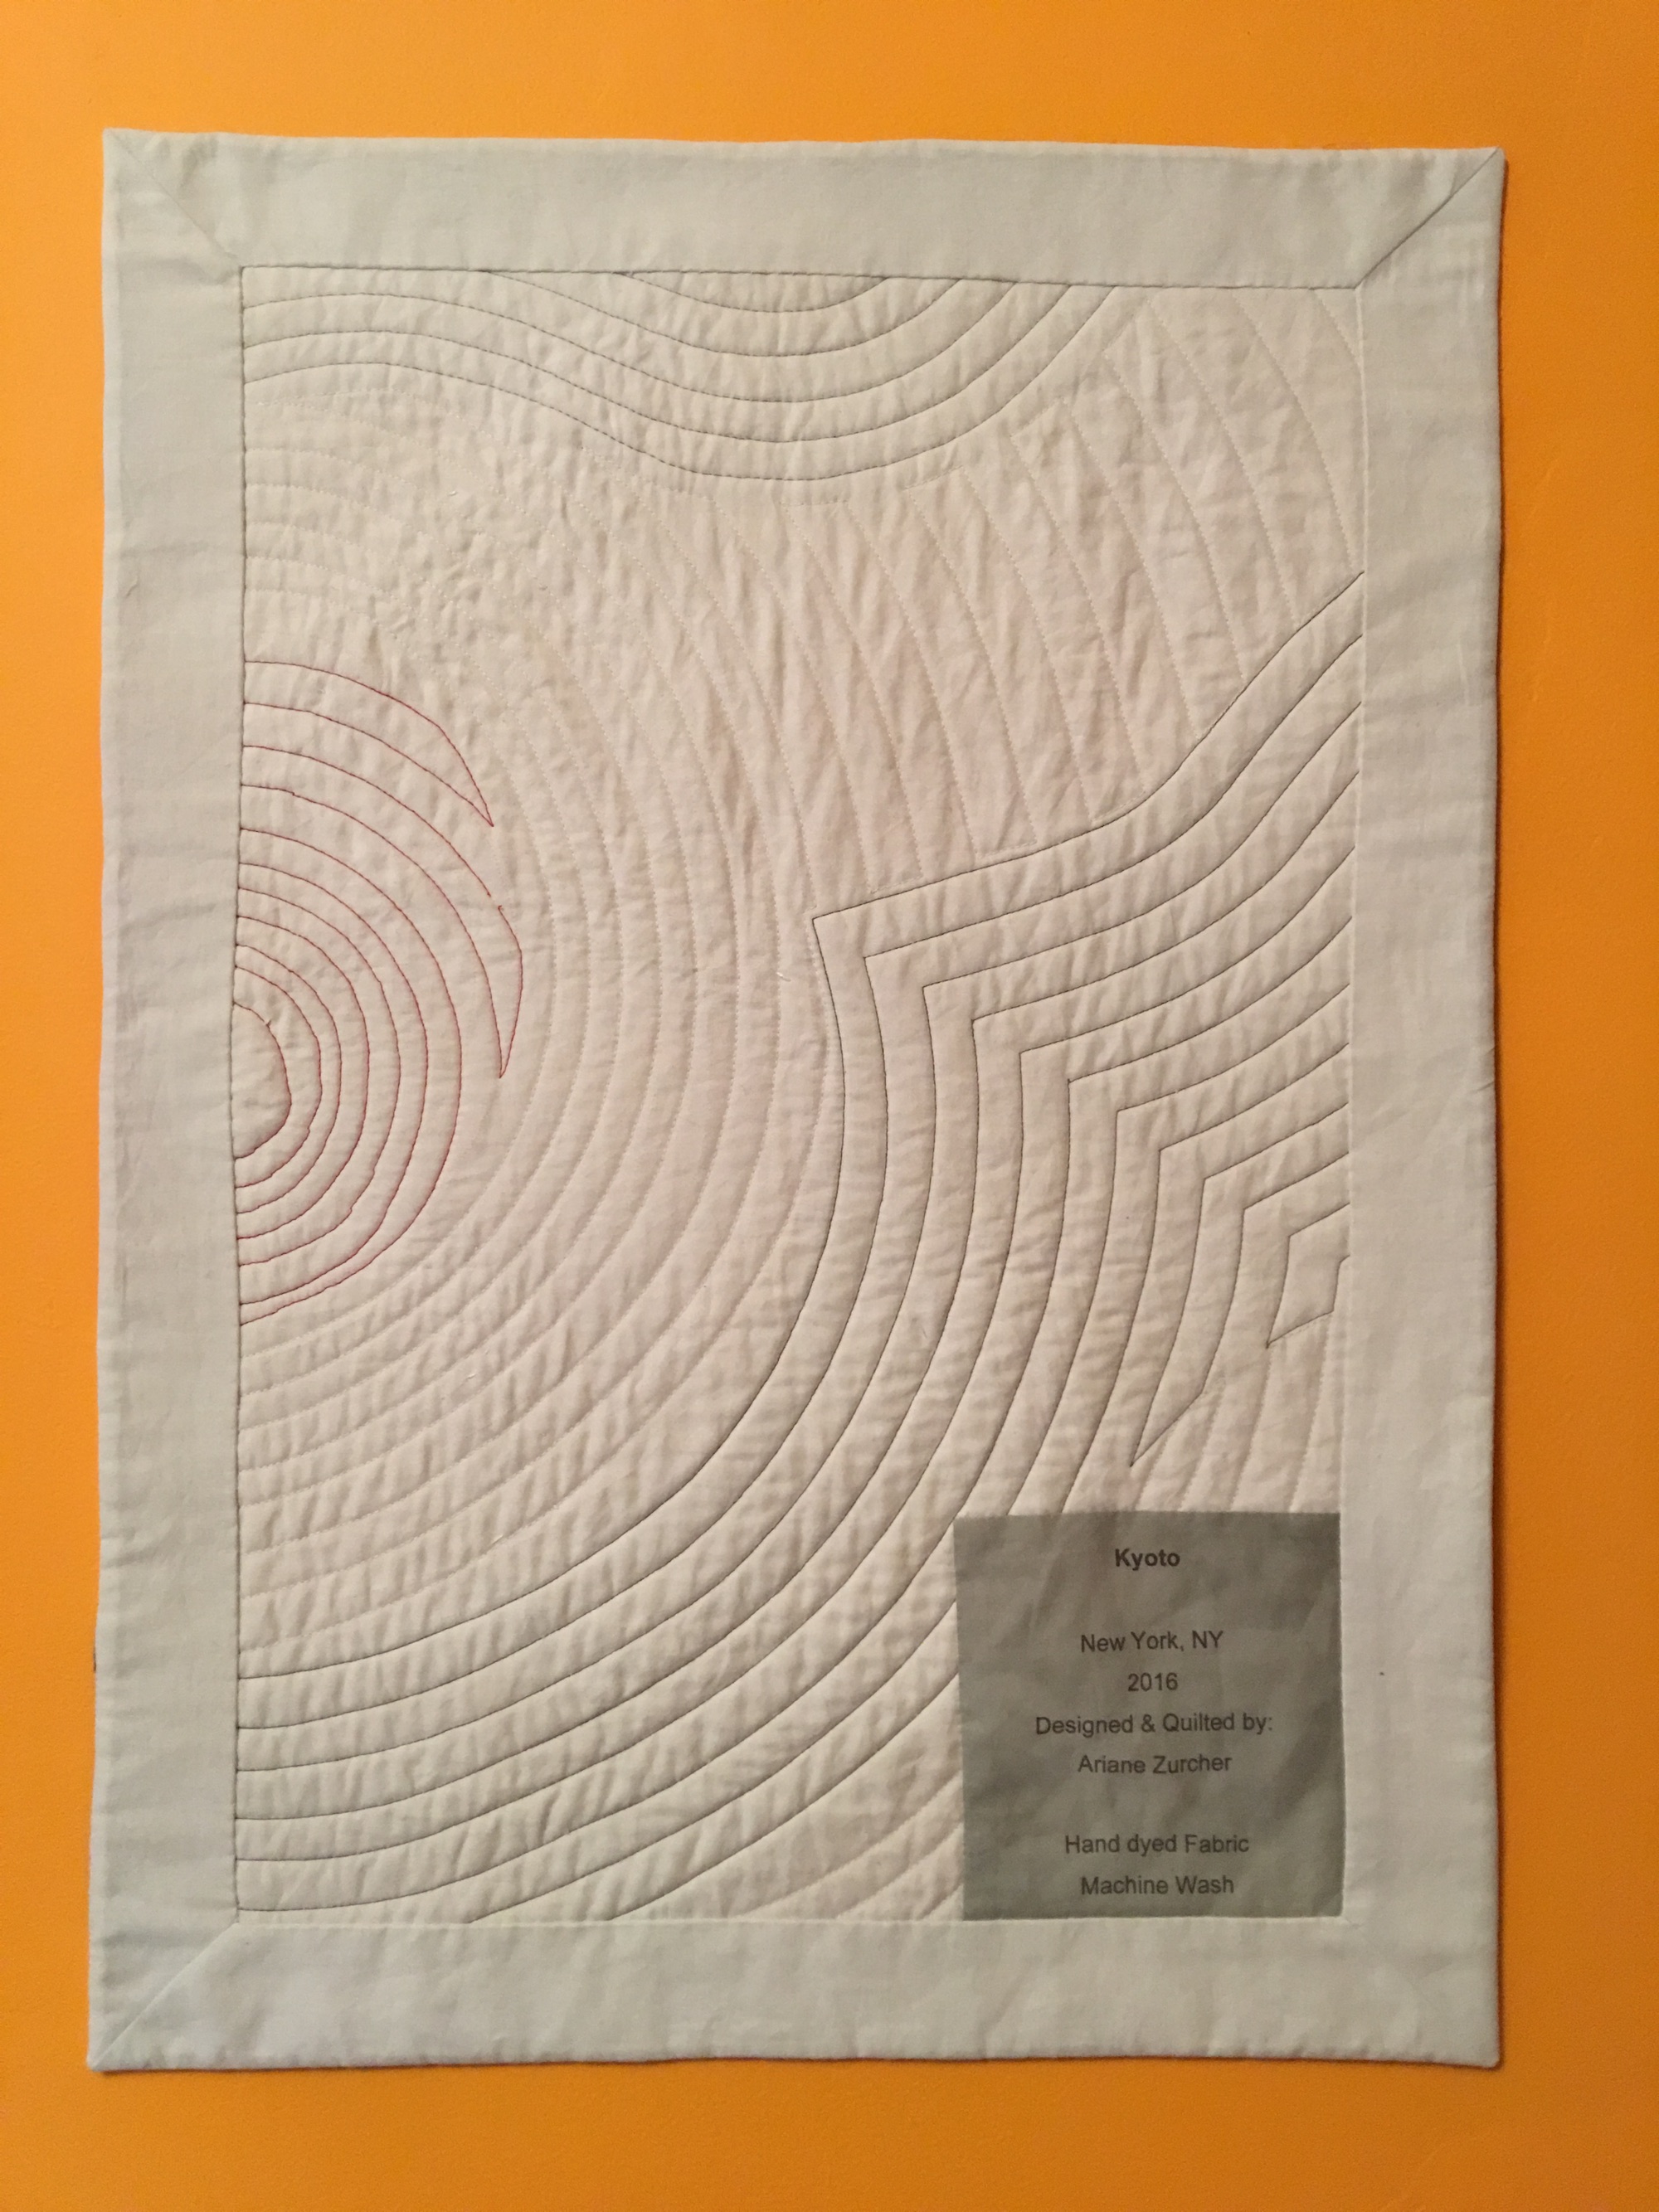
And here’s the back.
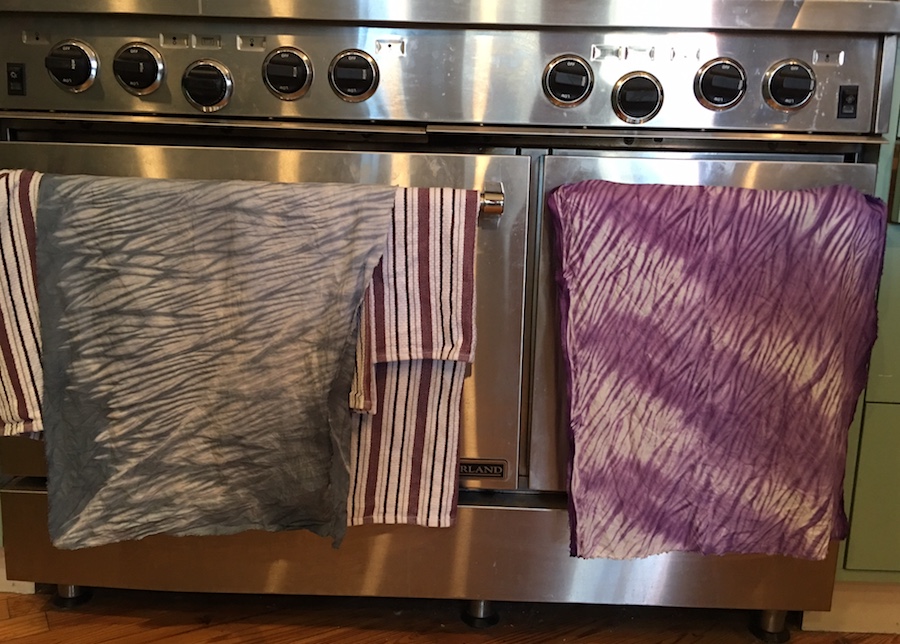
The third week of the class is well underway, my fabric arrived, the sink is running as is my walking foot (haha) and oh what fun I’m having! We are learning basic Shibori arashi dyeing. I still don’t have a washing machine, (and have two teenagers in the house) but these are luxury problems. I haven’t figured out what I’m doing with my beautiful dyed fabrics, but will come up with something in the next day or so. Here’s a sneak peak at this weeks dyeing and drying New York City style. And I didn’t make a single dye joke. The title doesn’t count because it’s Elizabeth’s name for her class. How can you not love that title? I may go back and edit a few in, just to amuse, or you can make a few in the comments!
Yay, I finished it!! My first large quilt. I began it in January and finished yesterday.
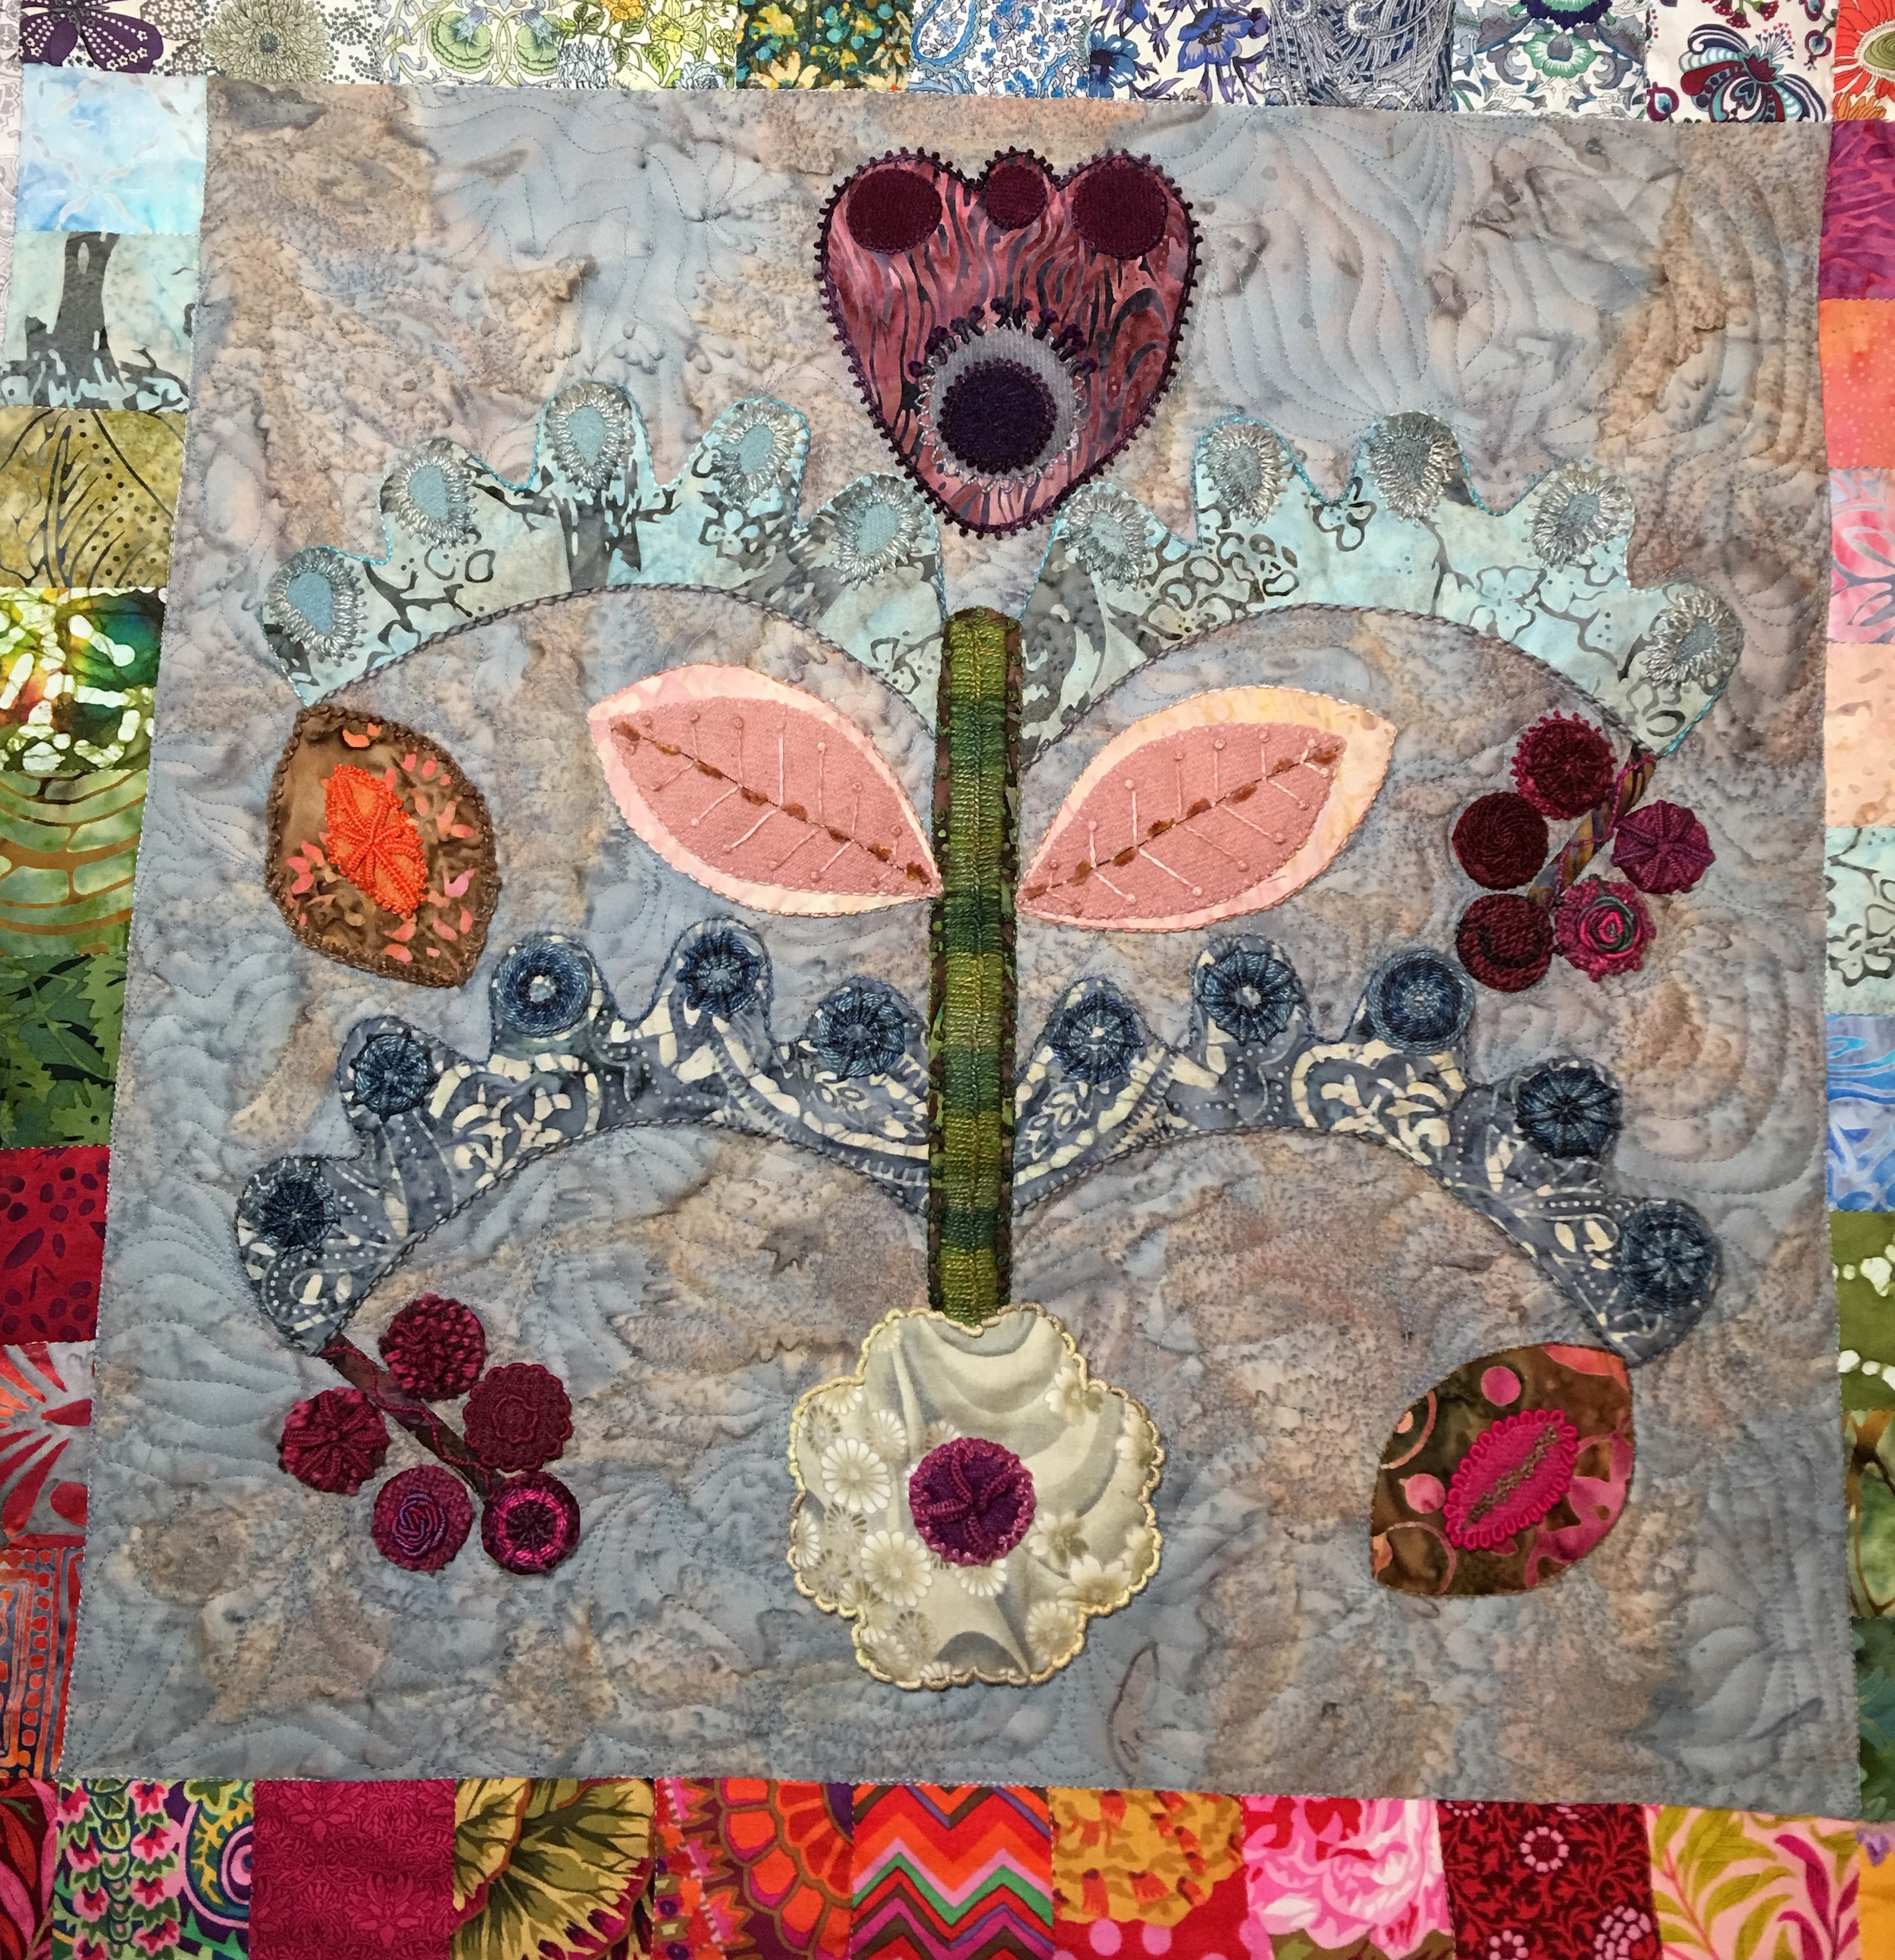
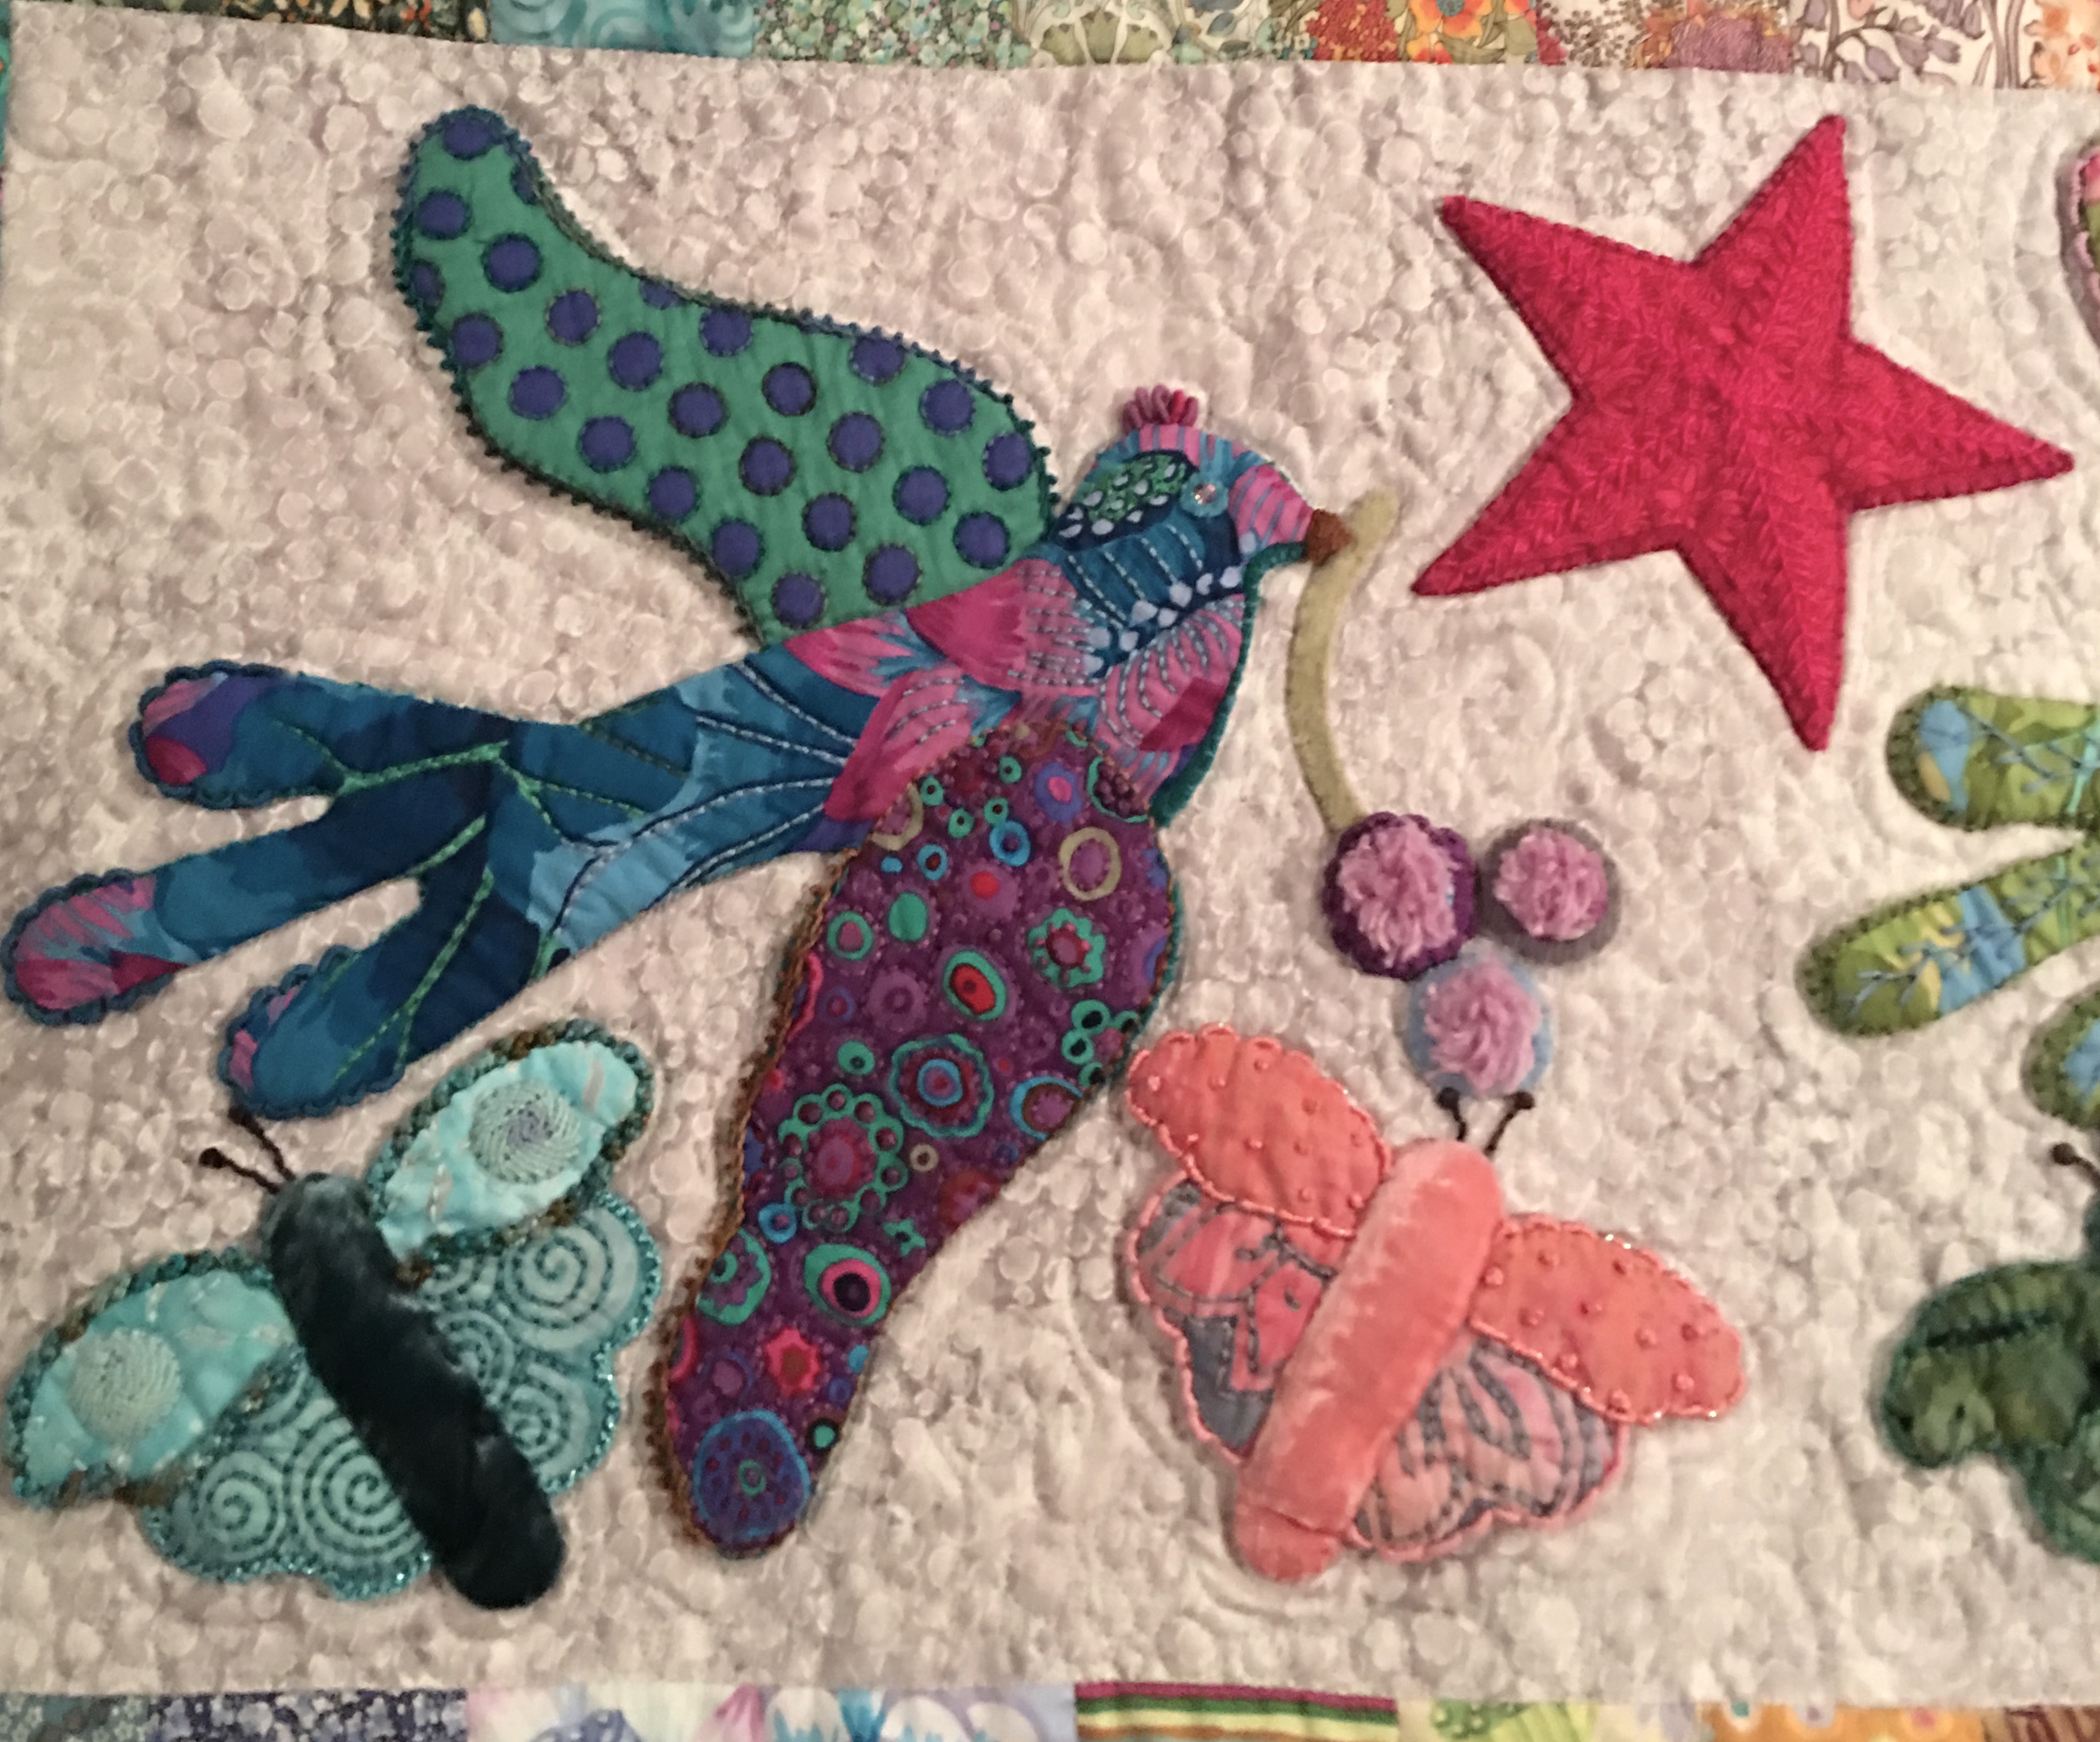
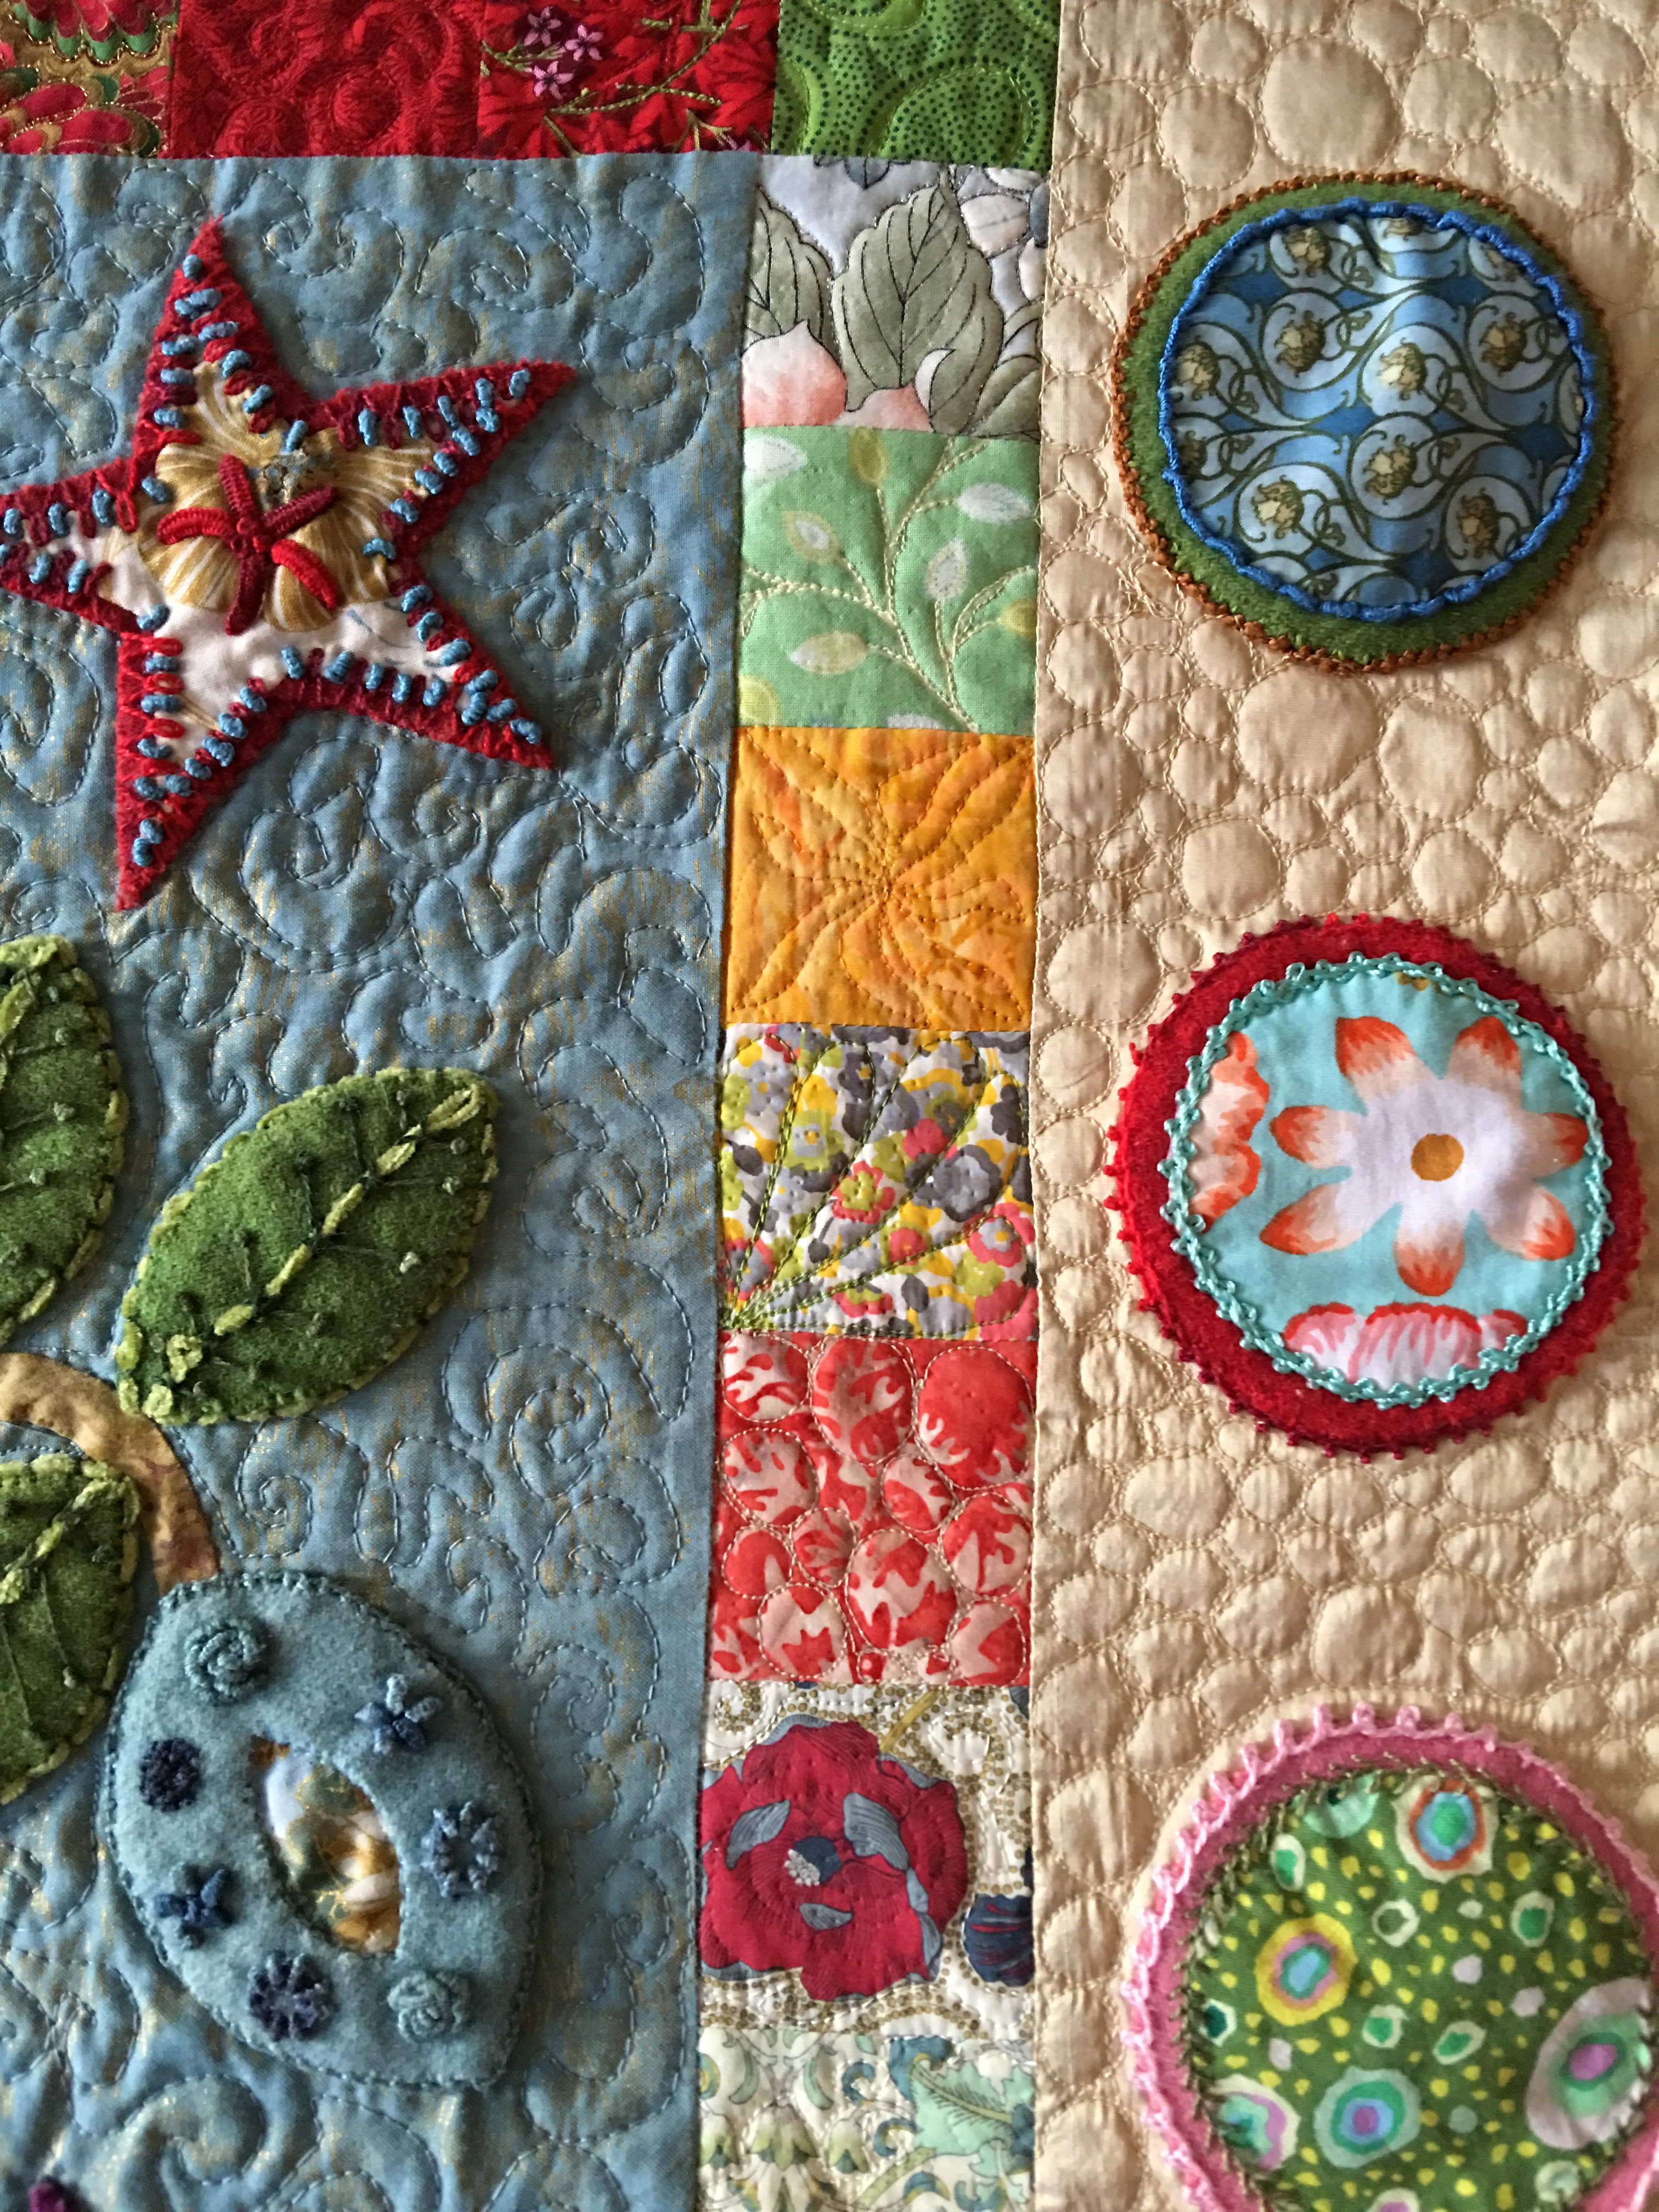
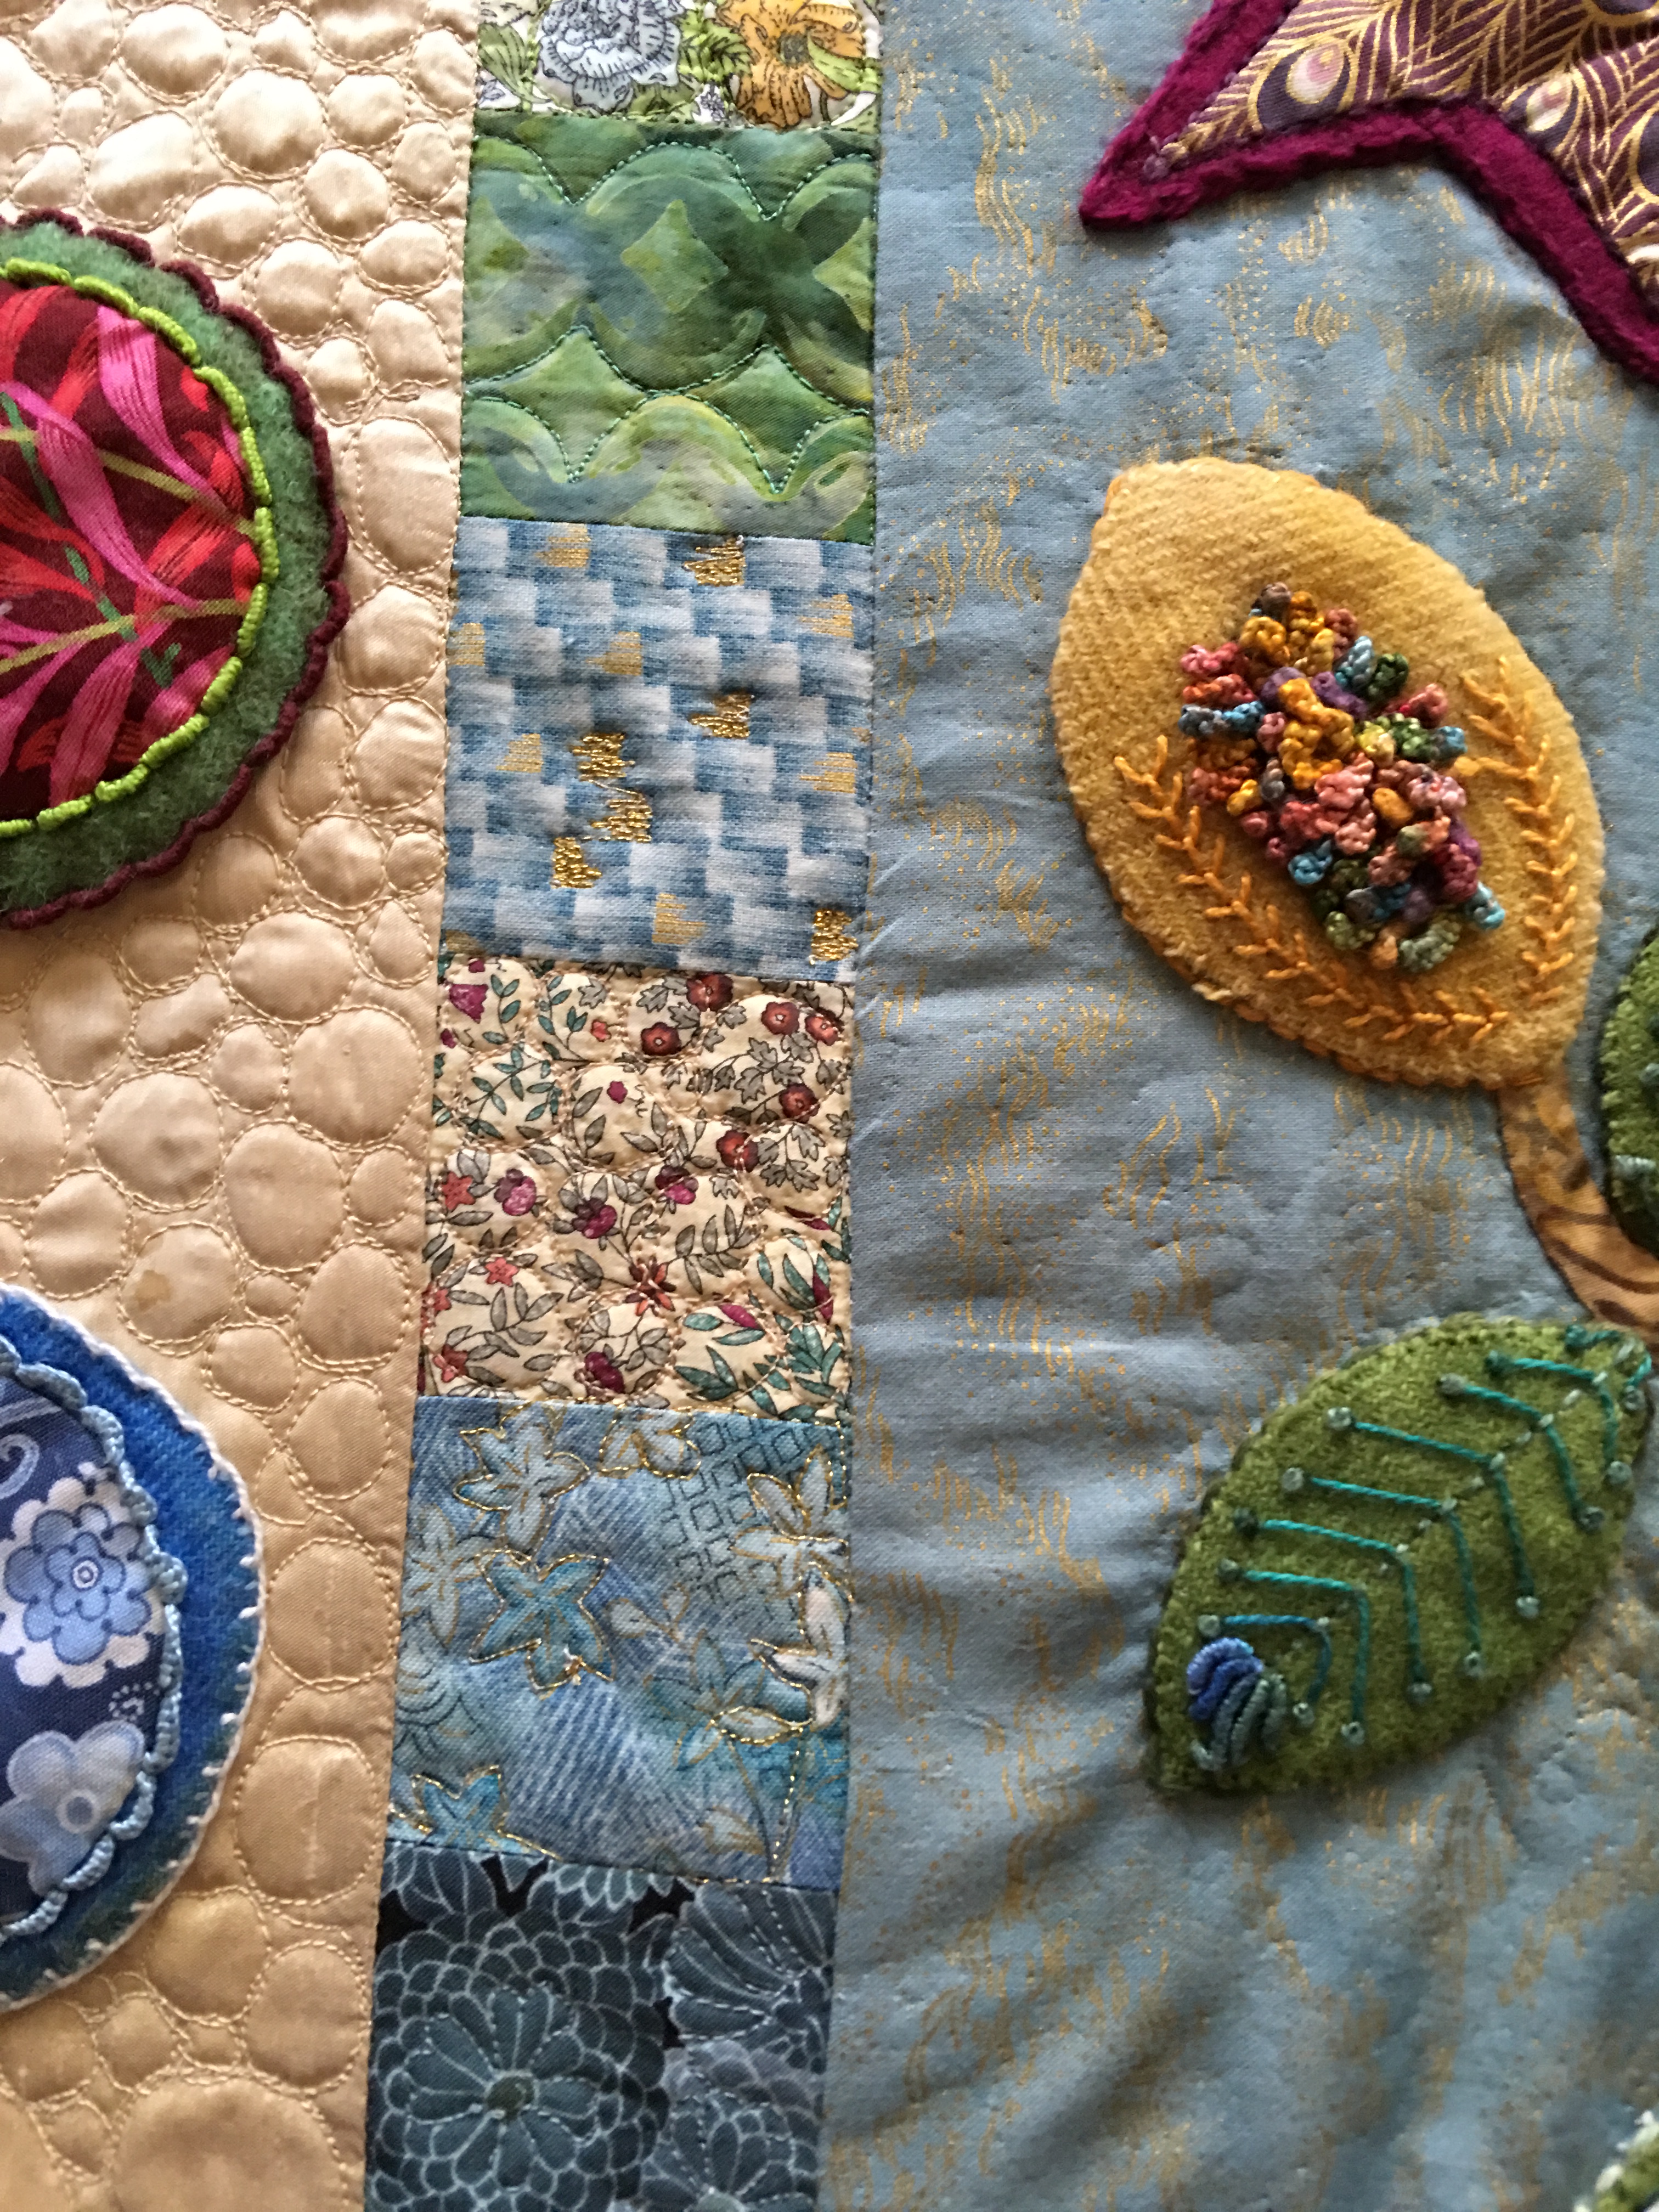
This is the queen-sized quilt that I have written about ‘here‘, ‘here‘, ‘here‘ and ‘here‘. In a nutshell this quilt was my starter quilt. I wanted to learn how to make a quilt start to finish. This quilt was designed by Kim McLean and is called Flower Pots. I took a class where we followed the pattern, learned to appliqué, and got to use all the things I had learned from Sue Spargo – layering, using different fabrics such as wool and velvet and then perle cotton and other threads and a multitude of stitches to enhance the shapes. I hand stitched all the appliqué and machine stitched the panels together with the sashing and border. I then used a wool batting and learned how to free motion quilt. I used a red batik for the binding, cut on the bias and hand stitched the back. Finally I made and applied a quilted label.
This first picture is of the lower center panel where I decided to try an emerging pattern of double leaf free motion quilting shape. I used a slightly darker grey thread.
Center Star Panel
For the upper center panel I wanted to try my hand at McTavishing, which is named after a woman who created a specific way to free motion quilt. After a few times, I went off and did my own thing, echoing, but also playing with flame shapes.
Top Center Panel
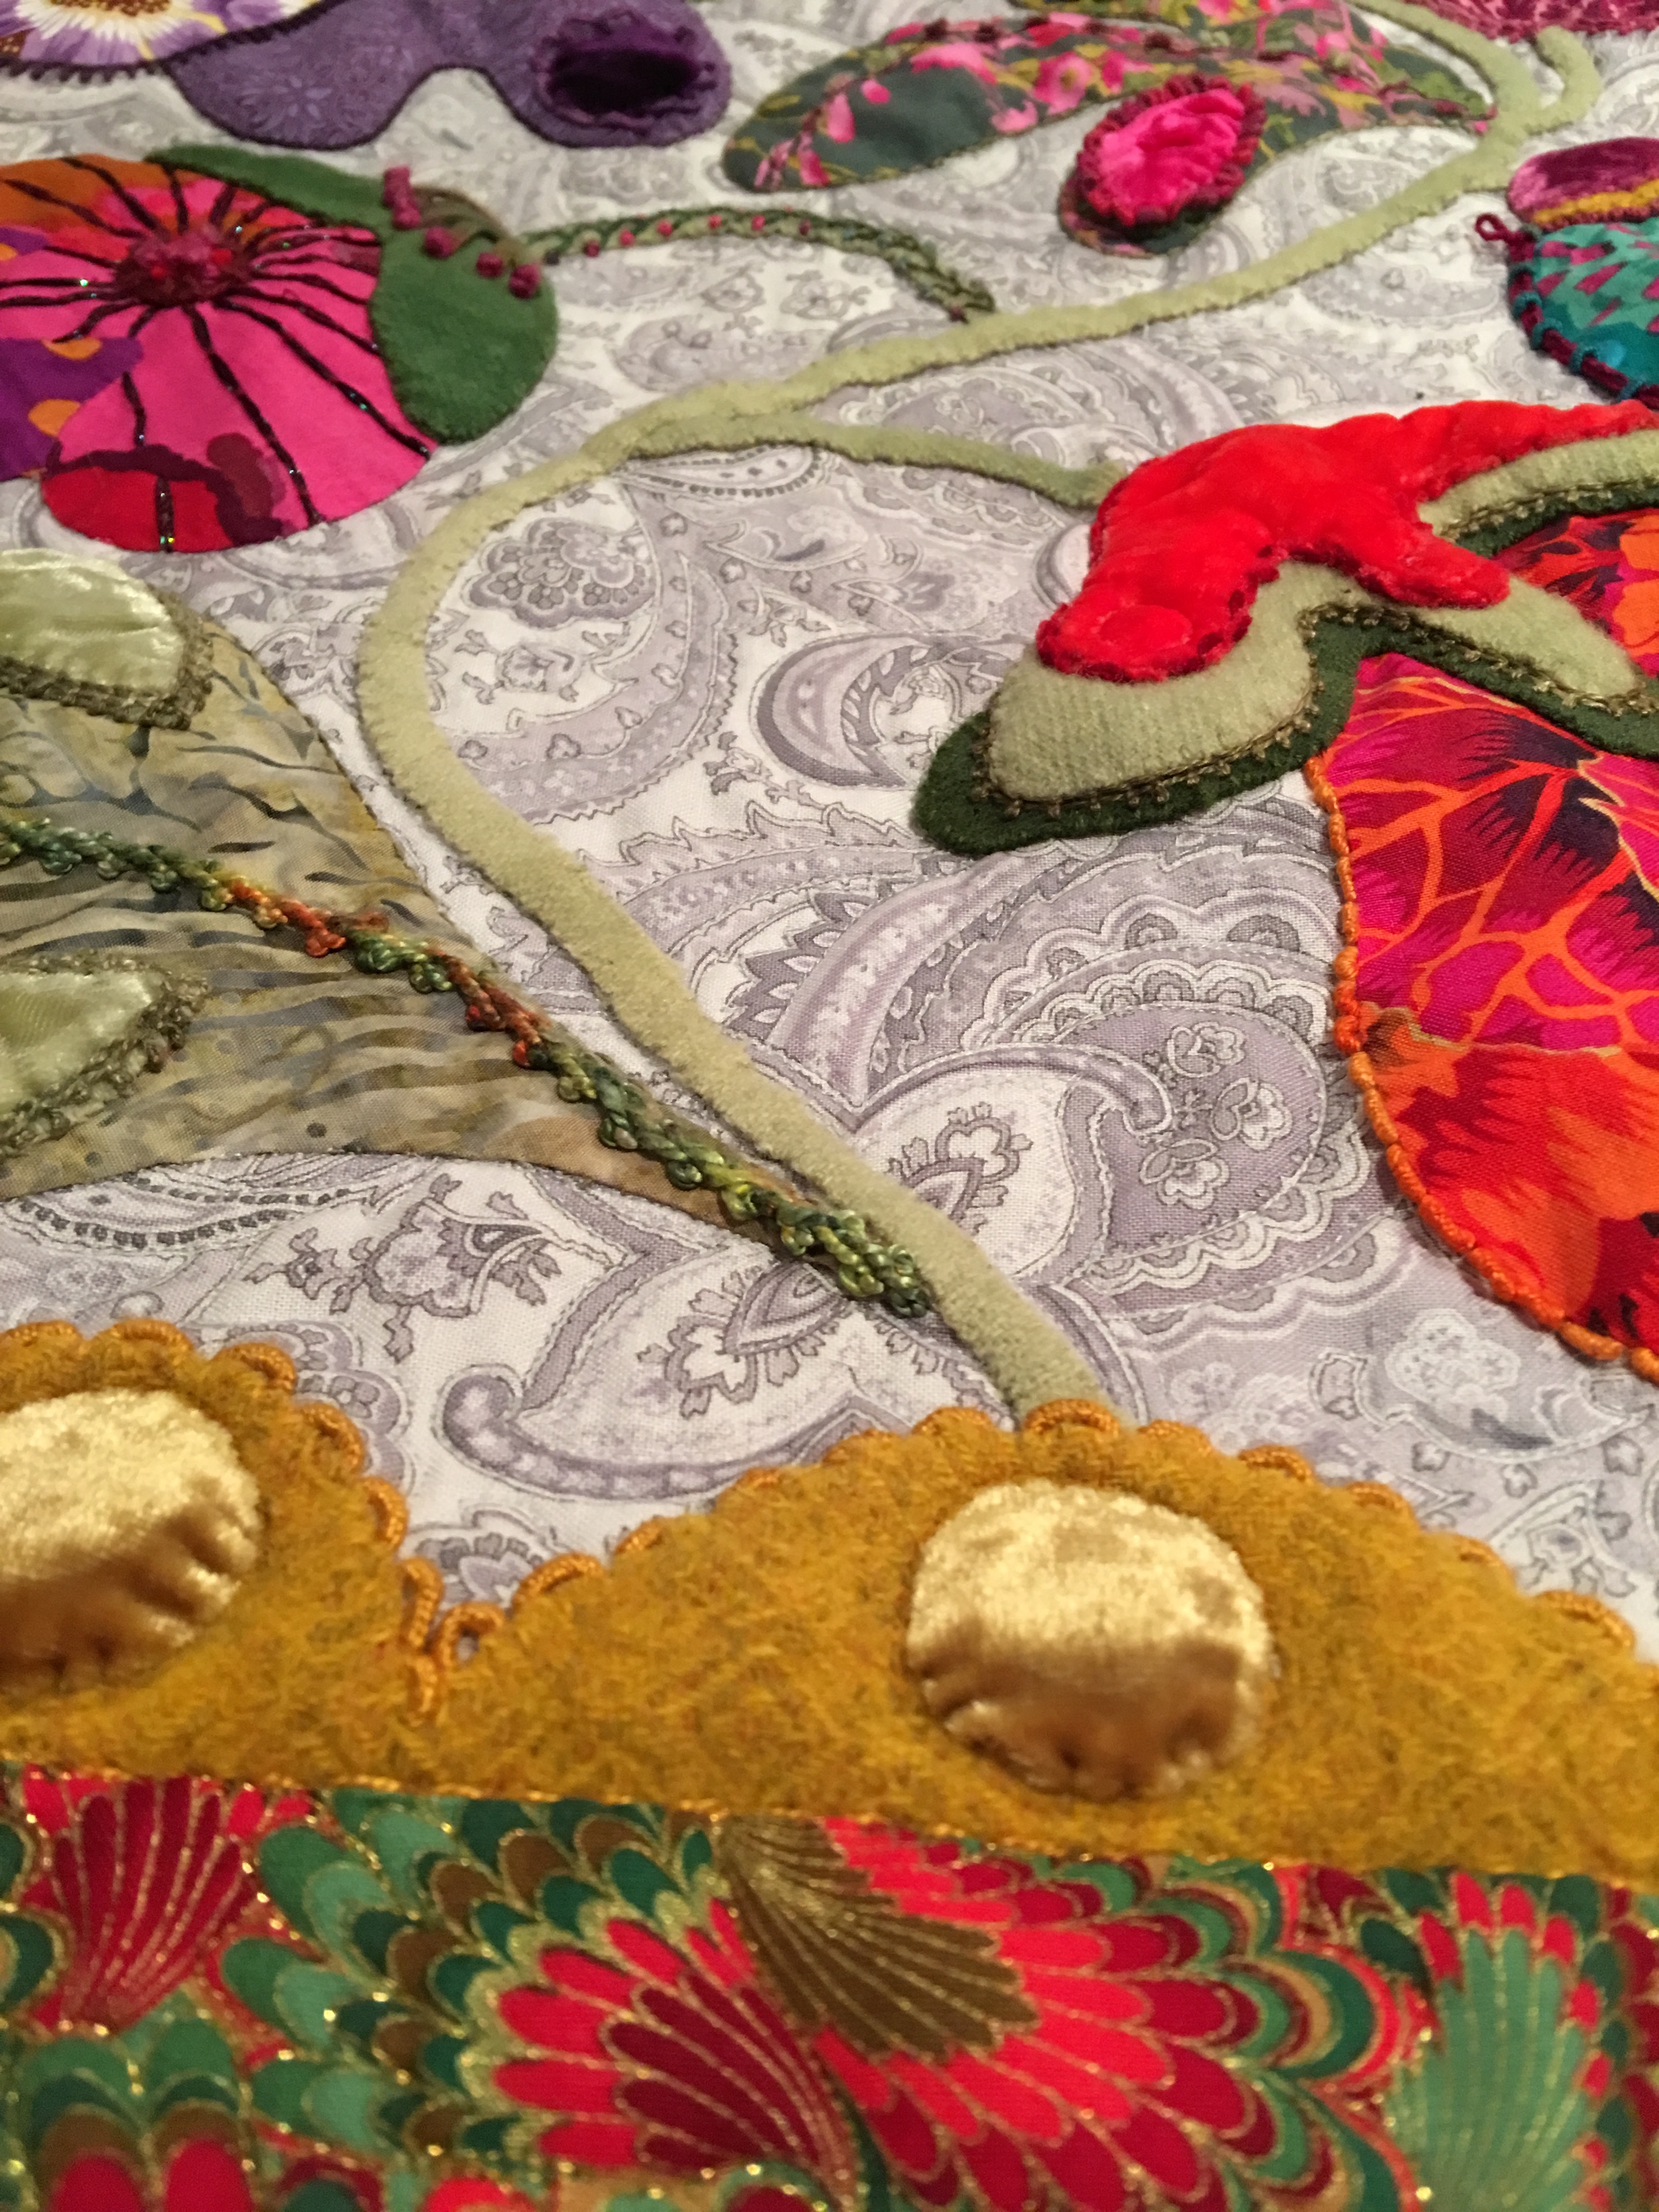
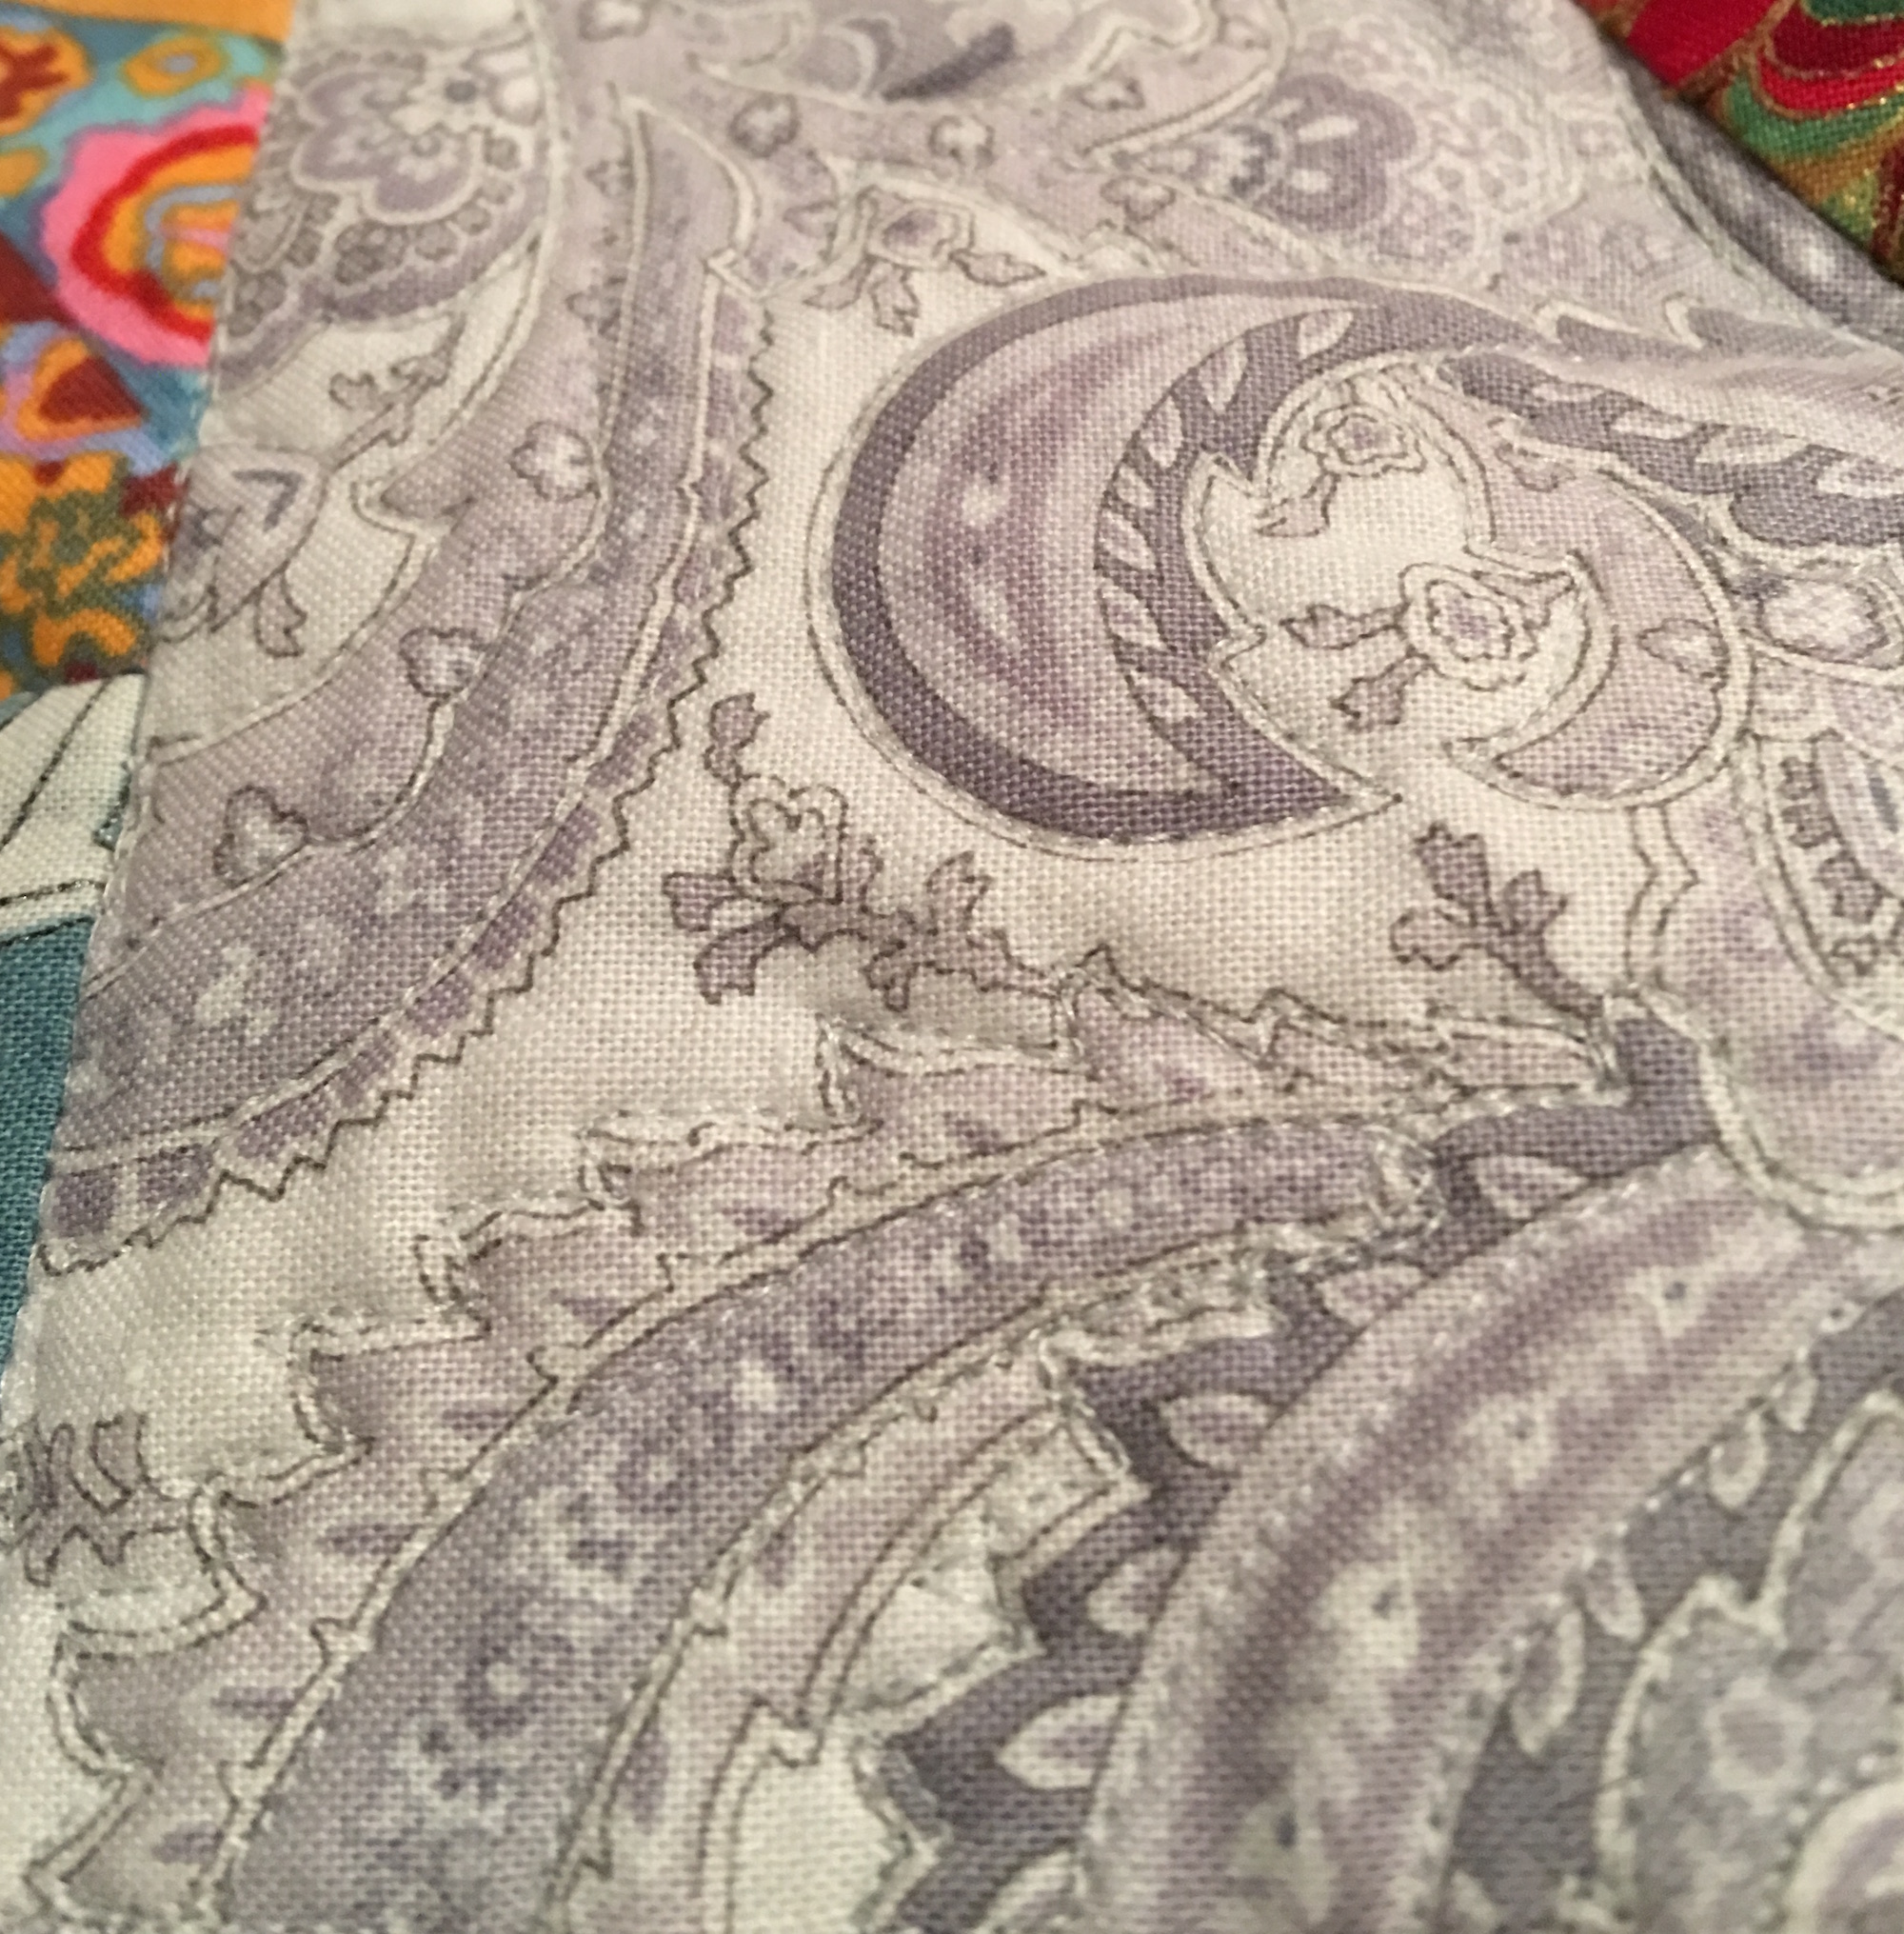
On this long side panel I decided that the paisley fabric was so cool I would just use it as a quilting guideline. I really loved how this turned out, though it’s hard to really see, I did add a close up below.
Side Panel
Detail of the free motion quilting on the side panel
This is the bottom panel and I included pebbles, echoing and swirls, which I did again on the top panel.
Bottom Panel
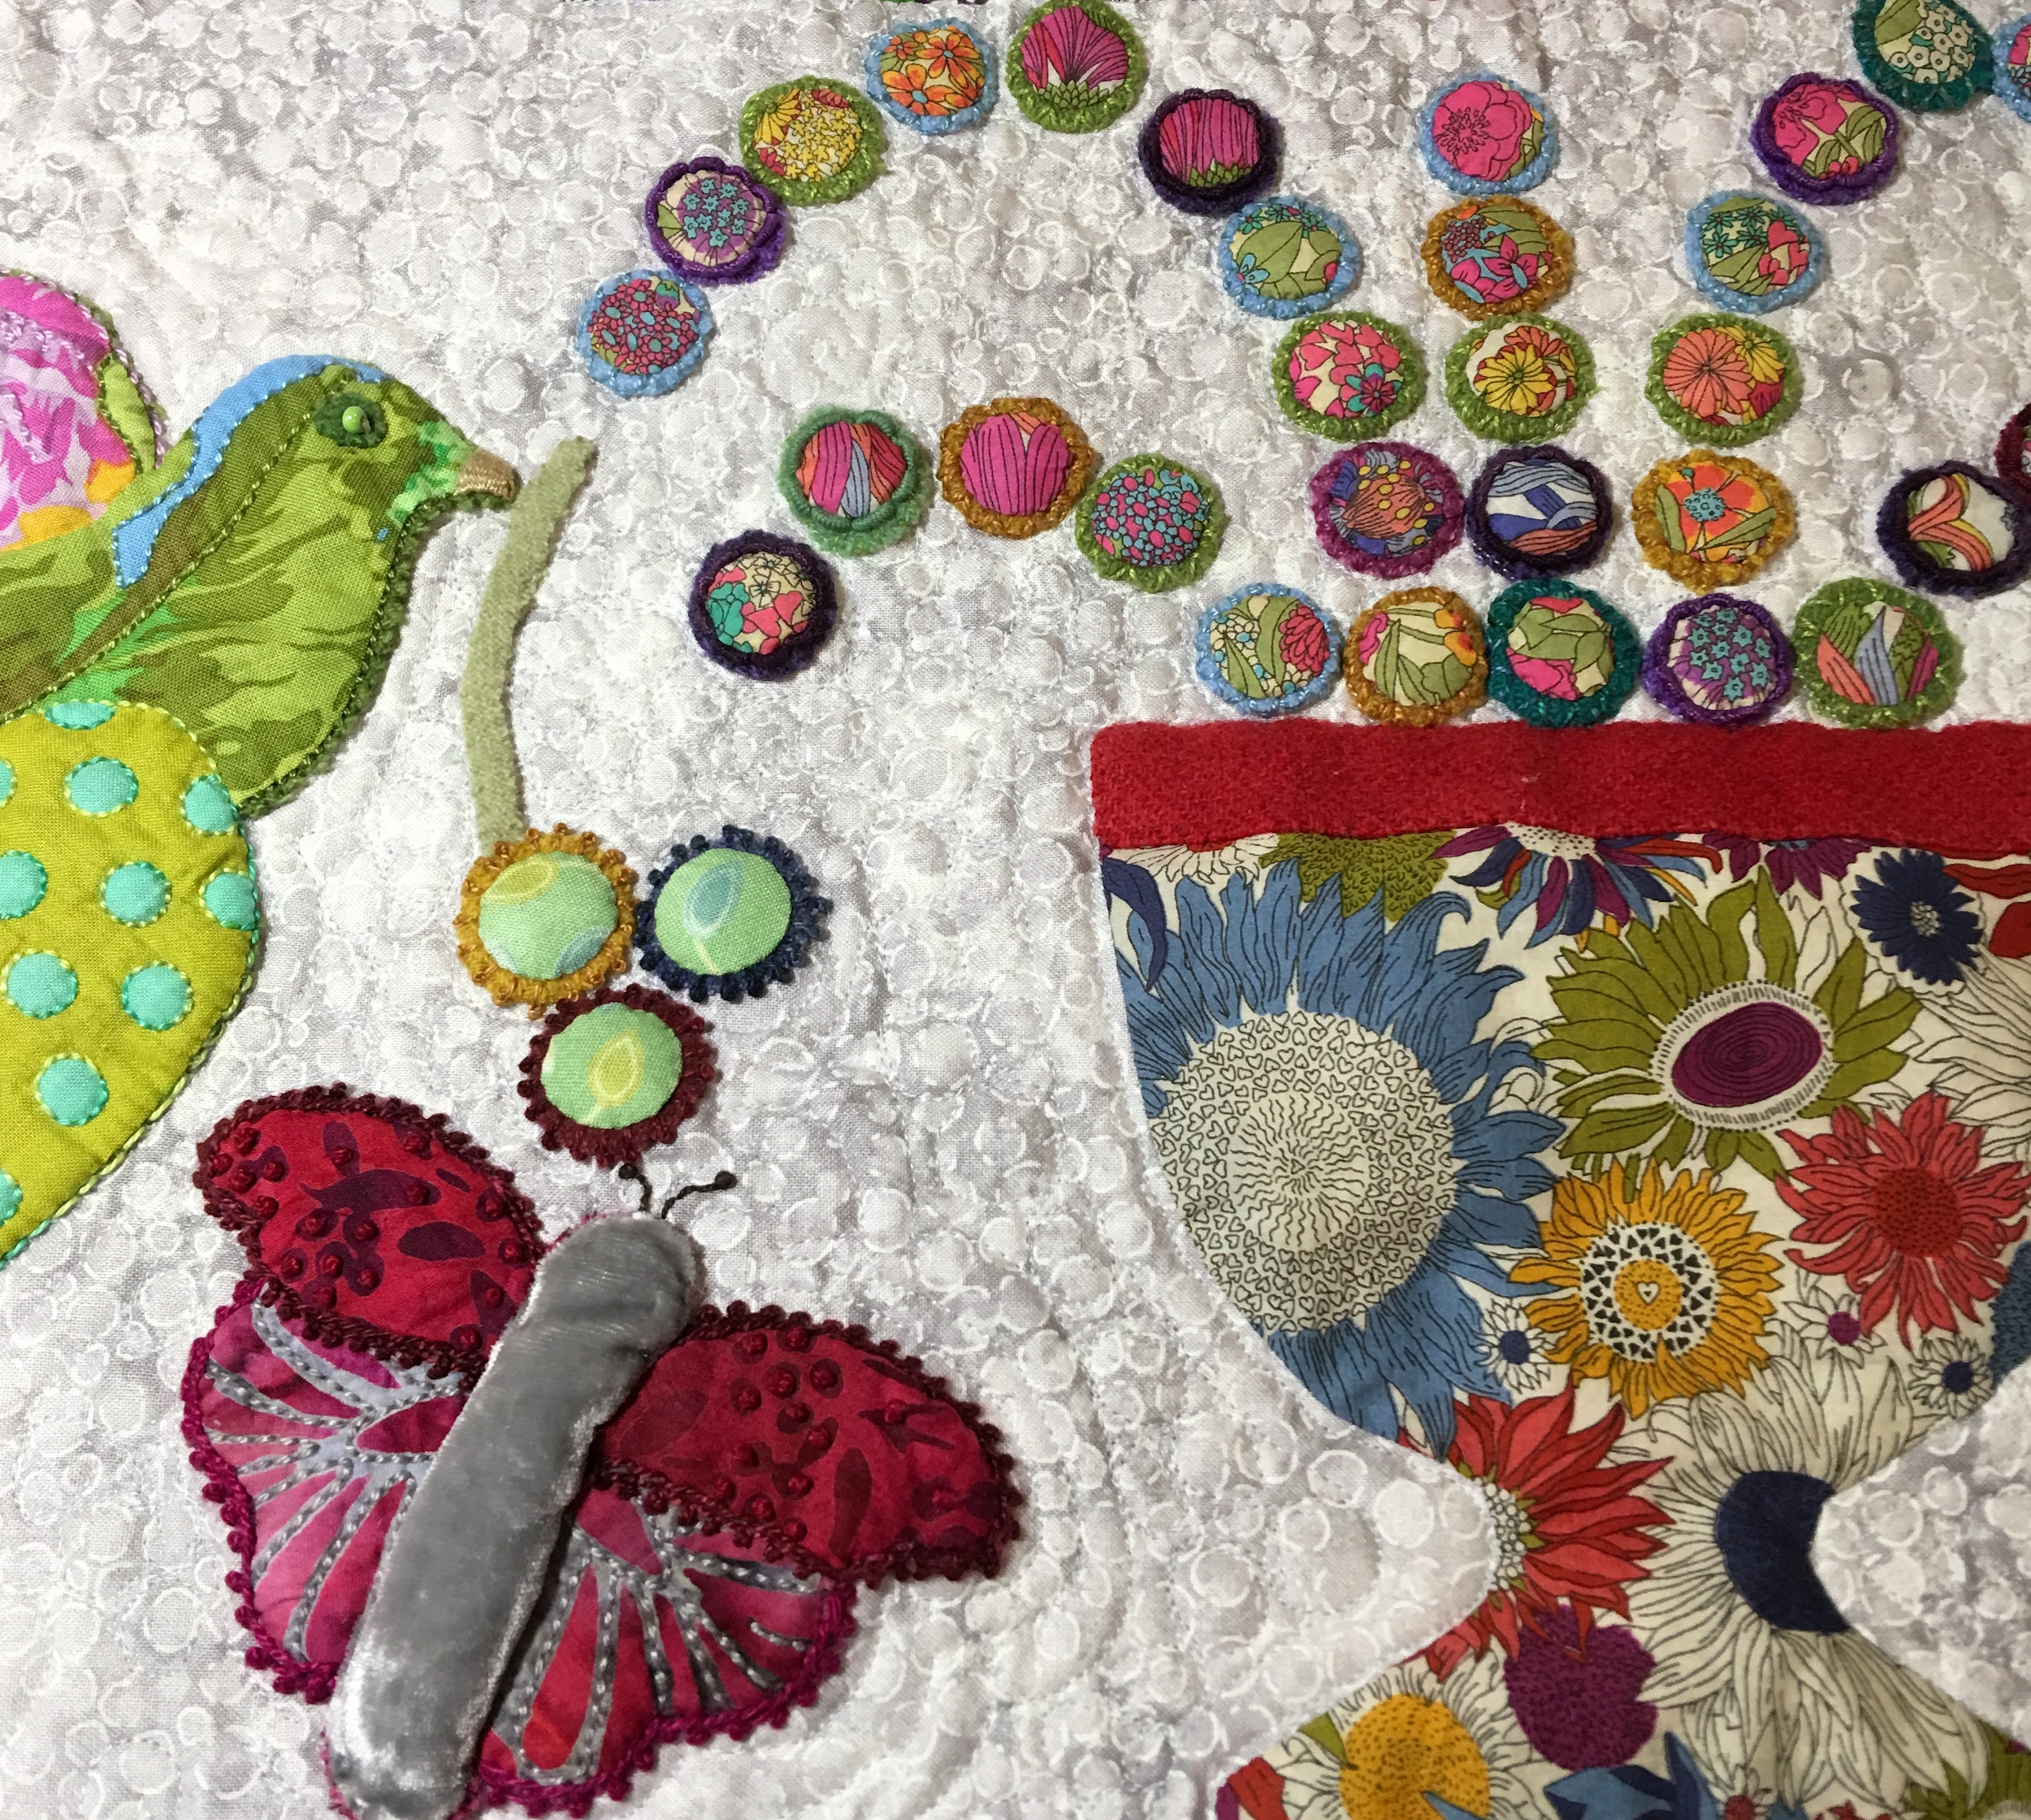
More of the center panel
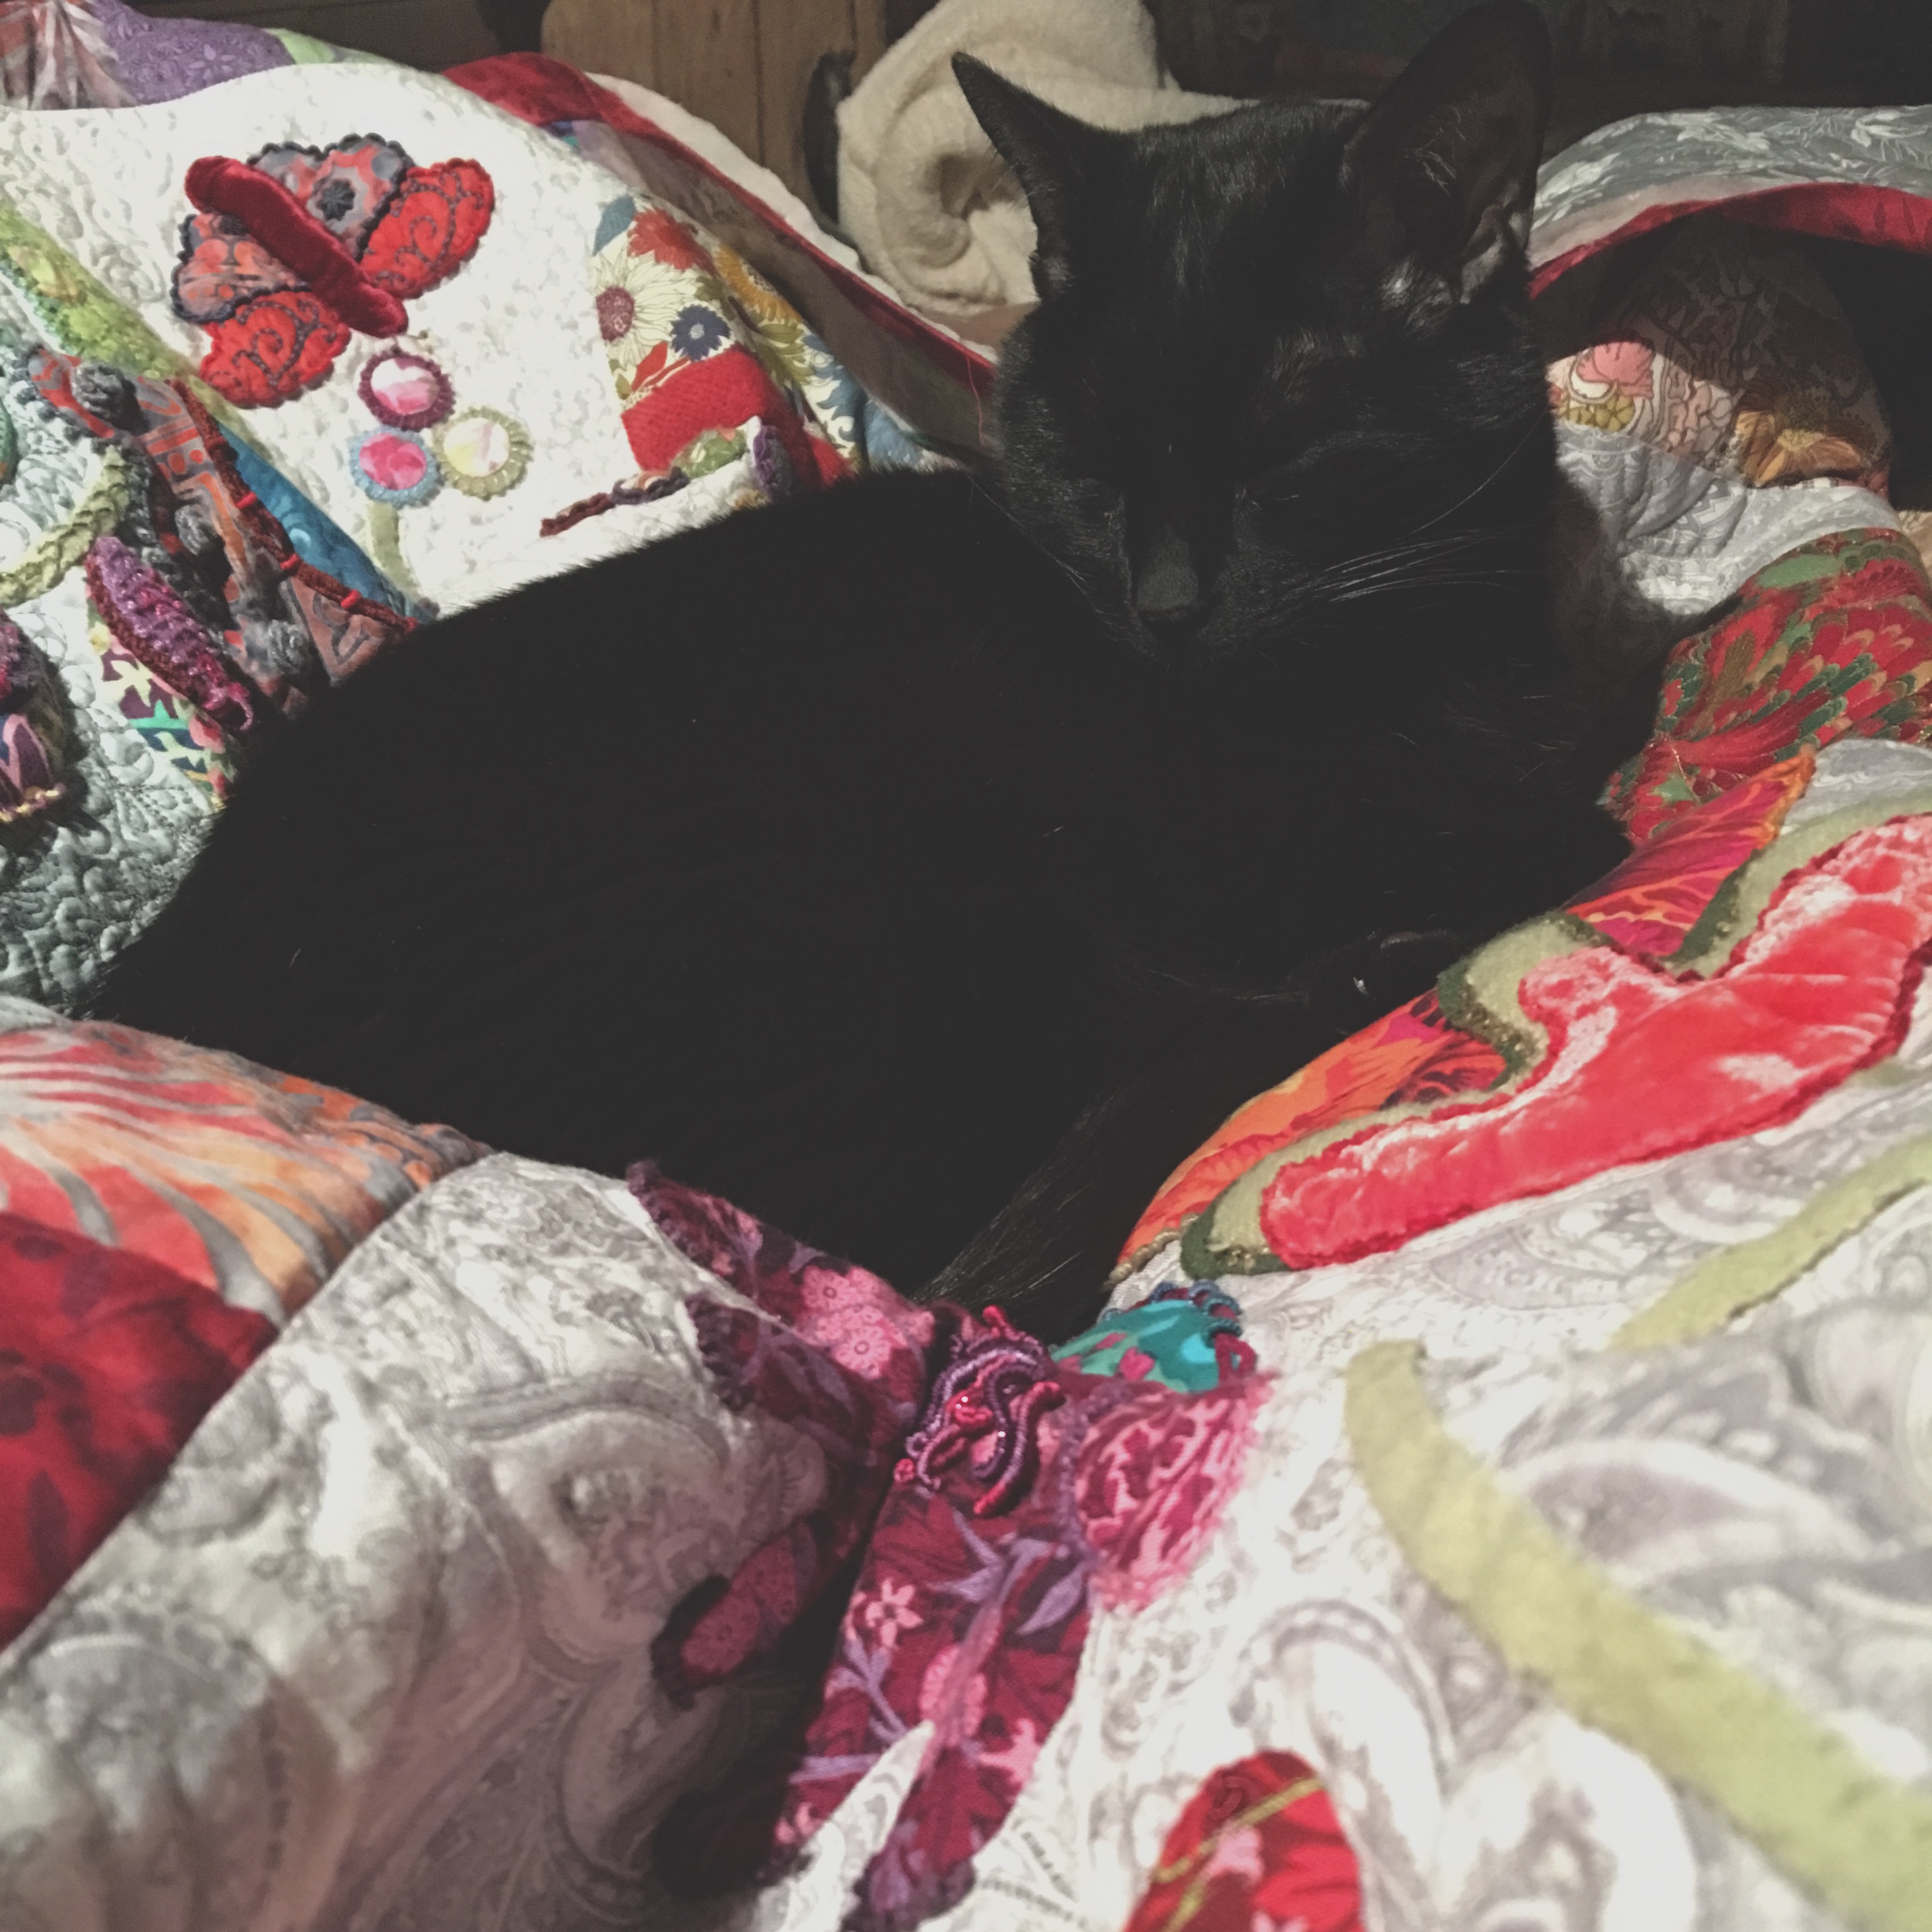
Merlin naps as I work
Merlin was constantly coming over to nap or pretend to nap while secretly inspecting my work. He loved snuggling up amongst the folds as I worked, making for some interesting adjustments on my part as I hated to disturb him!
The border
The entire border I did in a pebble stitch, which I love. It’s so reminiscent of shapes I used for my jewelry collection, The Lotus Collection. And now that I think of it, the swirls in the bottom and top panels remind me of my Samadhi Collection.
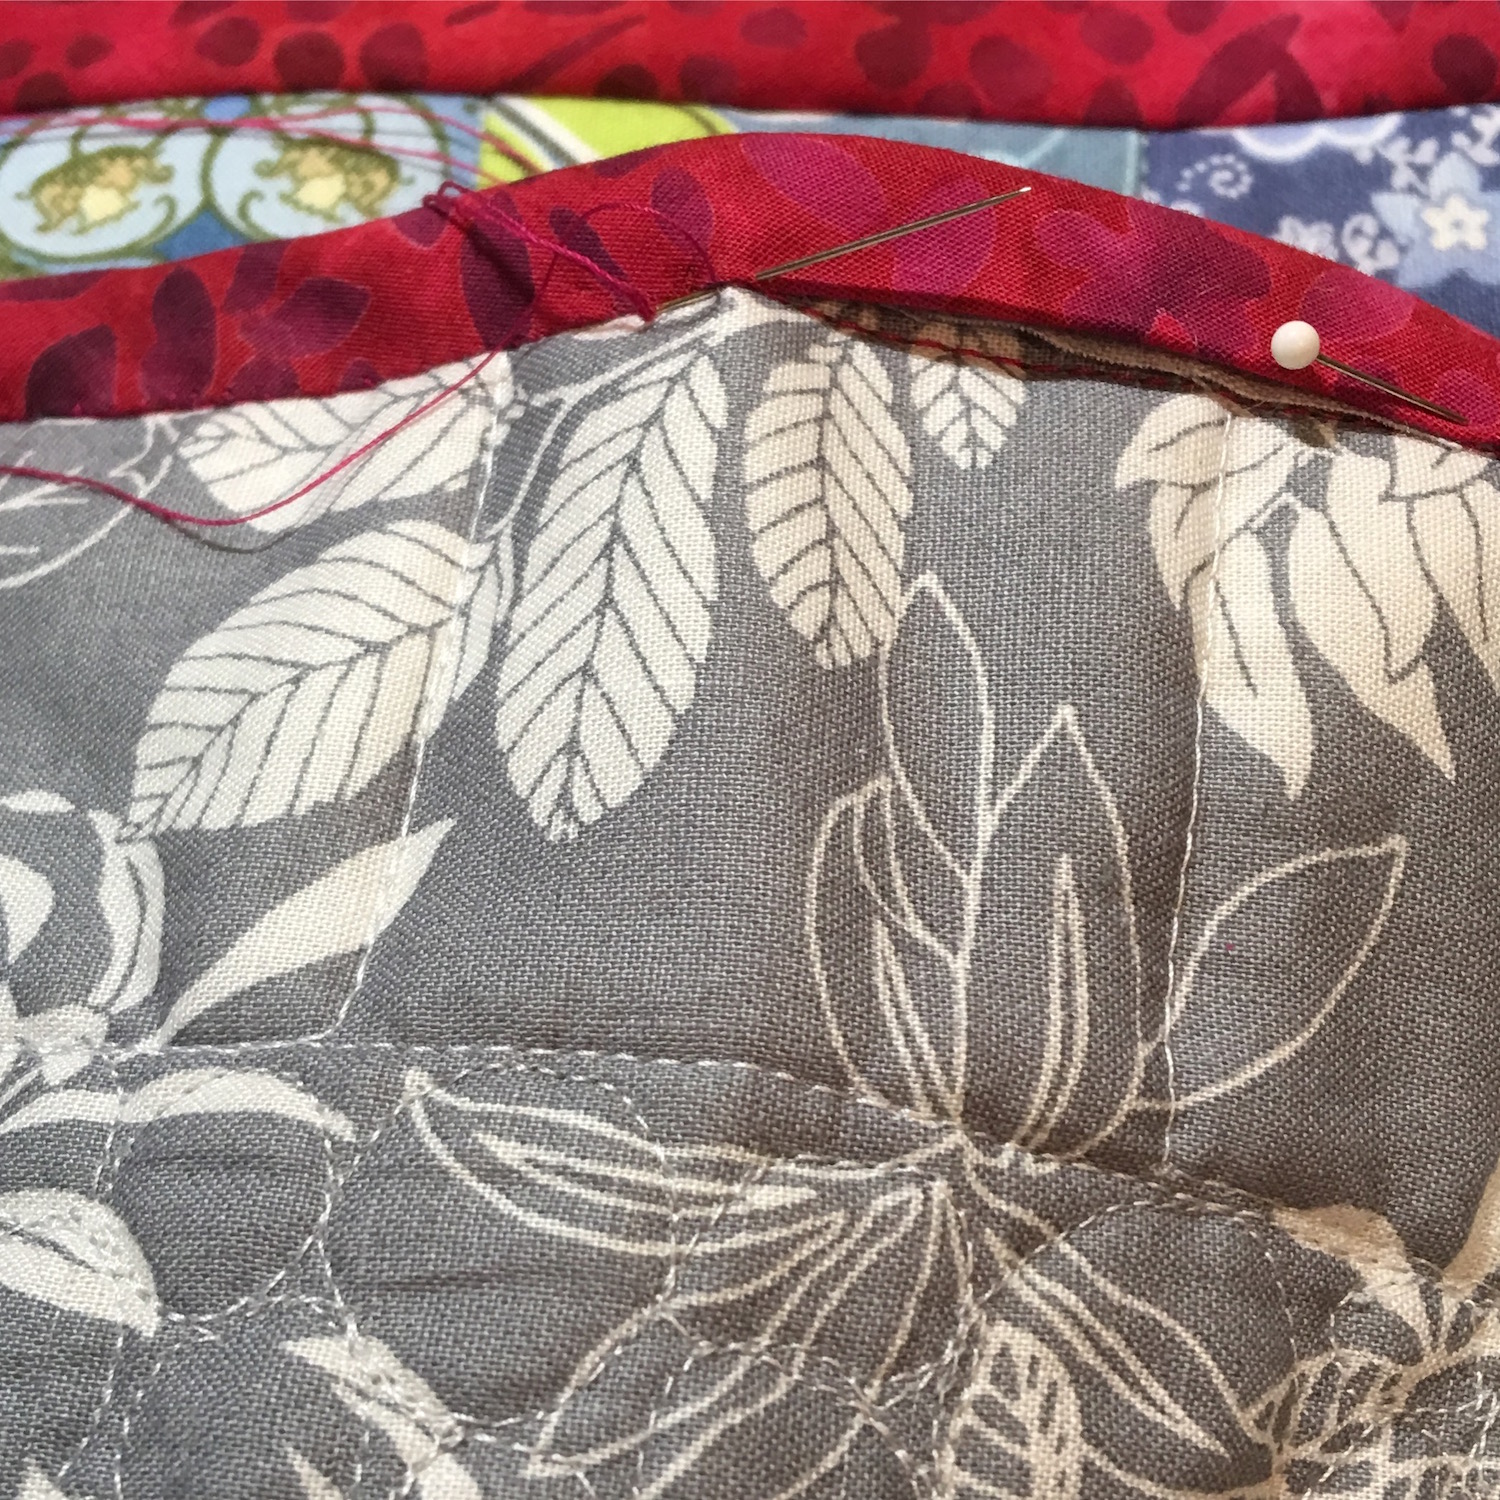
Hand Sewing the binding
Finally I had to learn how to make and add a binding. After a number of different ideas regarding what fabric to use, I decided, with my FH’s (fabulous husband’s) help, to go with a red batik. Batik tends to be pretty densely woven, and as the binding can get more wear and tear than the rest of the quilt, I thought it was a good choice, plus, I love the red. I cut it on the bias, mitered the corners, and hand stitched the back.
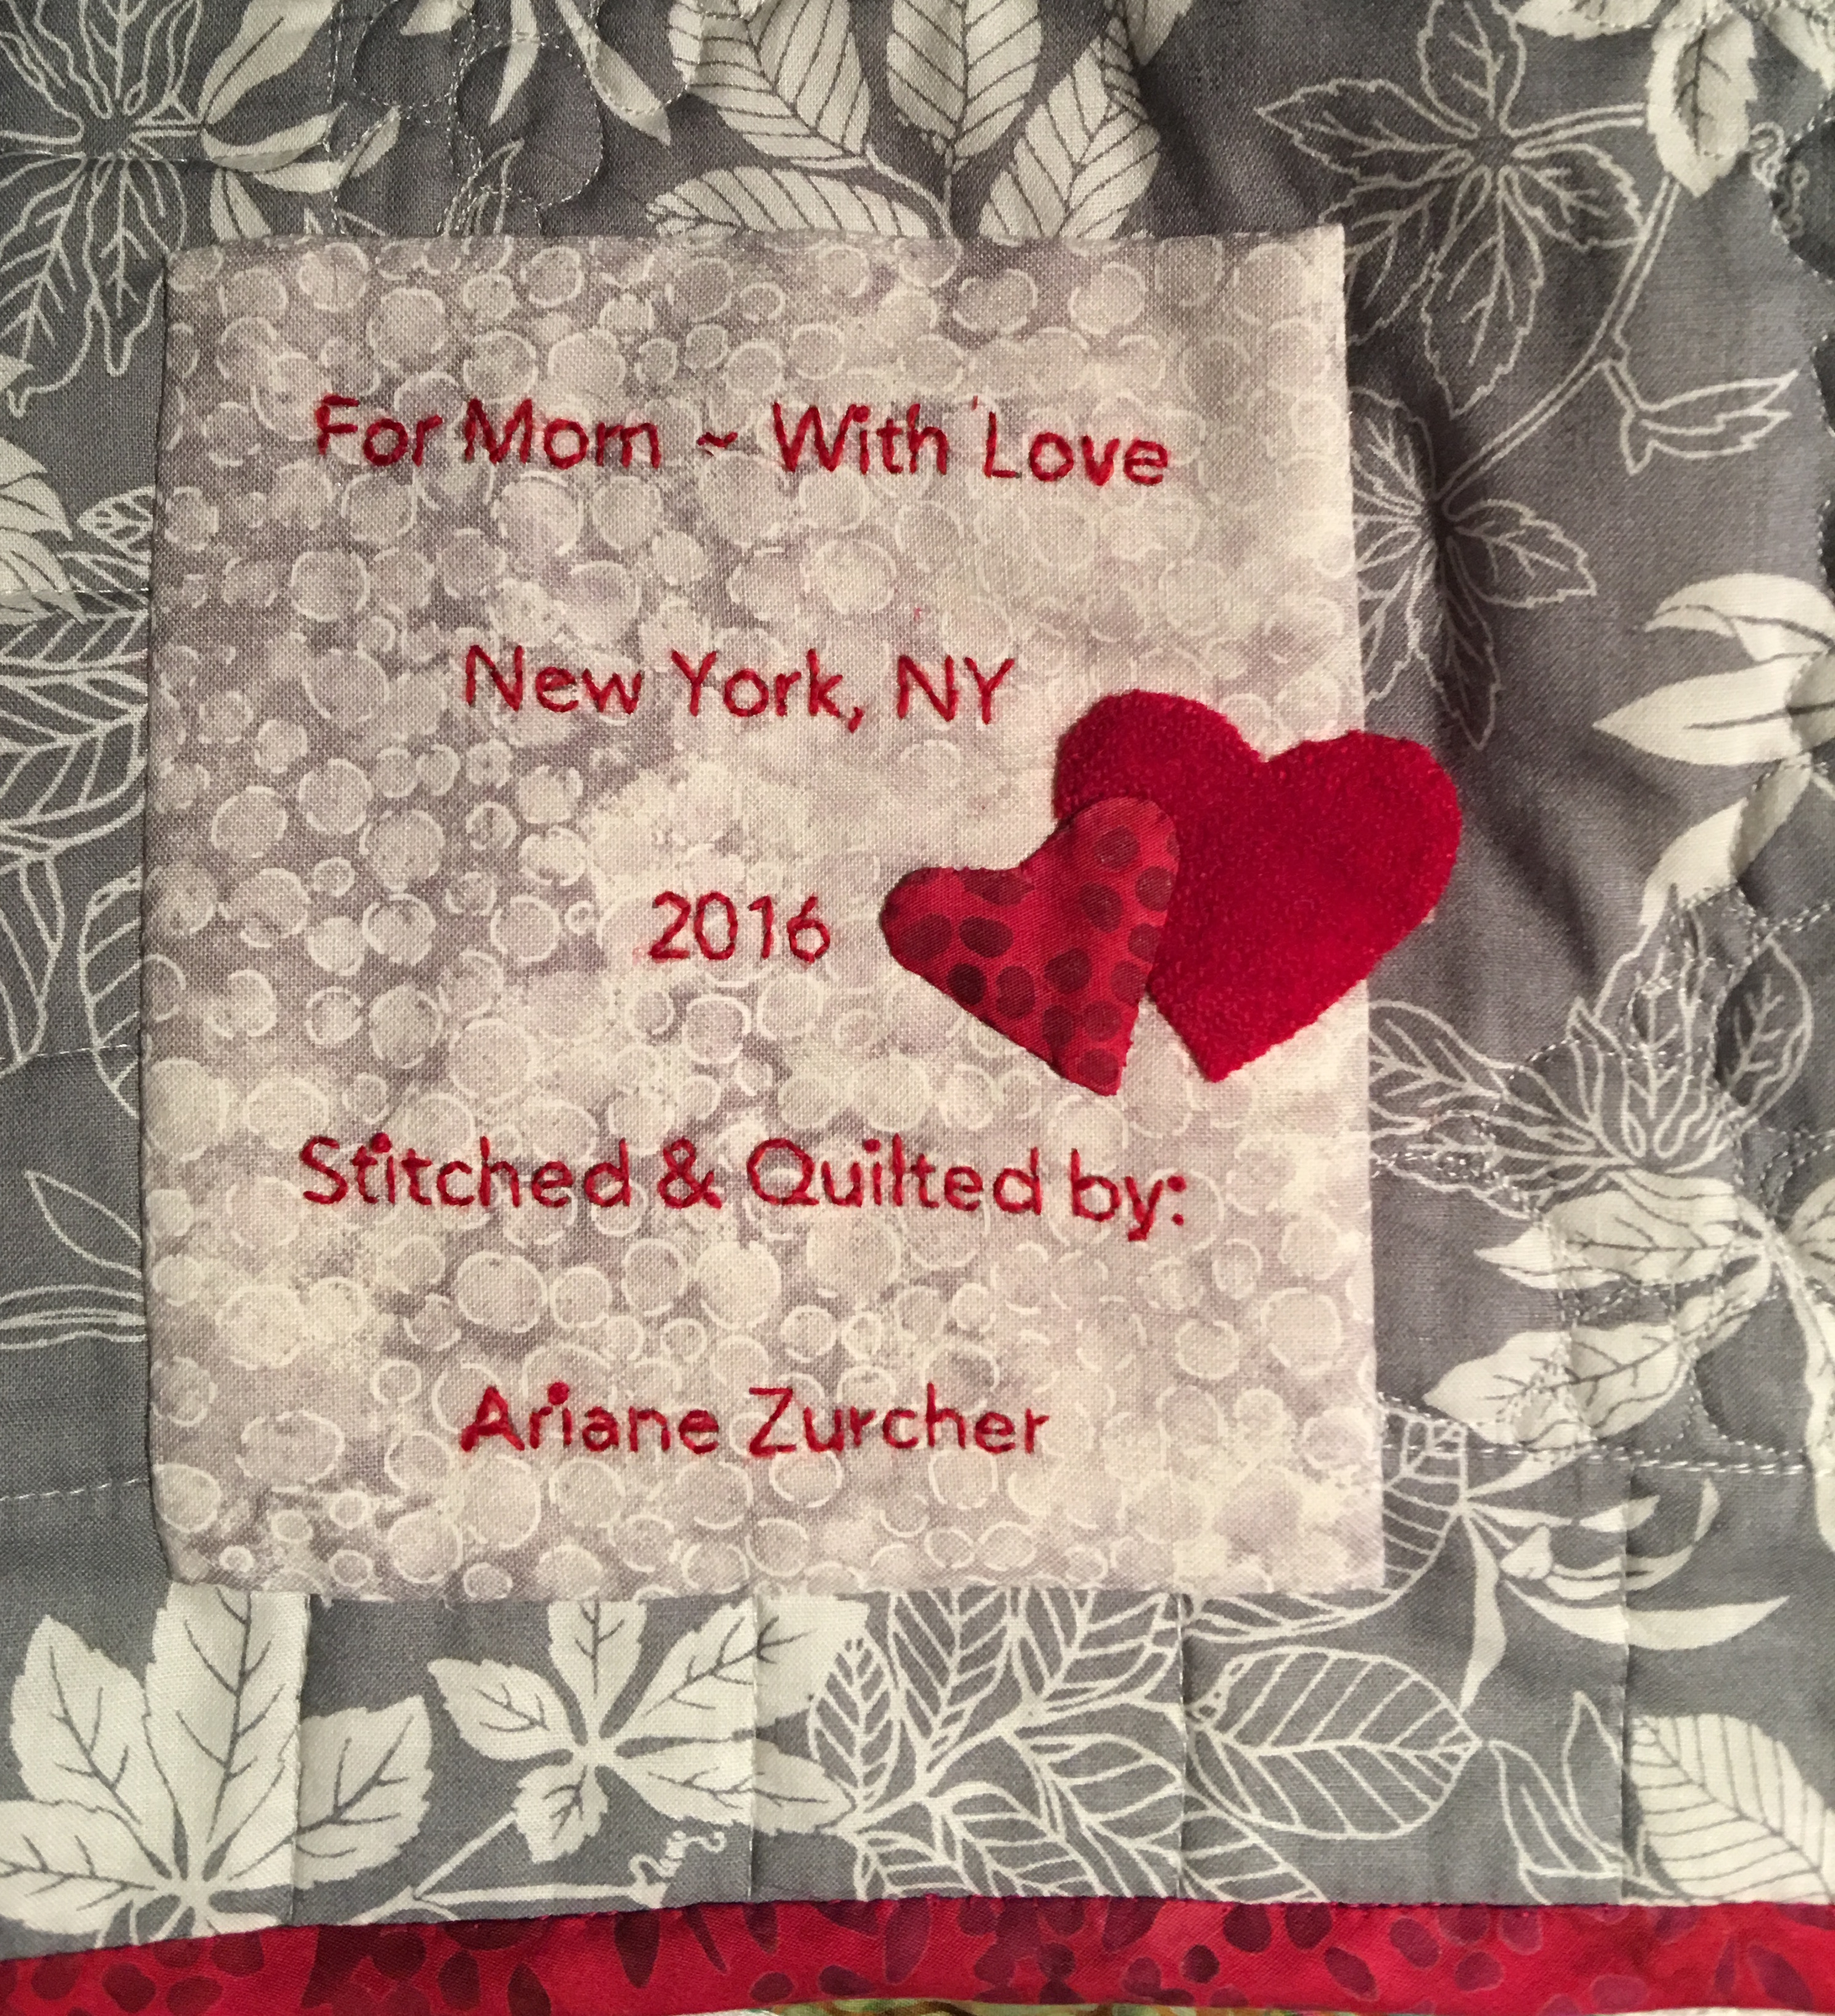
For my beautiful mom ~ Merry Christmas
And then I had to learn how to make a label for my quilt. There are wonderful ideas on Pinterest. Are you on Pinterest? I LOVE, LOVE, LOVE pinterest. I made a label using word documents and then used a freezer paper and cut a piece of fabric that I adhered the freezer paper to and copied the printed label onto the fabric, lightening the tone so it was just readable, but wouldn’t show too much. I then removed the freezer paper, sandwiched the printed material with a cotton batting and muslin and then used red wool thread and stitched the text. I added the little wool red heart and cut out another smaller heart in the same fabric as the binding because I figured I can’t add enough hearts to a quilt made specifically for my mom.
So Mom, if you’re reading this, the cats out of the bag. Merry Christmas!! This quilt was made for you. I thought of you the entire time I was making it. I hope it will keep you wonderfully warm during those cold winter months and I’m told wool batting breathes and should be perfect for the summer months as well. I love you.
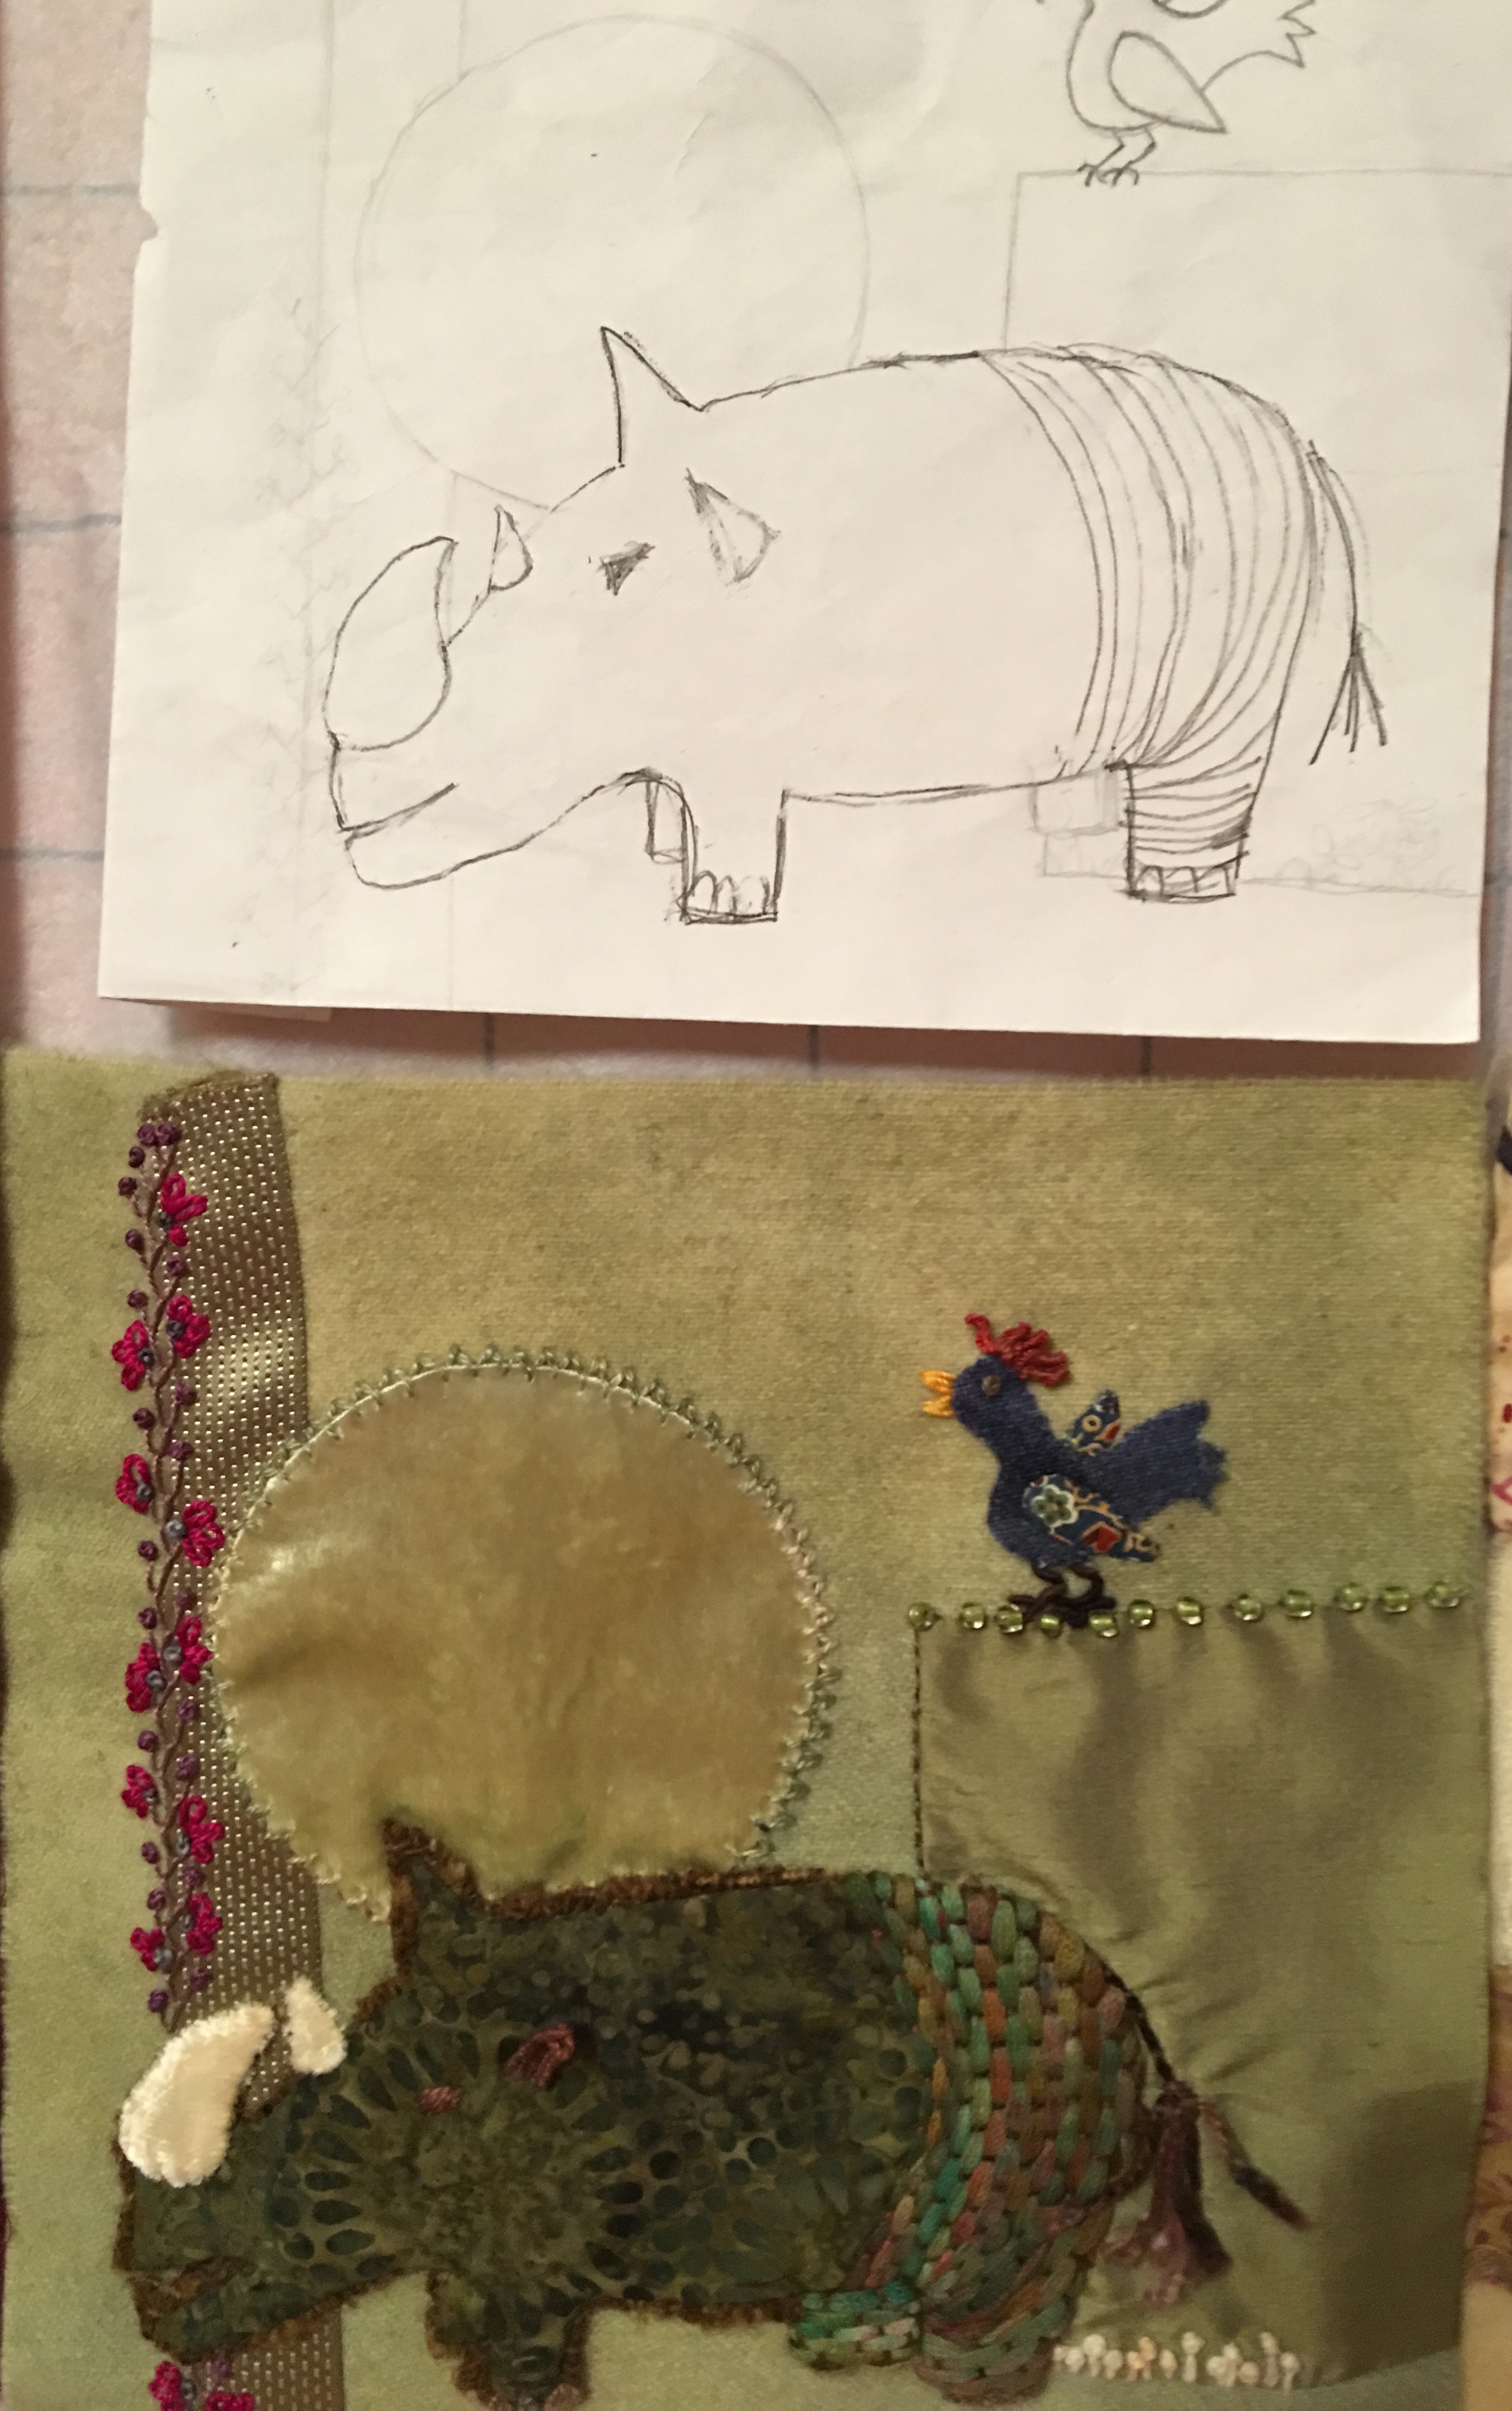
What’s next? A twin-sized quilt that I will design, stitch and quilt!! I’ve got my sketch book and am playing with some ideas… I’ll keep you posted! Heh-heh, a little pun to end this post.
At three in the morning, in a fit of frenzied sleeplessness I decided my work space was in desperate need of reorganization. And what great idea that comes to you in the wee hours of the morning isn’t a brilliant one?! However, upon further reflection, I decided reorganizing is not one of my strengths and so, I did what anyone would do. I solicited the help of someone who excels at reorganizing. Step into the limelight my fabulous husband (FH) and take a bow. He is extremely good at just this sort of thing. “Okay,” he said, all business-like, “talk me through this.” And then proceeded to ask me a series of questions.
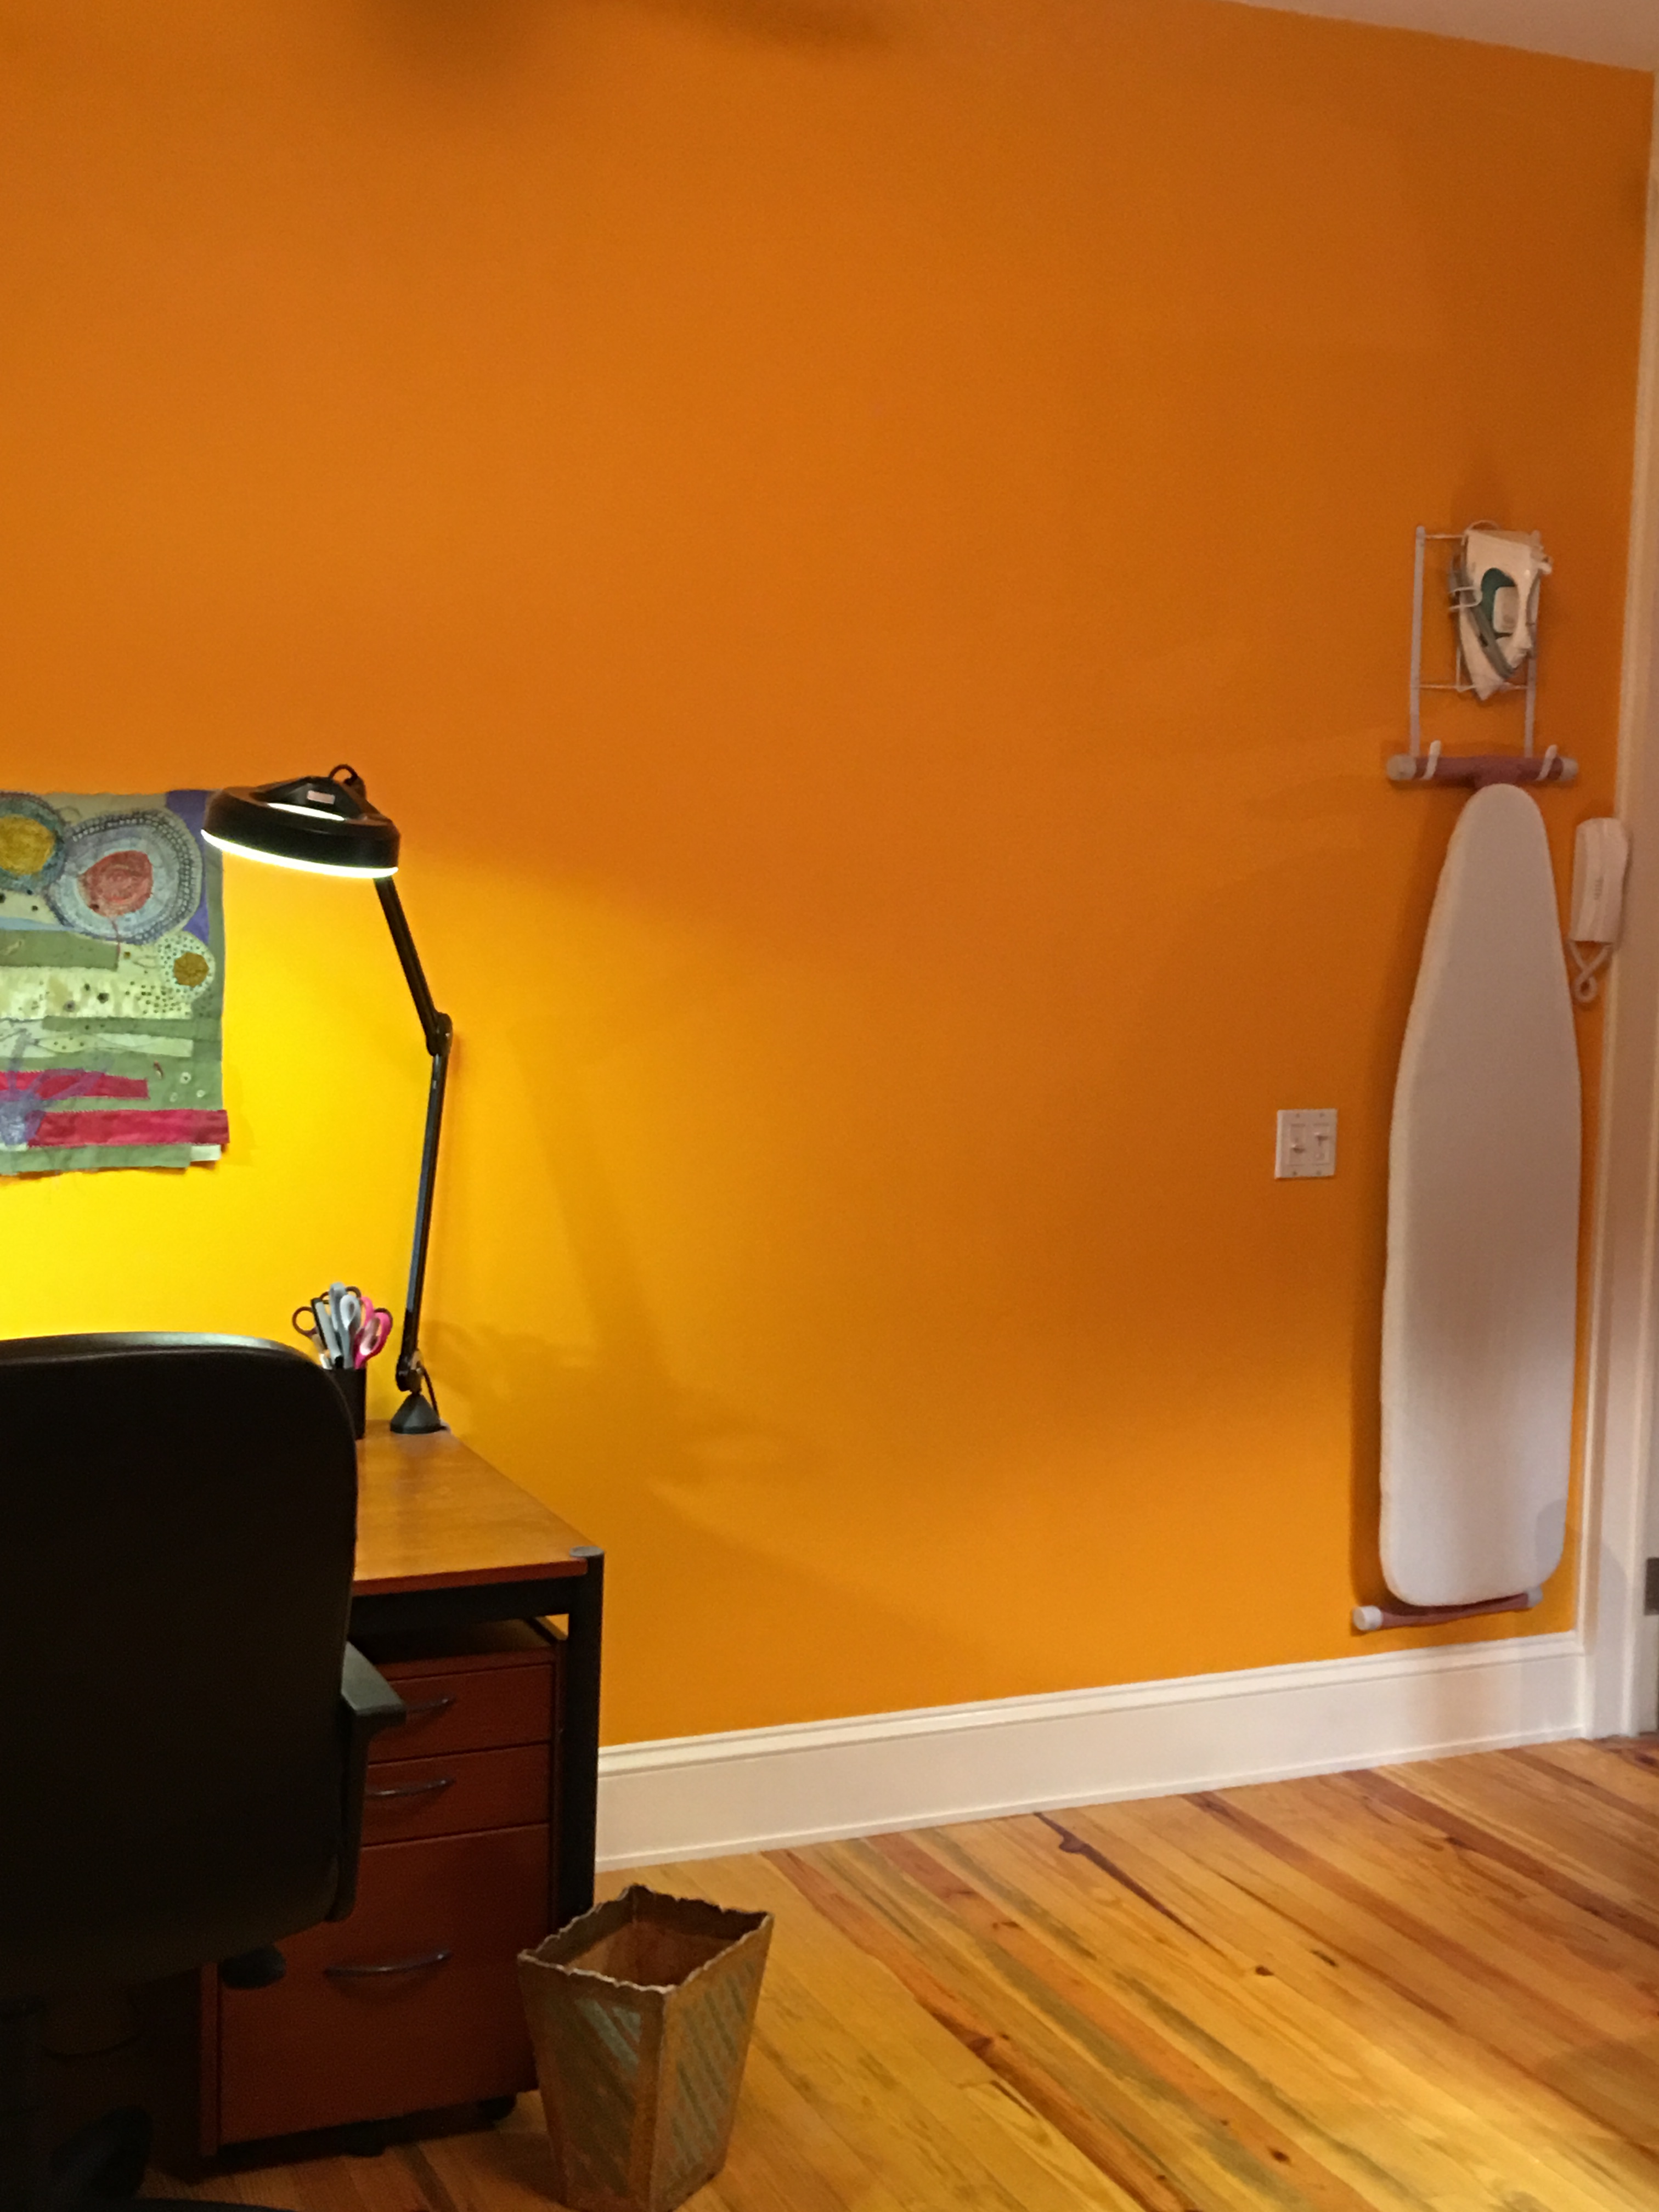
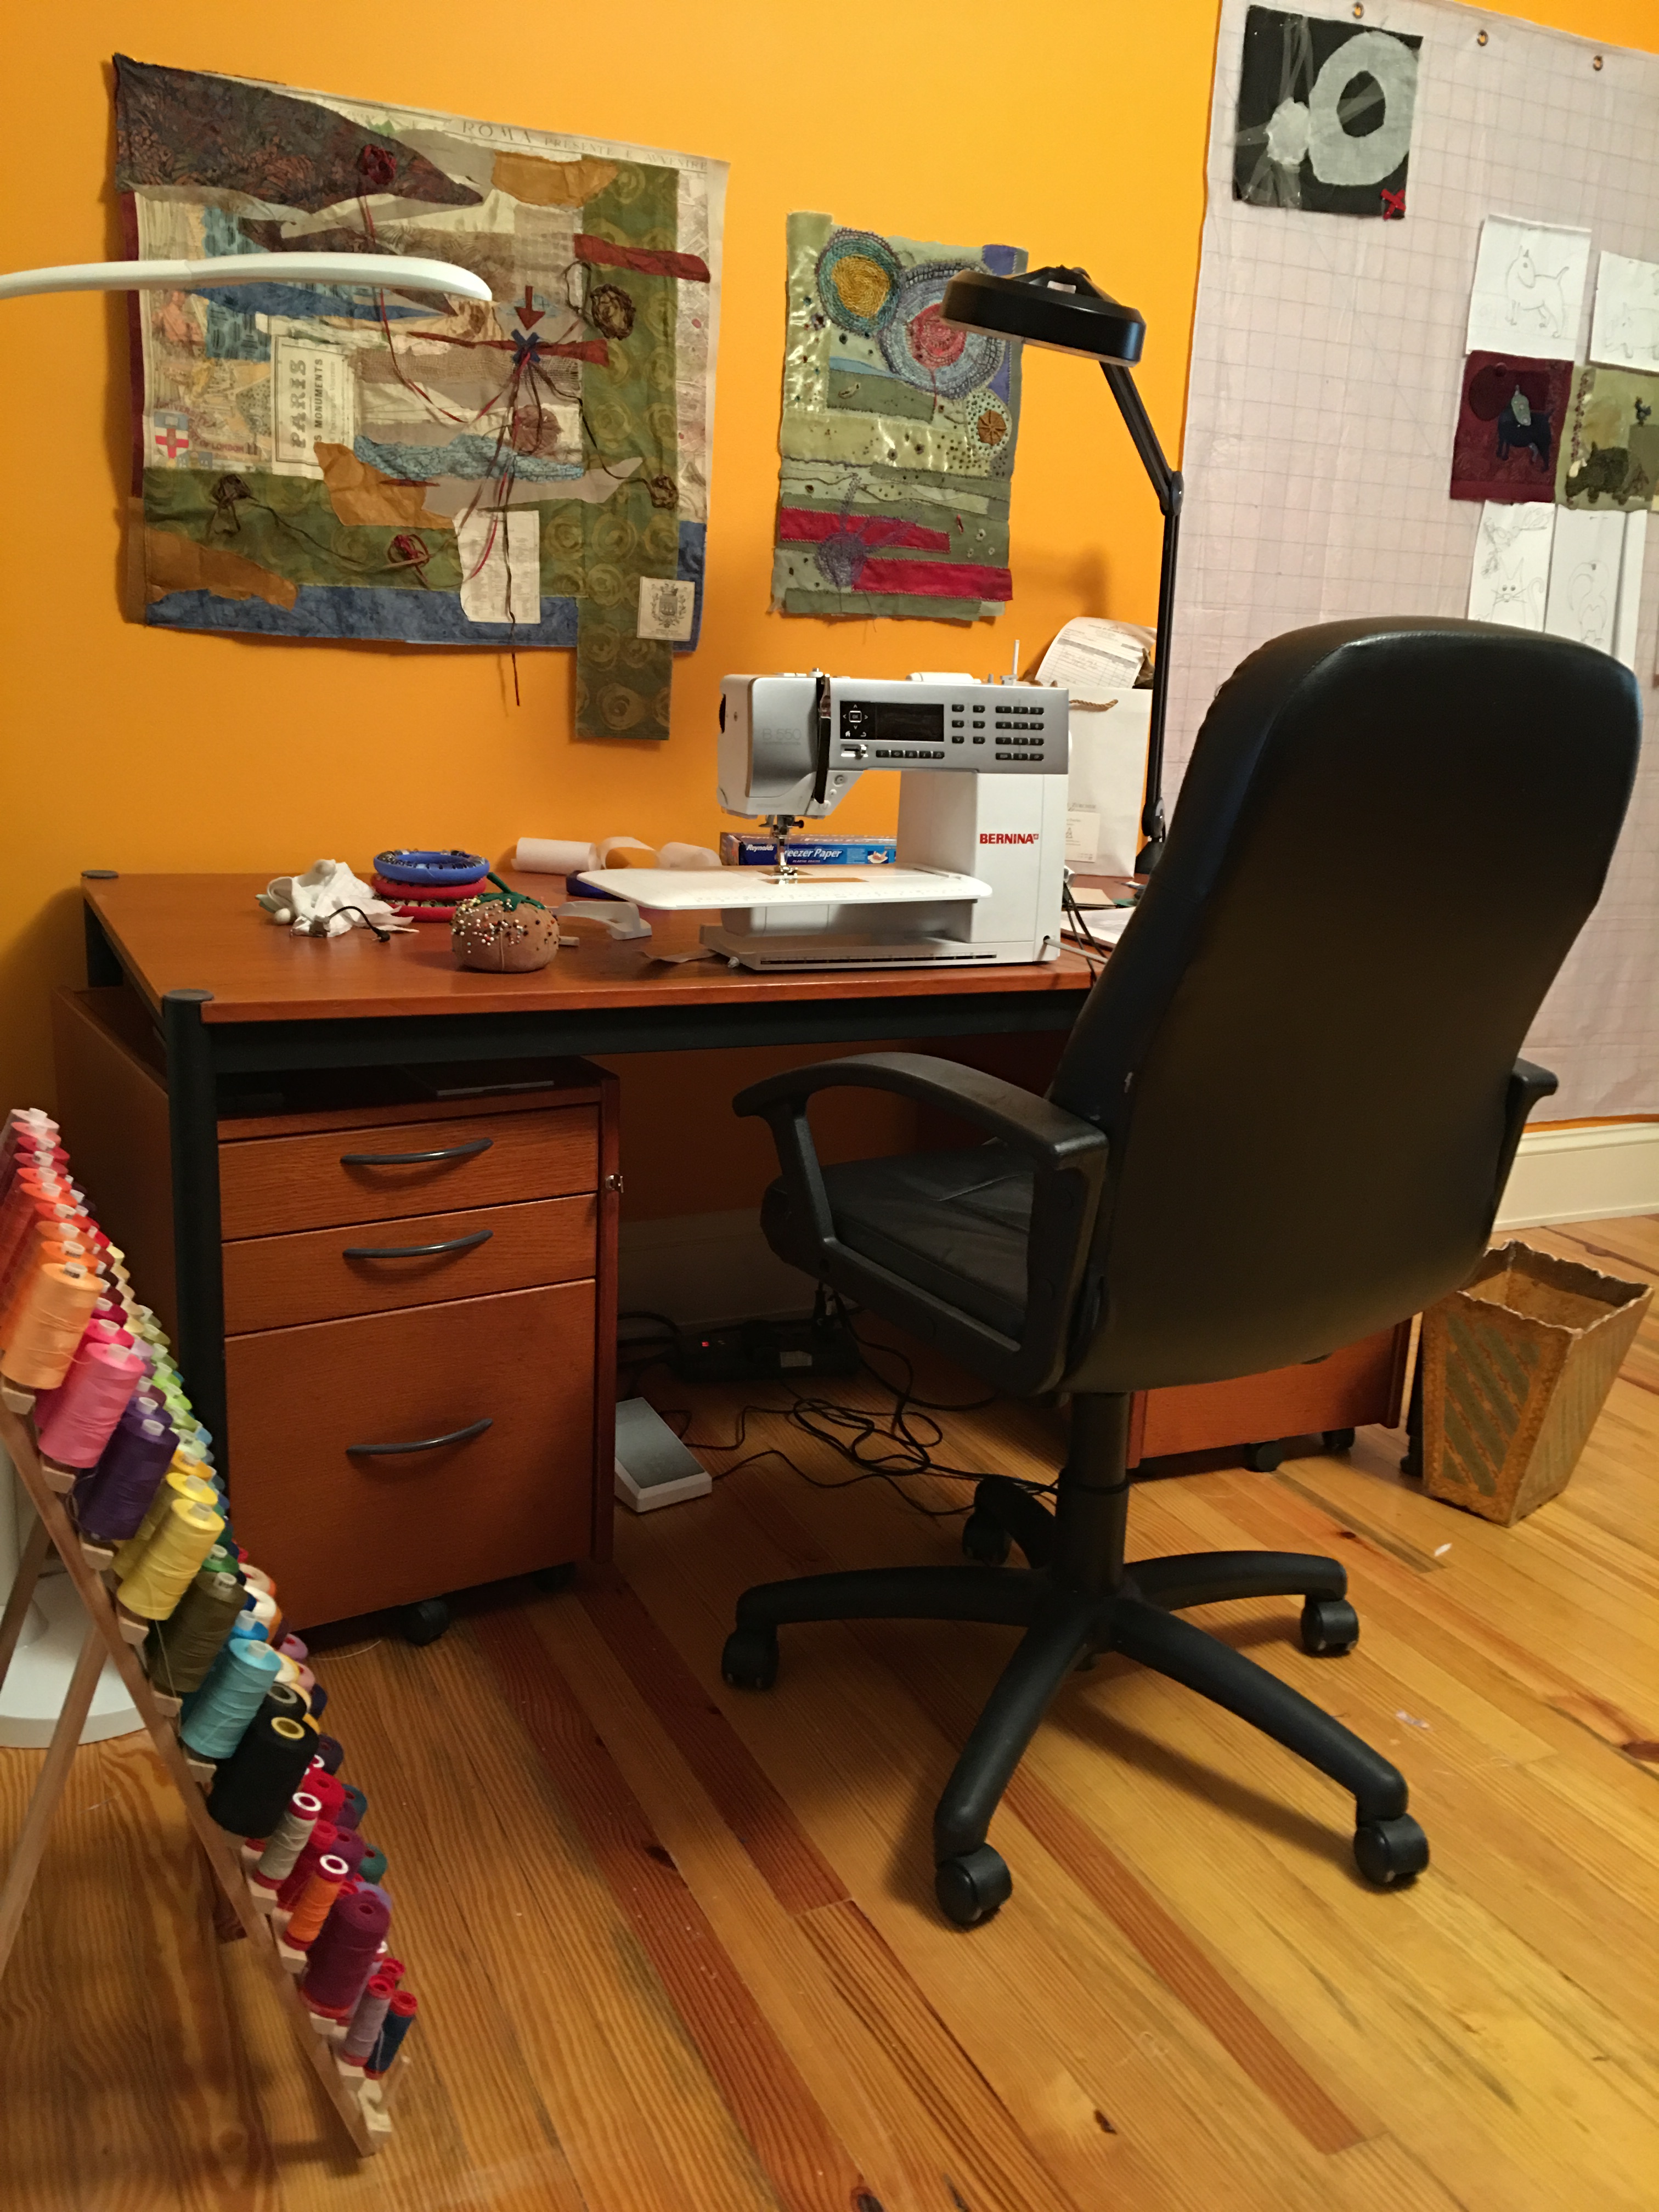
From this conversation he prioritized and broke down what I needed to do in manageable steps. I forgot to take a photograph of the disaster that was once my work space, but this is what it looked like at about the halfway point.
As I was trying to decide what color I should paint that great expanse of white wall (this was a tricky decision as it is a dark room, made even darker by the red carpet I bought decades ago in Turkey) I thought, “I need a design wall!” This is not essential, after all I have sketch books and a table where I can play with ideas, but a design wall would be really, really nice to have. So I googled design walls and found some wonderful ones. I decided I wanted one that is at least 62″ x 72.” In order to do this I needed to get rid of a great many things scattered all over the place.
I decided on a bright mango color to brighten the room up. However, as with so many things in life, painting one wall proved more complicated than I anticipated. I ran into bubbles. Thousands and thousands of tiny bubbles appeared after the first coat of paint. I pricked one of them with a pin and, much to my horror, the bubble expanded exponentially, revealing all the coats of paint below the fresh coat I’d just painted, so that I was staring at dry board! I was so horrified I didn’t have the presence of mind to take photos, but my FH was witness. I ended up pulling off great sheets of bubbled up paint. After running to the hardware store for advice, making a couple of emergency phone calls to friends of mine who are far more experienced in painting walls than I am, I finally pulled up as much paint as I could, sanded, dusted, spackled, sanded some more, dusted some more and finally repainted and held my breath. What should have taken a few hours took more than a day and a half, BUT it came out pretty well, if I do say so myself! FH had the great idea of hanging my ironing board.Then there was the question of my design wall, which is removable.I needed to organize my fabrics and other materials that I use for my jewelry design, such as wax, files, metals, wire, etc. While I was doing all of this, I came across my old portfolio from my days in fashion design and got a little side tracked… Finally, after all of that, I got back on track.
And here is the finished space!Now it’s time to get back to work – I have a queen-sized quilt to sandwich, baste and free motion quilt and then there are these little guys who keep calling to me.
In my last post I was busy learning how to free motion quilt and began practicing on a sandwich made for just this purpose, practice. I wrote about all of this ‘here‘ so I won’t go into all of that again.
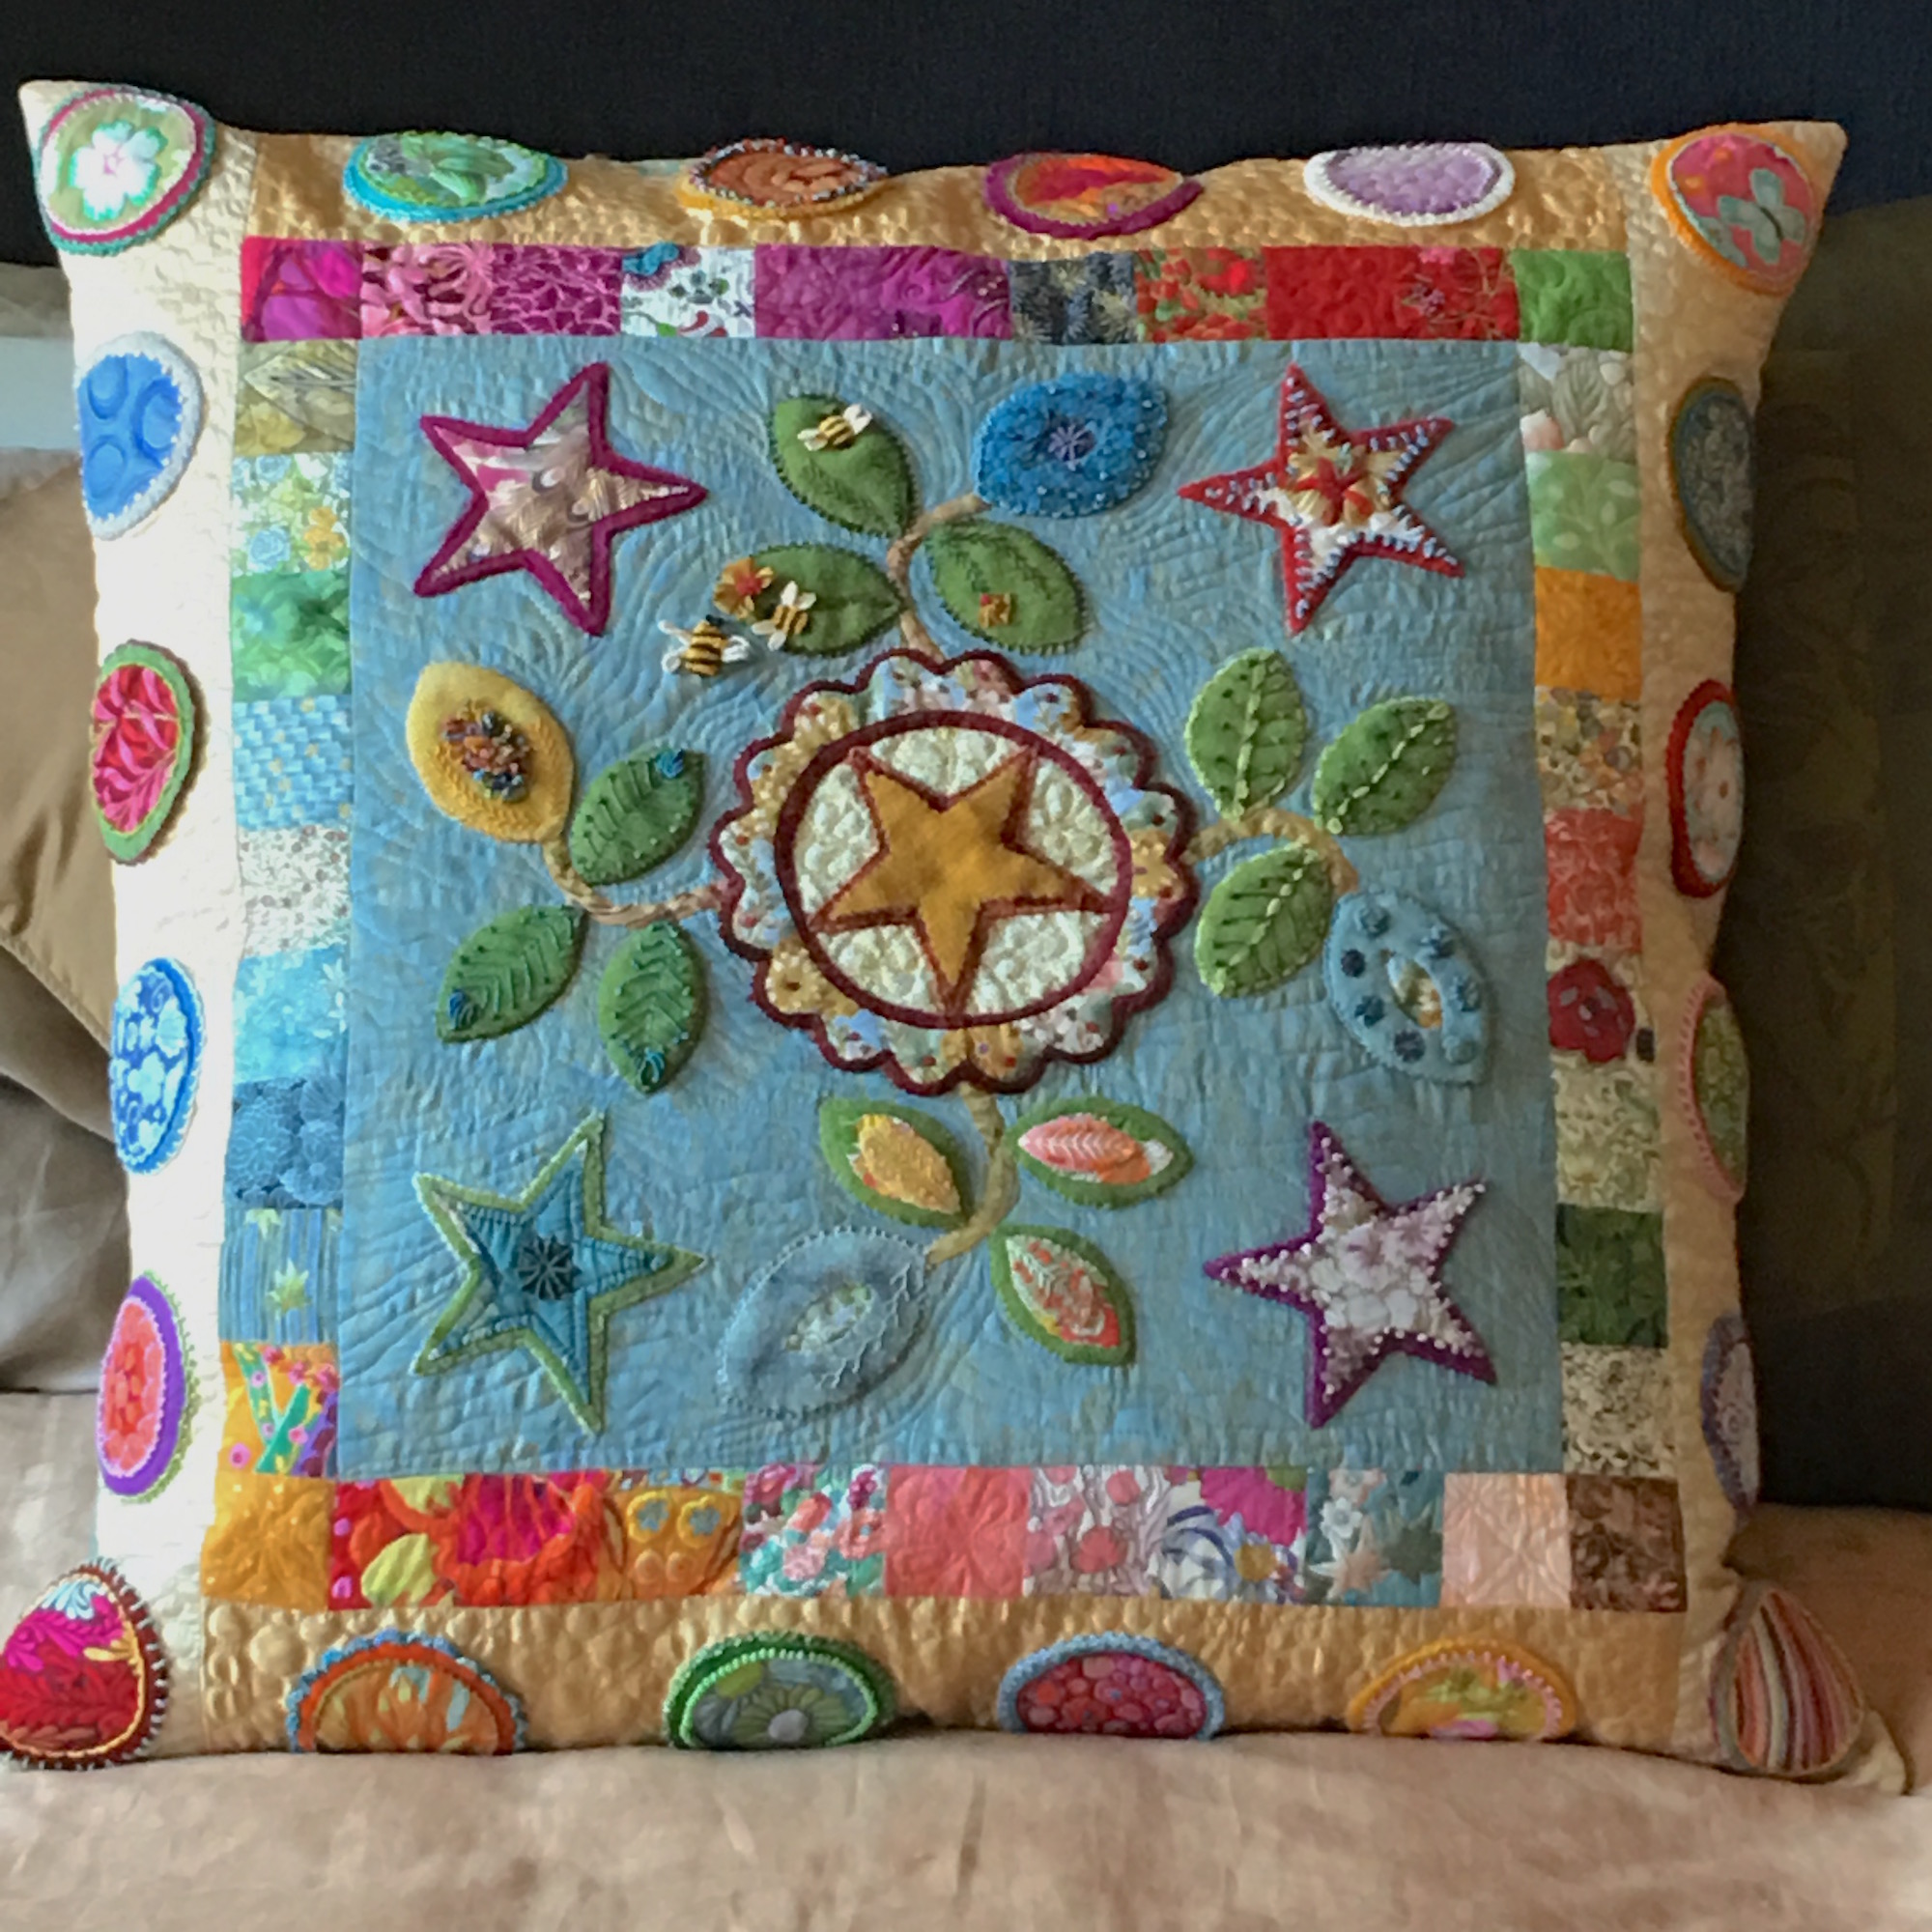
But now you have to see the finished product!
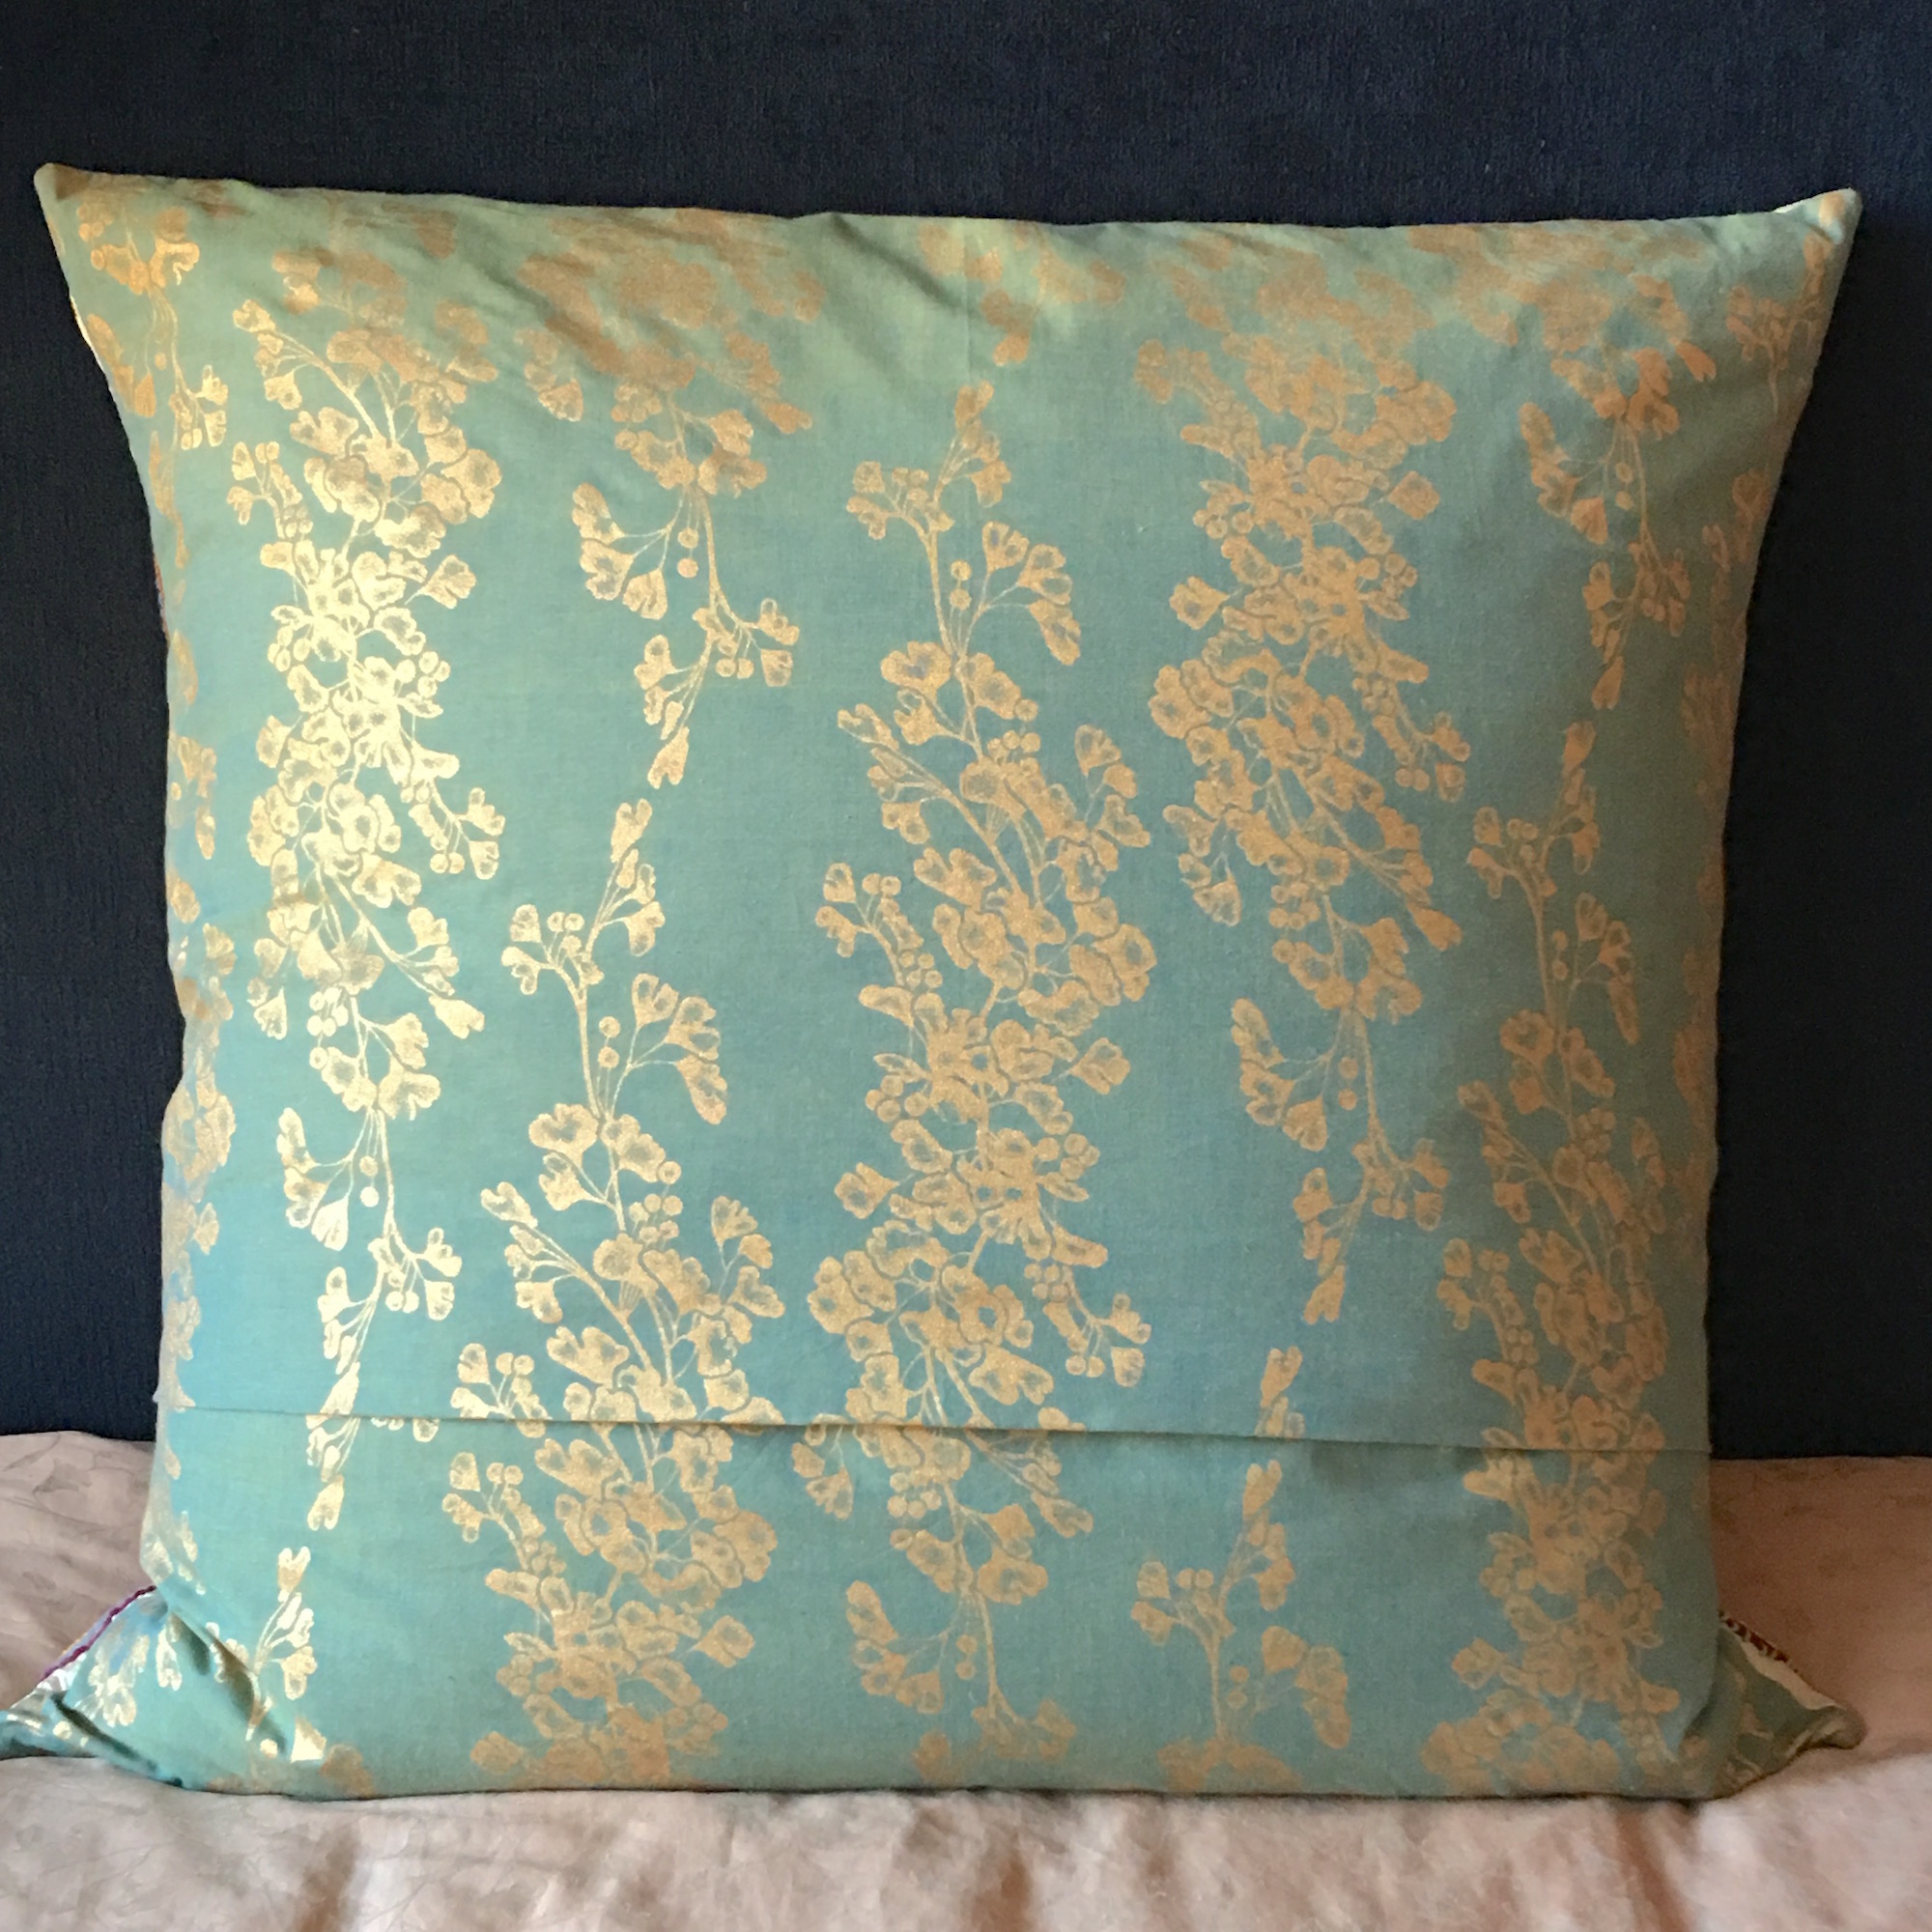
The Quilted Pillow!
And it’s only fair to show you the back, because I agonized over the material. I asked for lots of people’s opinions and then the quilter, teacher, fabric enthusiast, Diane Rode Schneck, whom many of you in the quilting world may know, pulled out this fabric and said, “I like this one.” And that was it. She was right. It was perfect!
The back
This pillow is BIG, measuring 30″ square and it will go with the quilt top I have not yet begun quilting as my machine is STILL not repaired. In the meantime I have a work space to reorganize.
“What’s all the stitching in the background?” I typed to the artist, quilter and stitcher, Sue Spargo while taking her terrific class, Embroidering Texture and Dimension By Hand, on Craftsy. I didn’t know the world I was about to be transported to with that simple question. More ‘here‘ on Sue’s class.
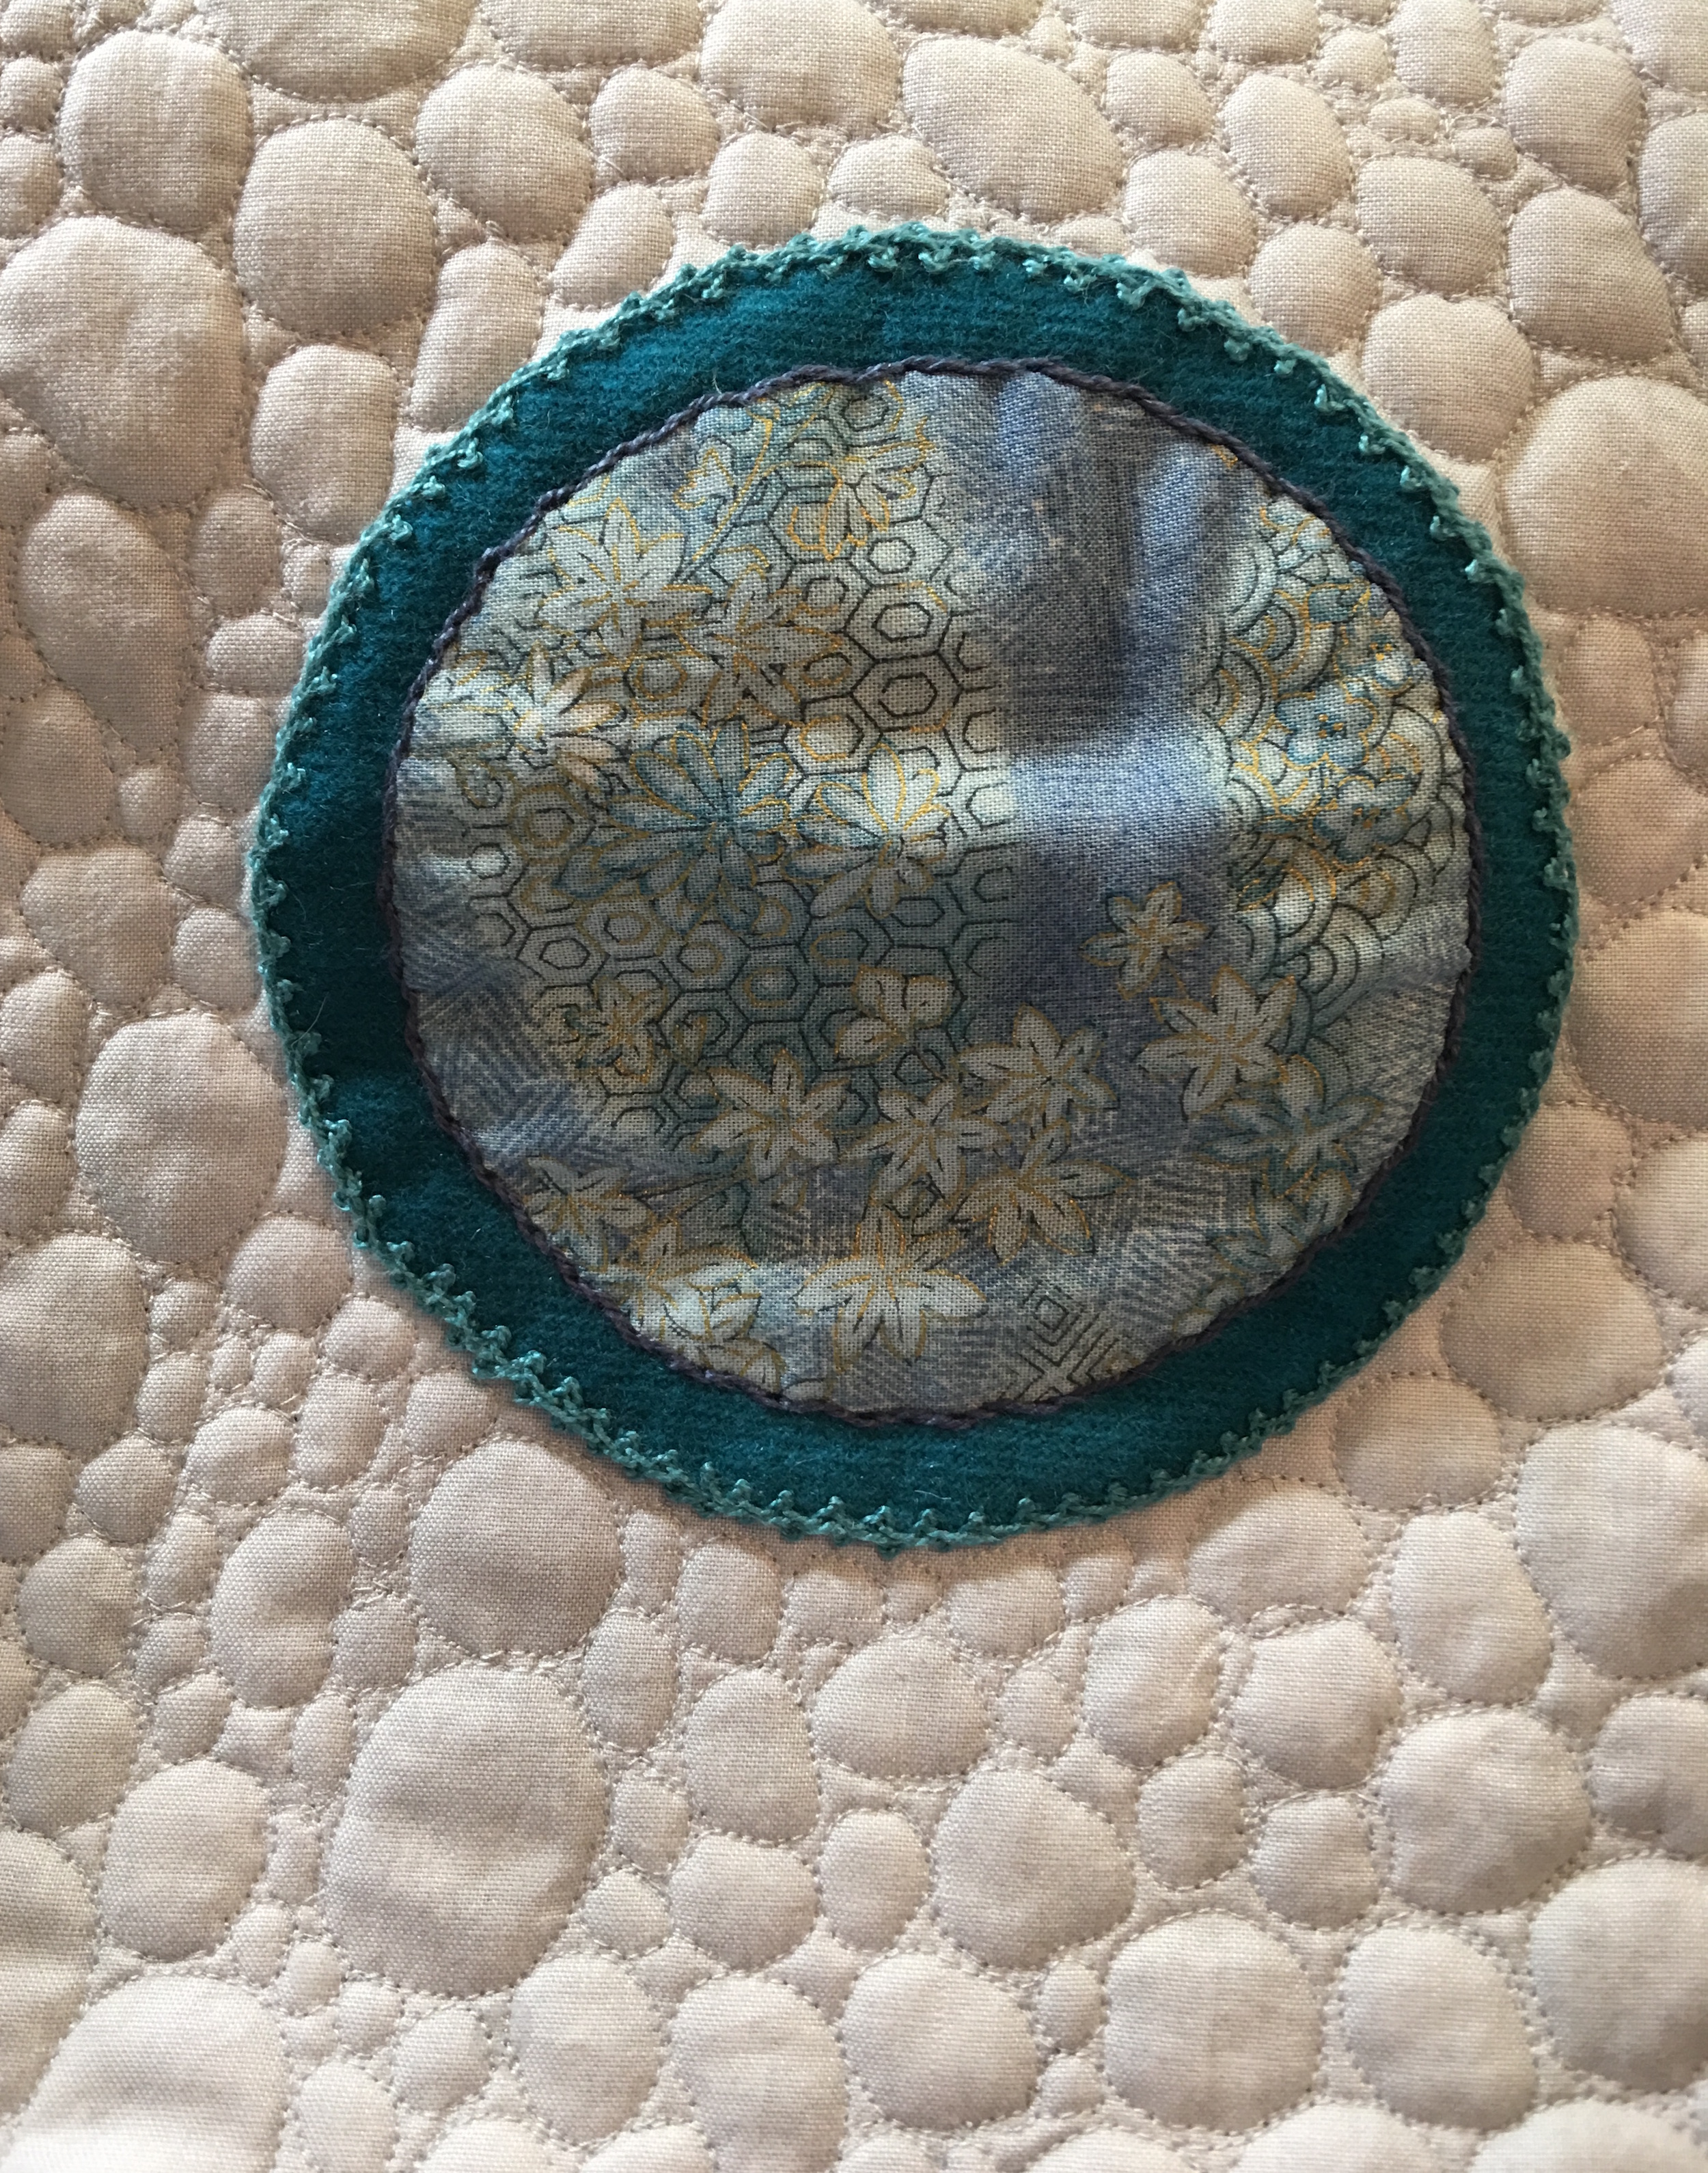
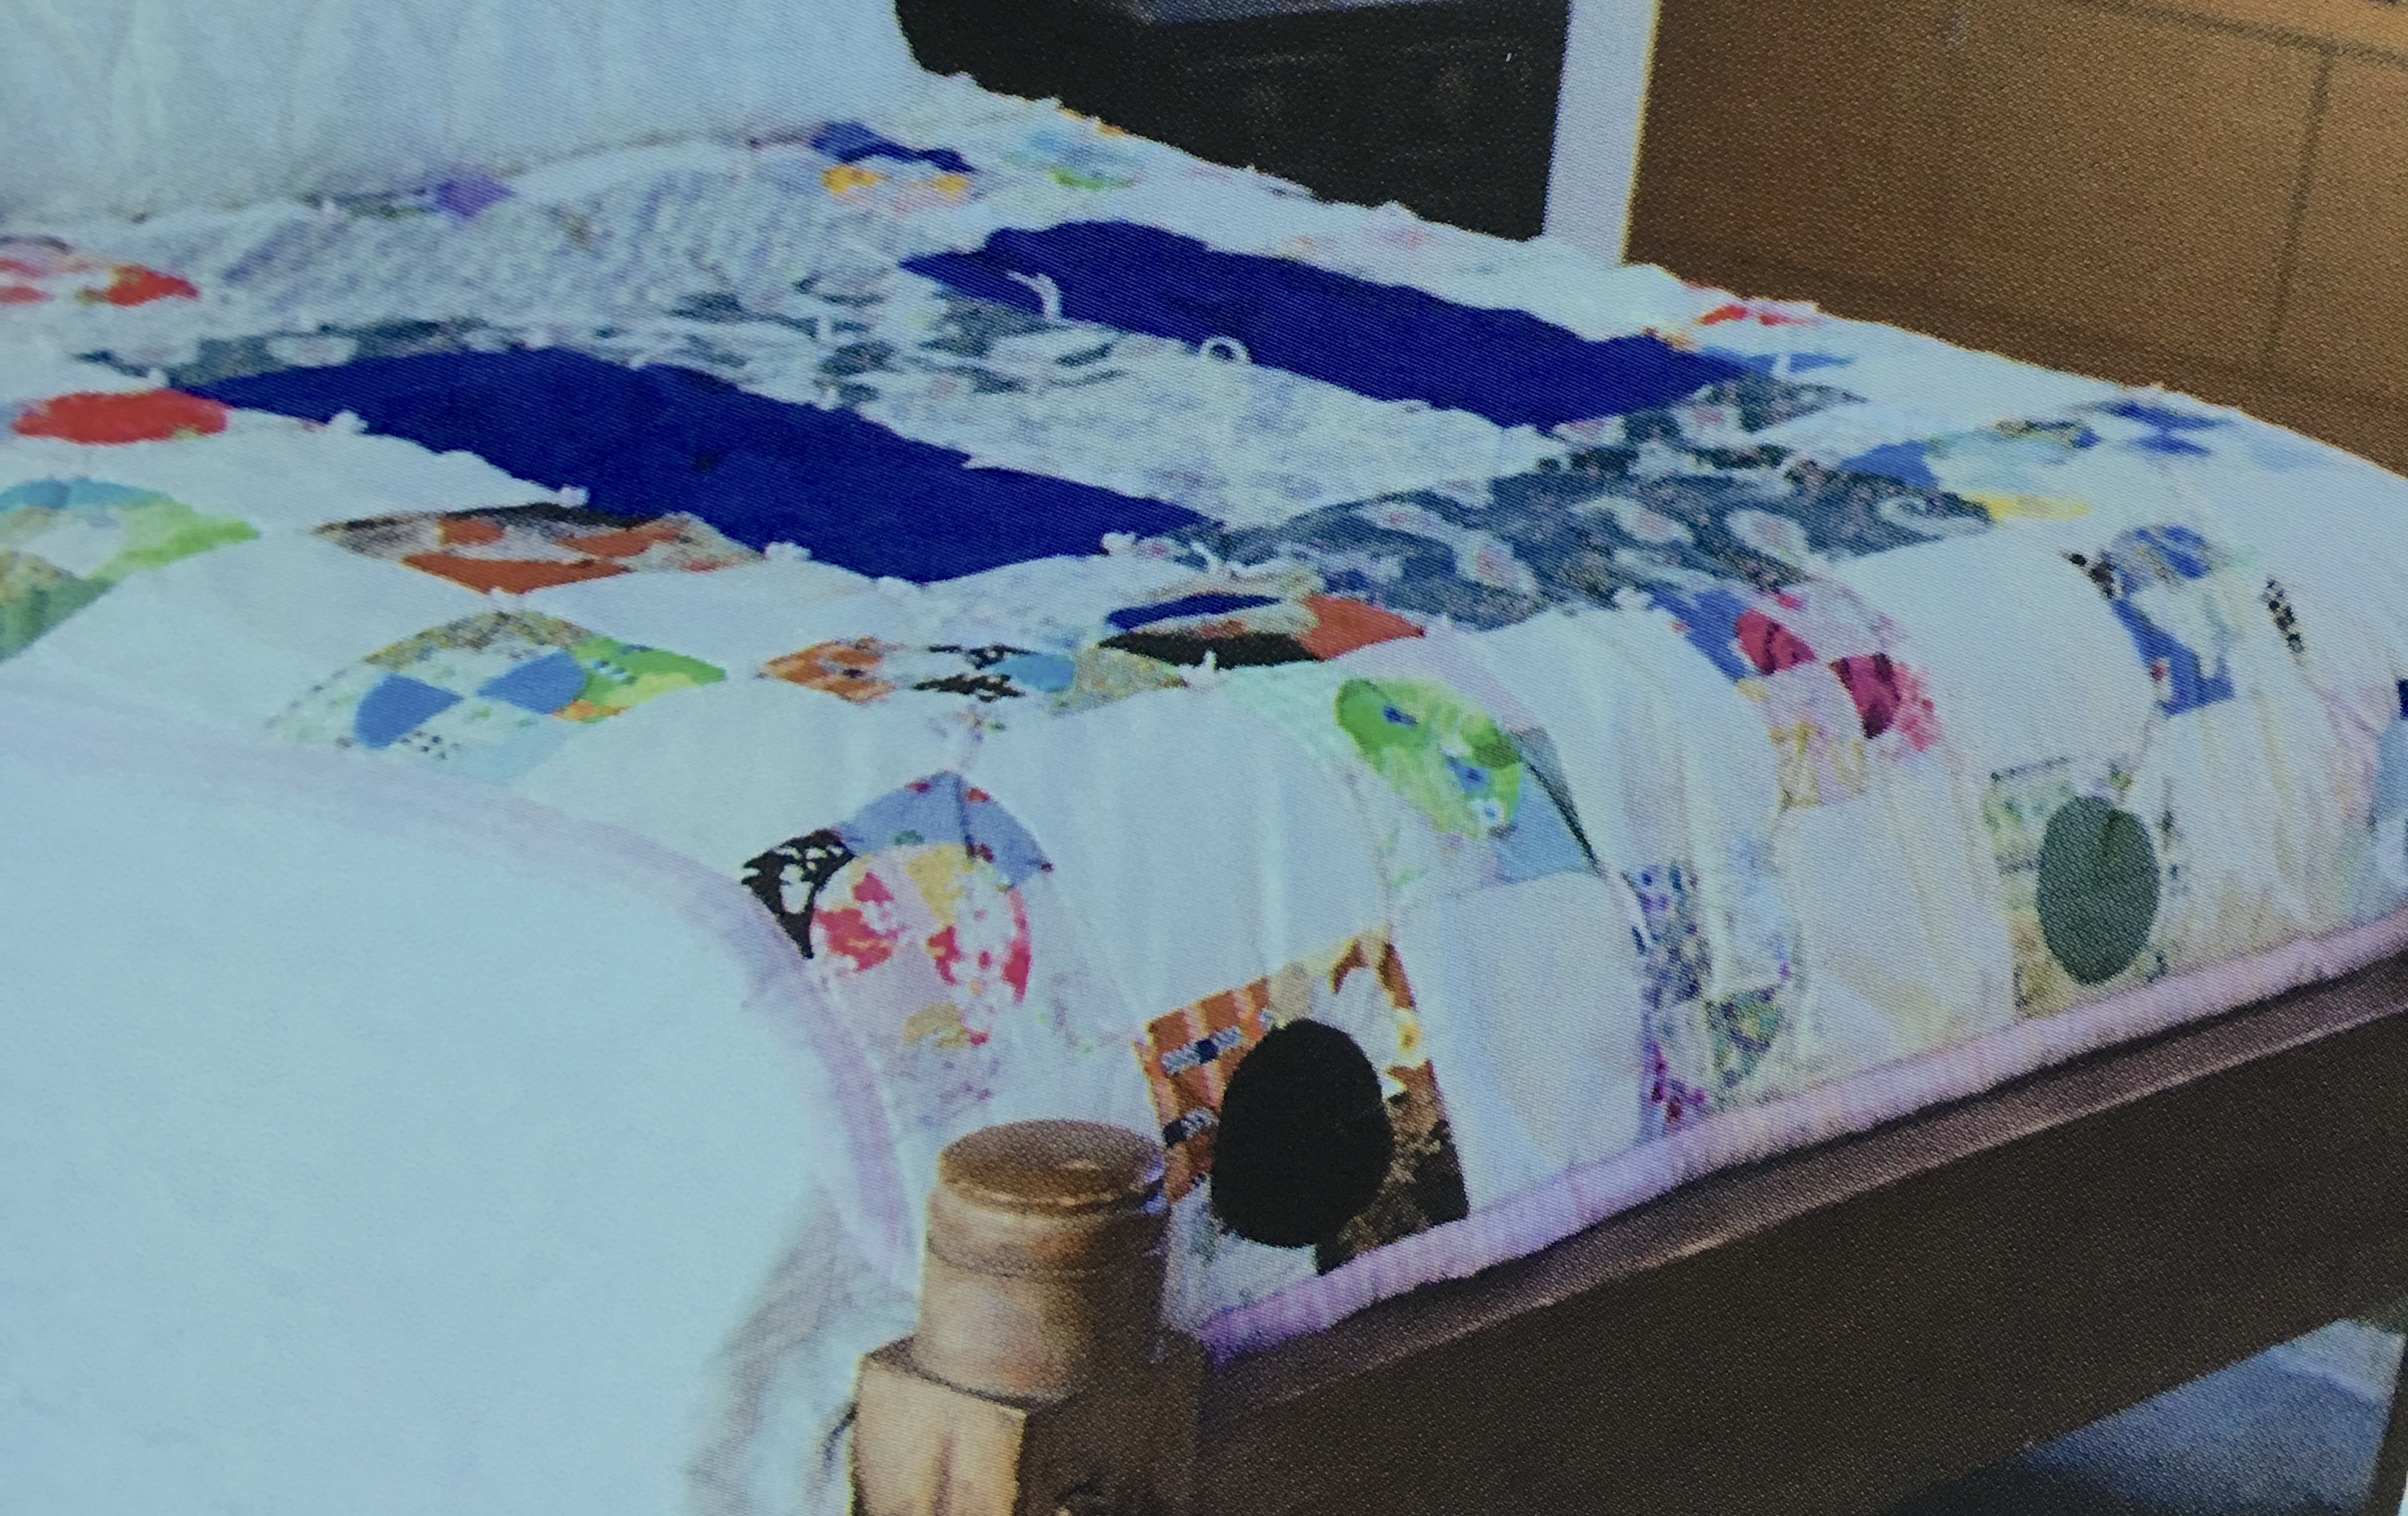
A quick back track, seriously, it will be quick. This is a quilt I made when I was 15 years old for my home economics class in high school, which also included sex education and fire prevention, presumably all things that happen in the home, though not necessarily at the same time…
My First Quilt Ever When I Was Fifteen
In a previous post I wrote that I knew nothing about quilts and quilting and now this photo will show me as an unreliable narrator, but in my defense, when I found Sue Spargo’s class and saw her beautiful art, this project, made more than forty years ago, did NOT leap to mind. As you can see I got a little tired of all those circle blocks and decided to alternate with a plain white block and then in the middle just added huge rectangular pieces of dark blue (a polyester satin-like fabric, if I’m not mistaken, it was the 70’s after all) and some cotton paisley fabric top and bottom, because it was all becoming so endless and tedious. By the time I was finished with the various blocks I tied each corner with a little knot and called it a day. I think I used a polyester filling, not sure I knew the word “batting.” I do not remember particularly loving the process and I think this project may have been the reason I didn’t think much more about quilting for the next forty years!
Okay, so that was brief-ish, right?
I blogged about my first large quilting project ‘here‘ so I won’t go into all of that again, but now I’m at the quilting stage of the quilt. Quilting the quilt is a whole other beast indeed. There are some who like hand quilting and then there are those who like machine quilting and then there are those like me, who think both are amazing and want to do it ALL. Which led me to Free Motion Quilting. This is where you put the feed dogs down on your machine and guide the fabric to obtain beautiful fluid looking stitches that add a whole other layer to your quilt. But since I knew very little about FMQ I decided I needed to take another class. Christina Cameli teaches one on Craftsy called Free Motion Quilting Essentials that I love, as it’s perfect for the beginner (me) and plus, she’s lovely.
I had a quilt sandwich that I’d prepped for another class and began practicing. After a few days I decided to leap in and began quilting the first block I made (and then didn’t like the background fabric and so remade for my queen-sized Flower Pots quilt designed by Kim McLean). I designed a border to match Kim’s queen-sized border and now have a top perfect for a 30″ square pillow, which will go nicely with the queen-sized quilt.
Free Motion Quilting
I started with the center and did swirls and whirls, but ran into problems with my stitch regulator, which broke (it’s still not fixed) but I barreled ahead without it, rationalizing that people make beautiful quilts without stitch regulators all the time. This idea, people-have-been-doing-it-this-way-for-centuries, was also how I rationalized giving birth to both my children without drugs, cutting my own hair, as well as my children’s when they were small (my son may still have some trauma from that.) Then I did the sashing and each 2-inch square was a chance to practice something different, with a different colored thread and finally I began stitching the outer border in a pebble motif, which I love, love, love!
Now here’s the thing… I know people who never pull out stitches, but I’m not one of them. I can. I’ve done it. It makes me very, very uncomfortable. Kind of like fingernails scratching on a chalkboard. So after I finished the outer border, which I really like, I decided the center swirls and whirls had to go. And besides, the stitches were uneven, its all about practice and the process, which I’m thoroughly enjoying… So yeah, I pulled the whole thing out. Yup. Five hours. That’s how long it took. This is what television is for, I’ve decided. My husband watches a couple of movies and I sit beside him allowing my obsessiveness to flow.
Free of Swirls
Now back to quilting. Oh, but what fun, and it’s only just beginning!
 And I didn’t make a single dye joke. The title doesn’t count because it’s Elizabeth’s name for her class. How can you not love that title? I may go back and edit a few in, just to amuse, or you can make a few in the comments!
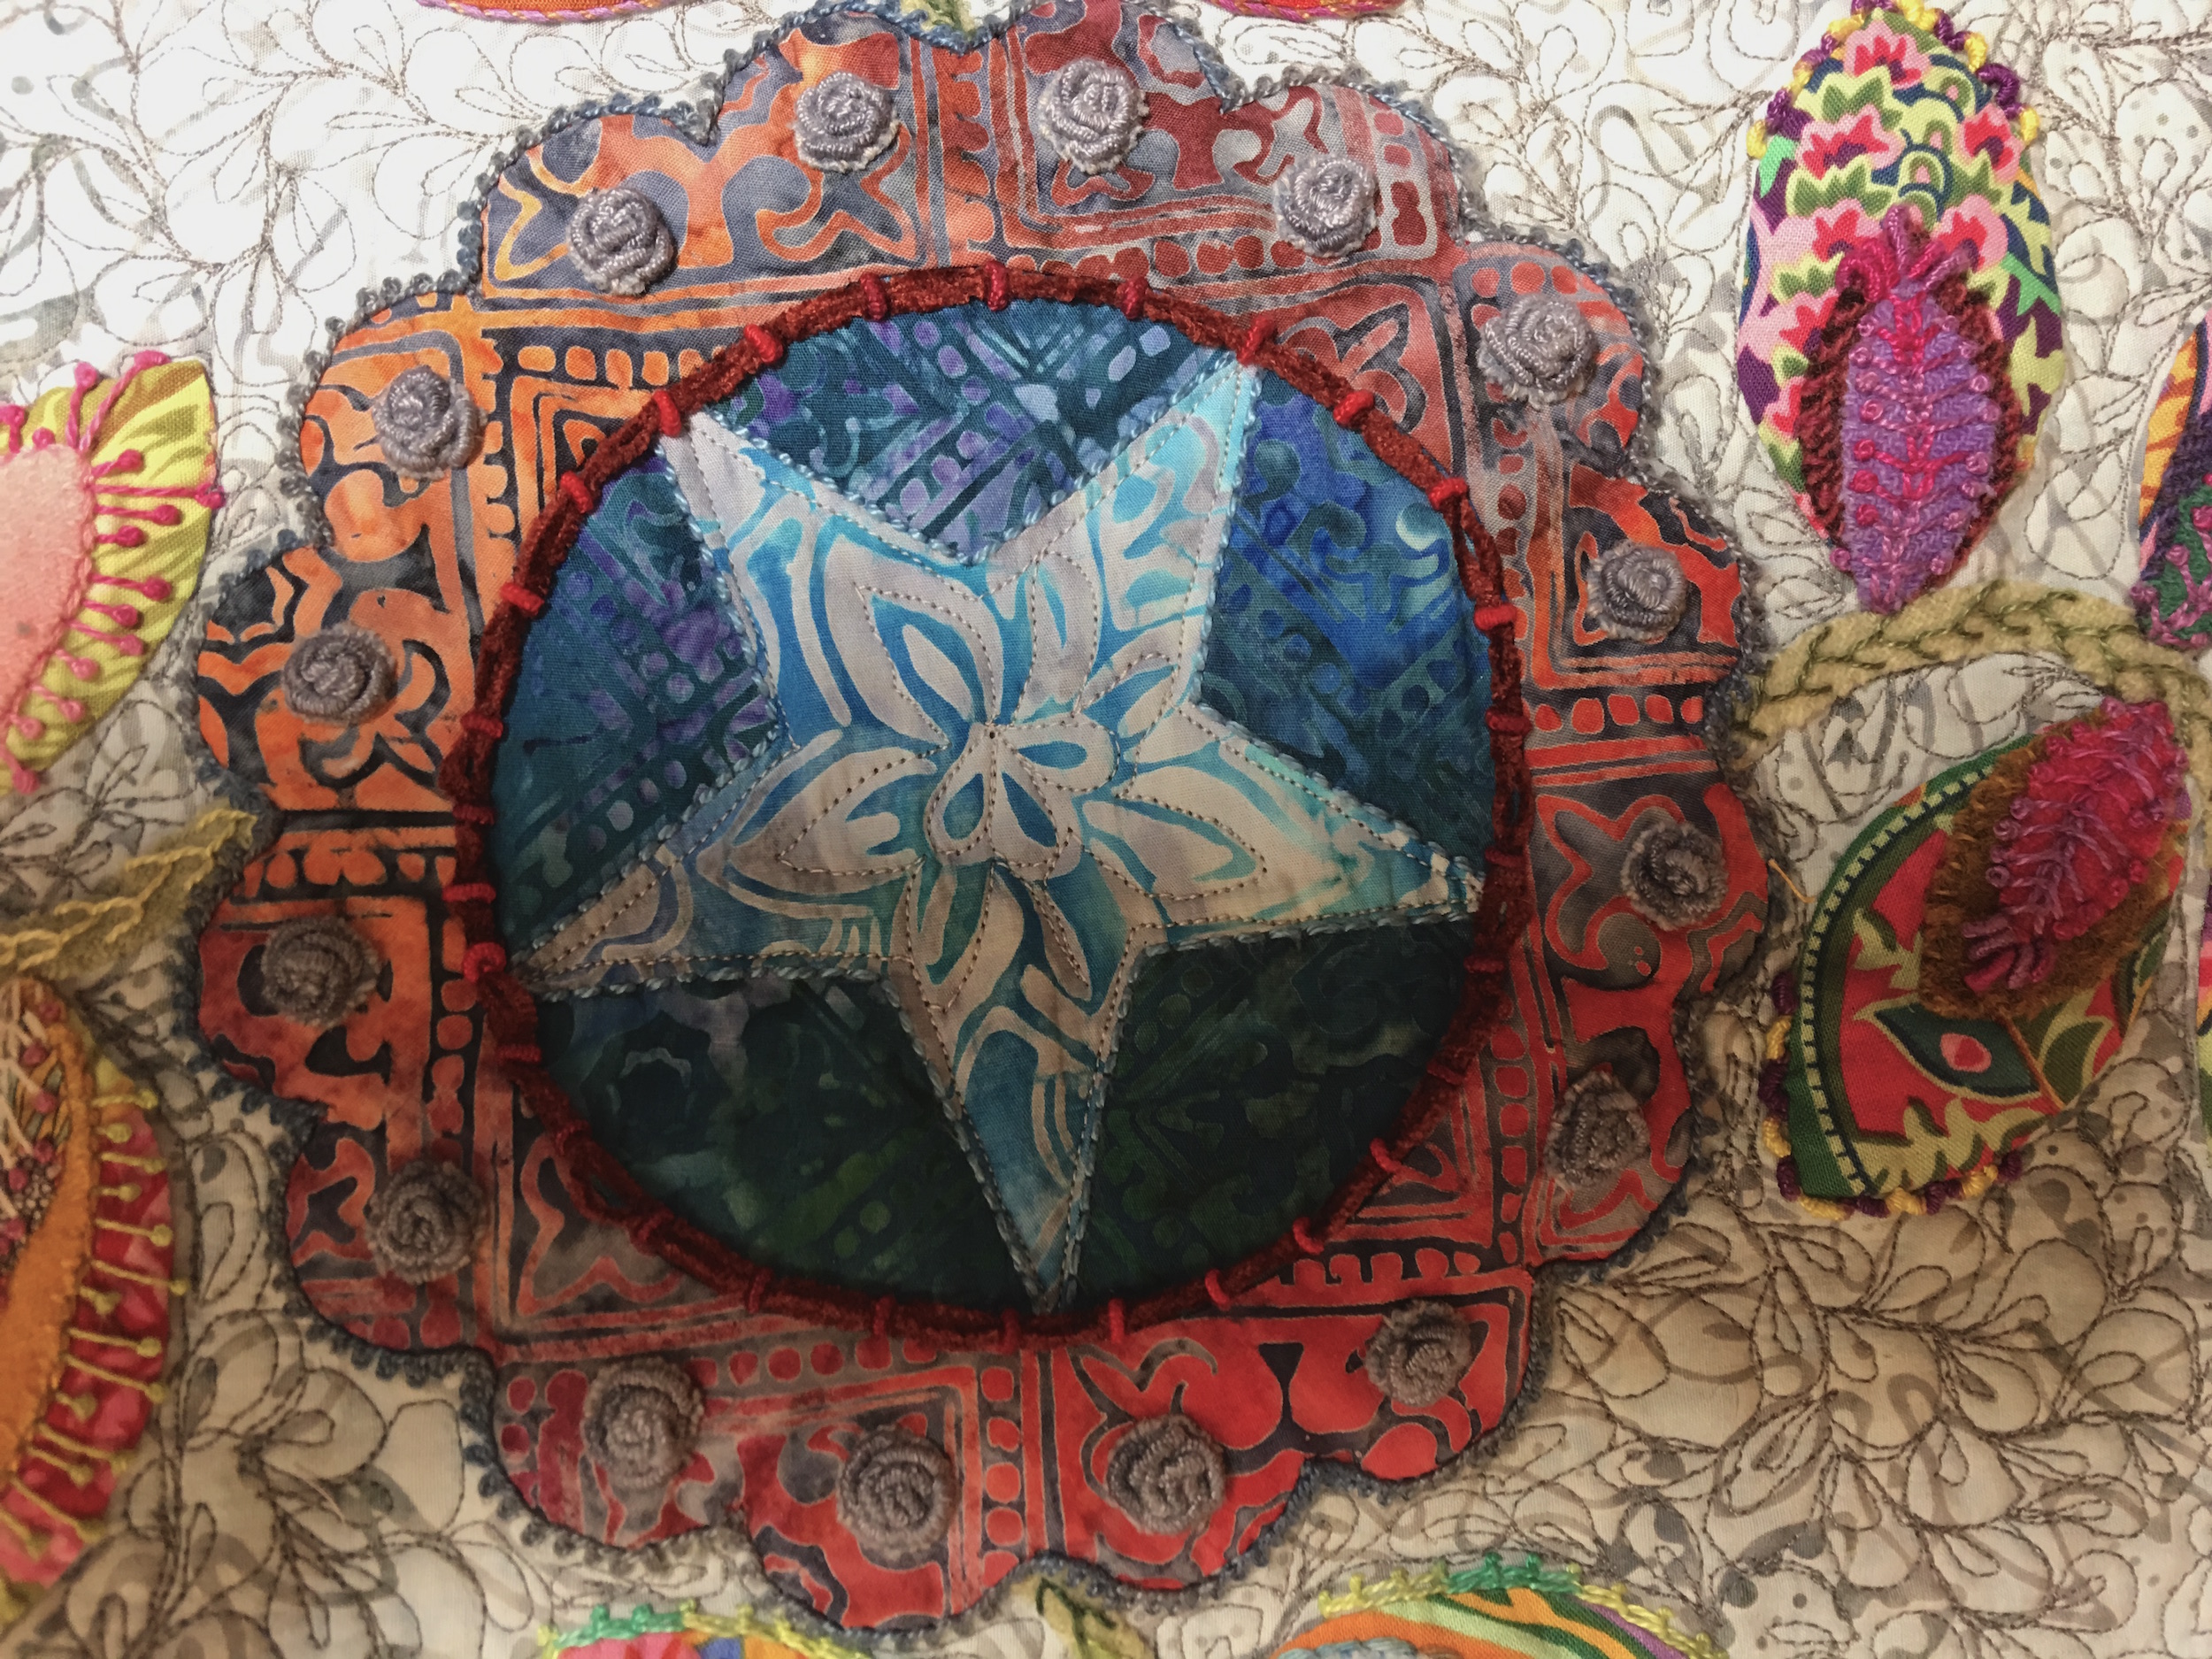
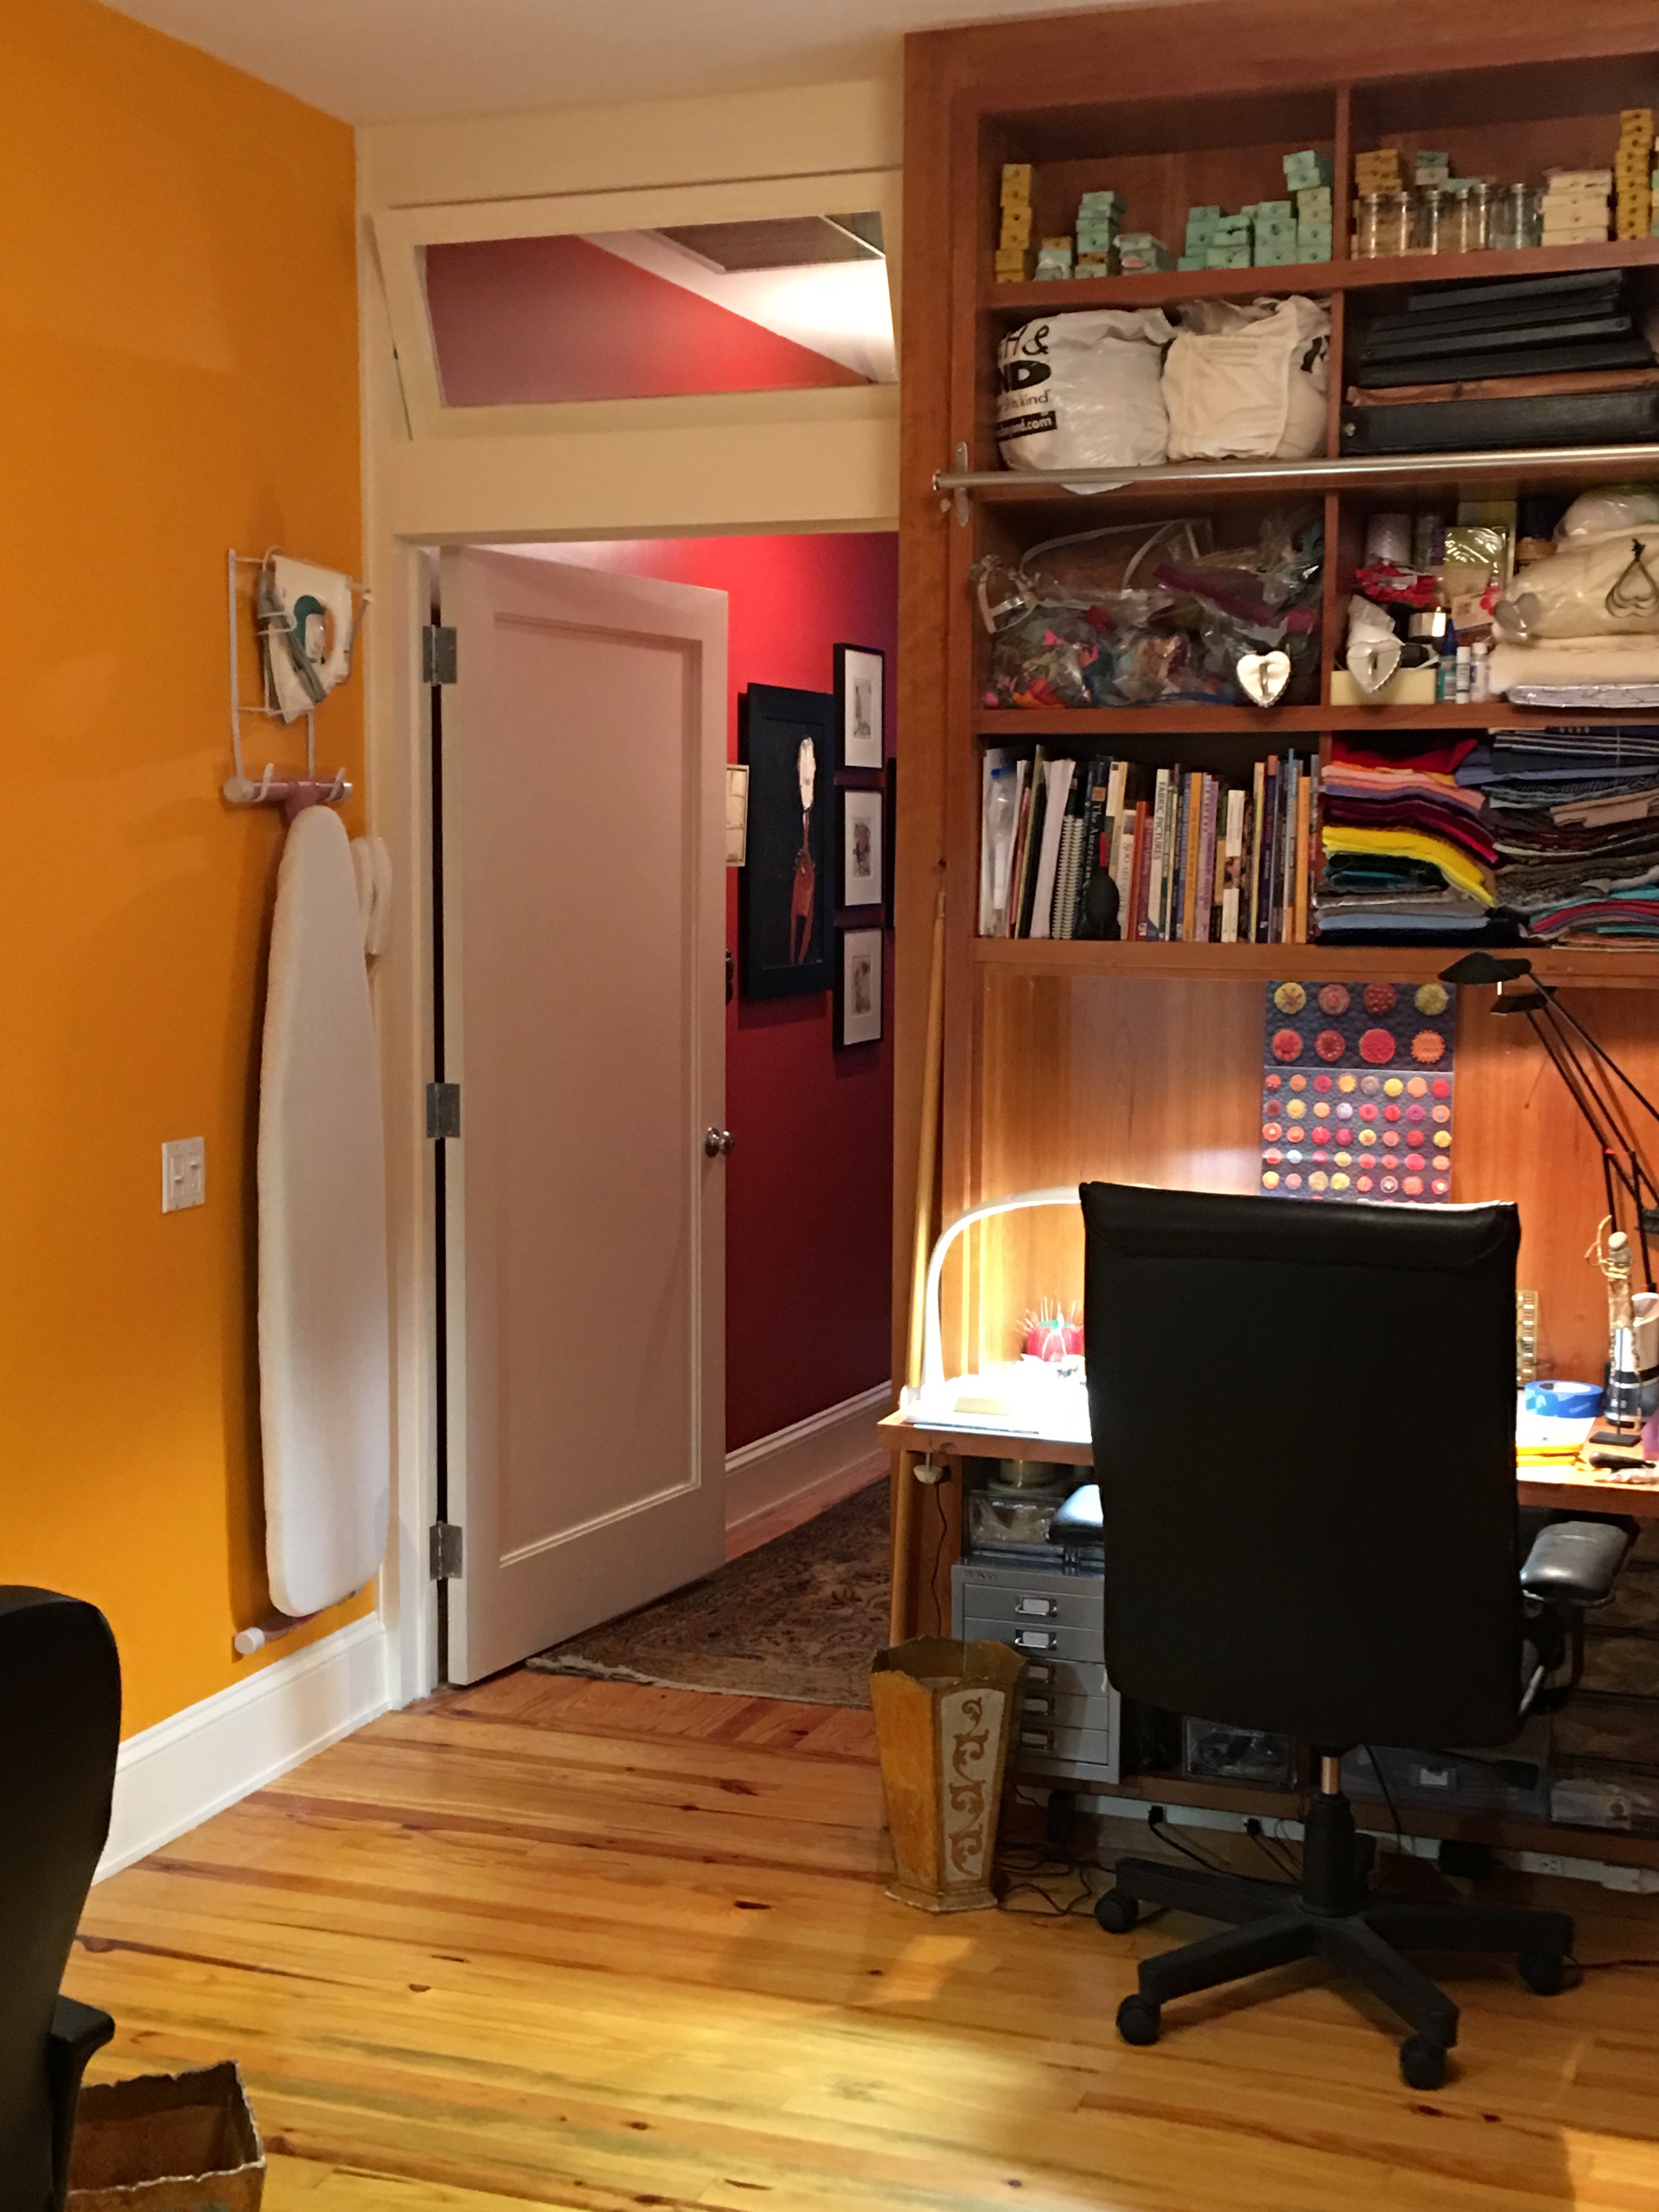 Then there was the question of my design wall, which is removable.
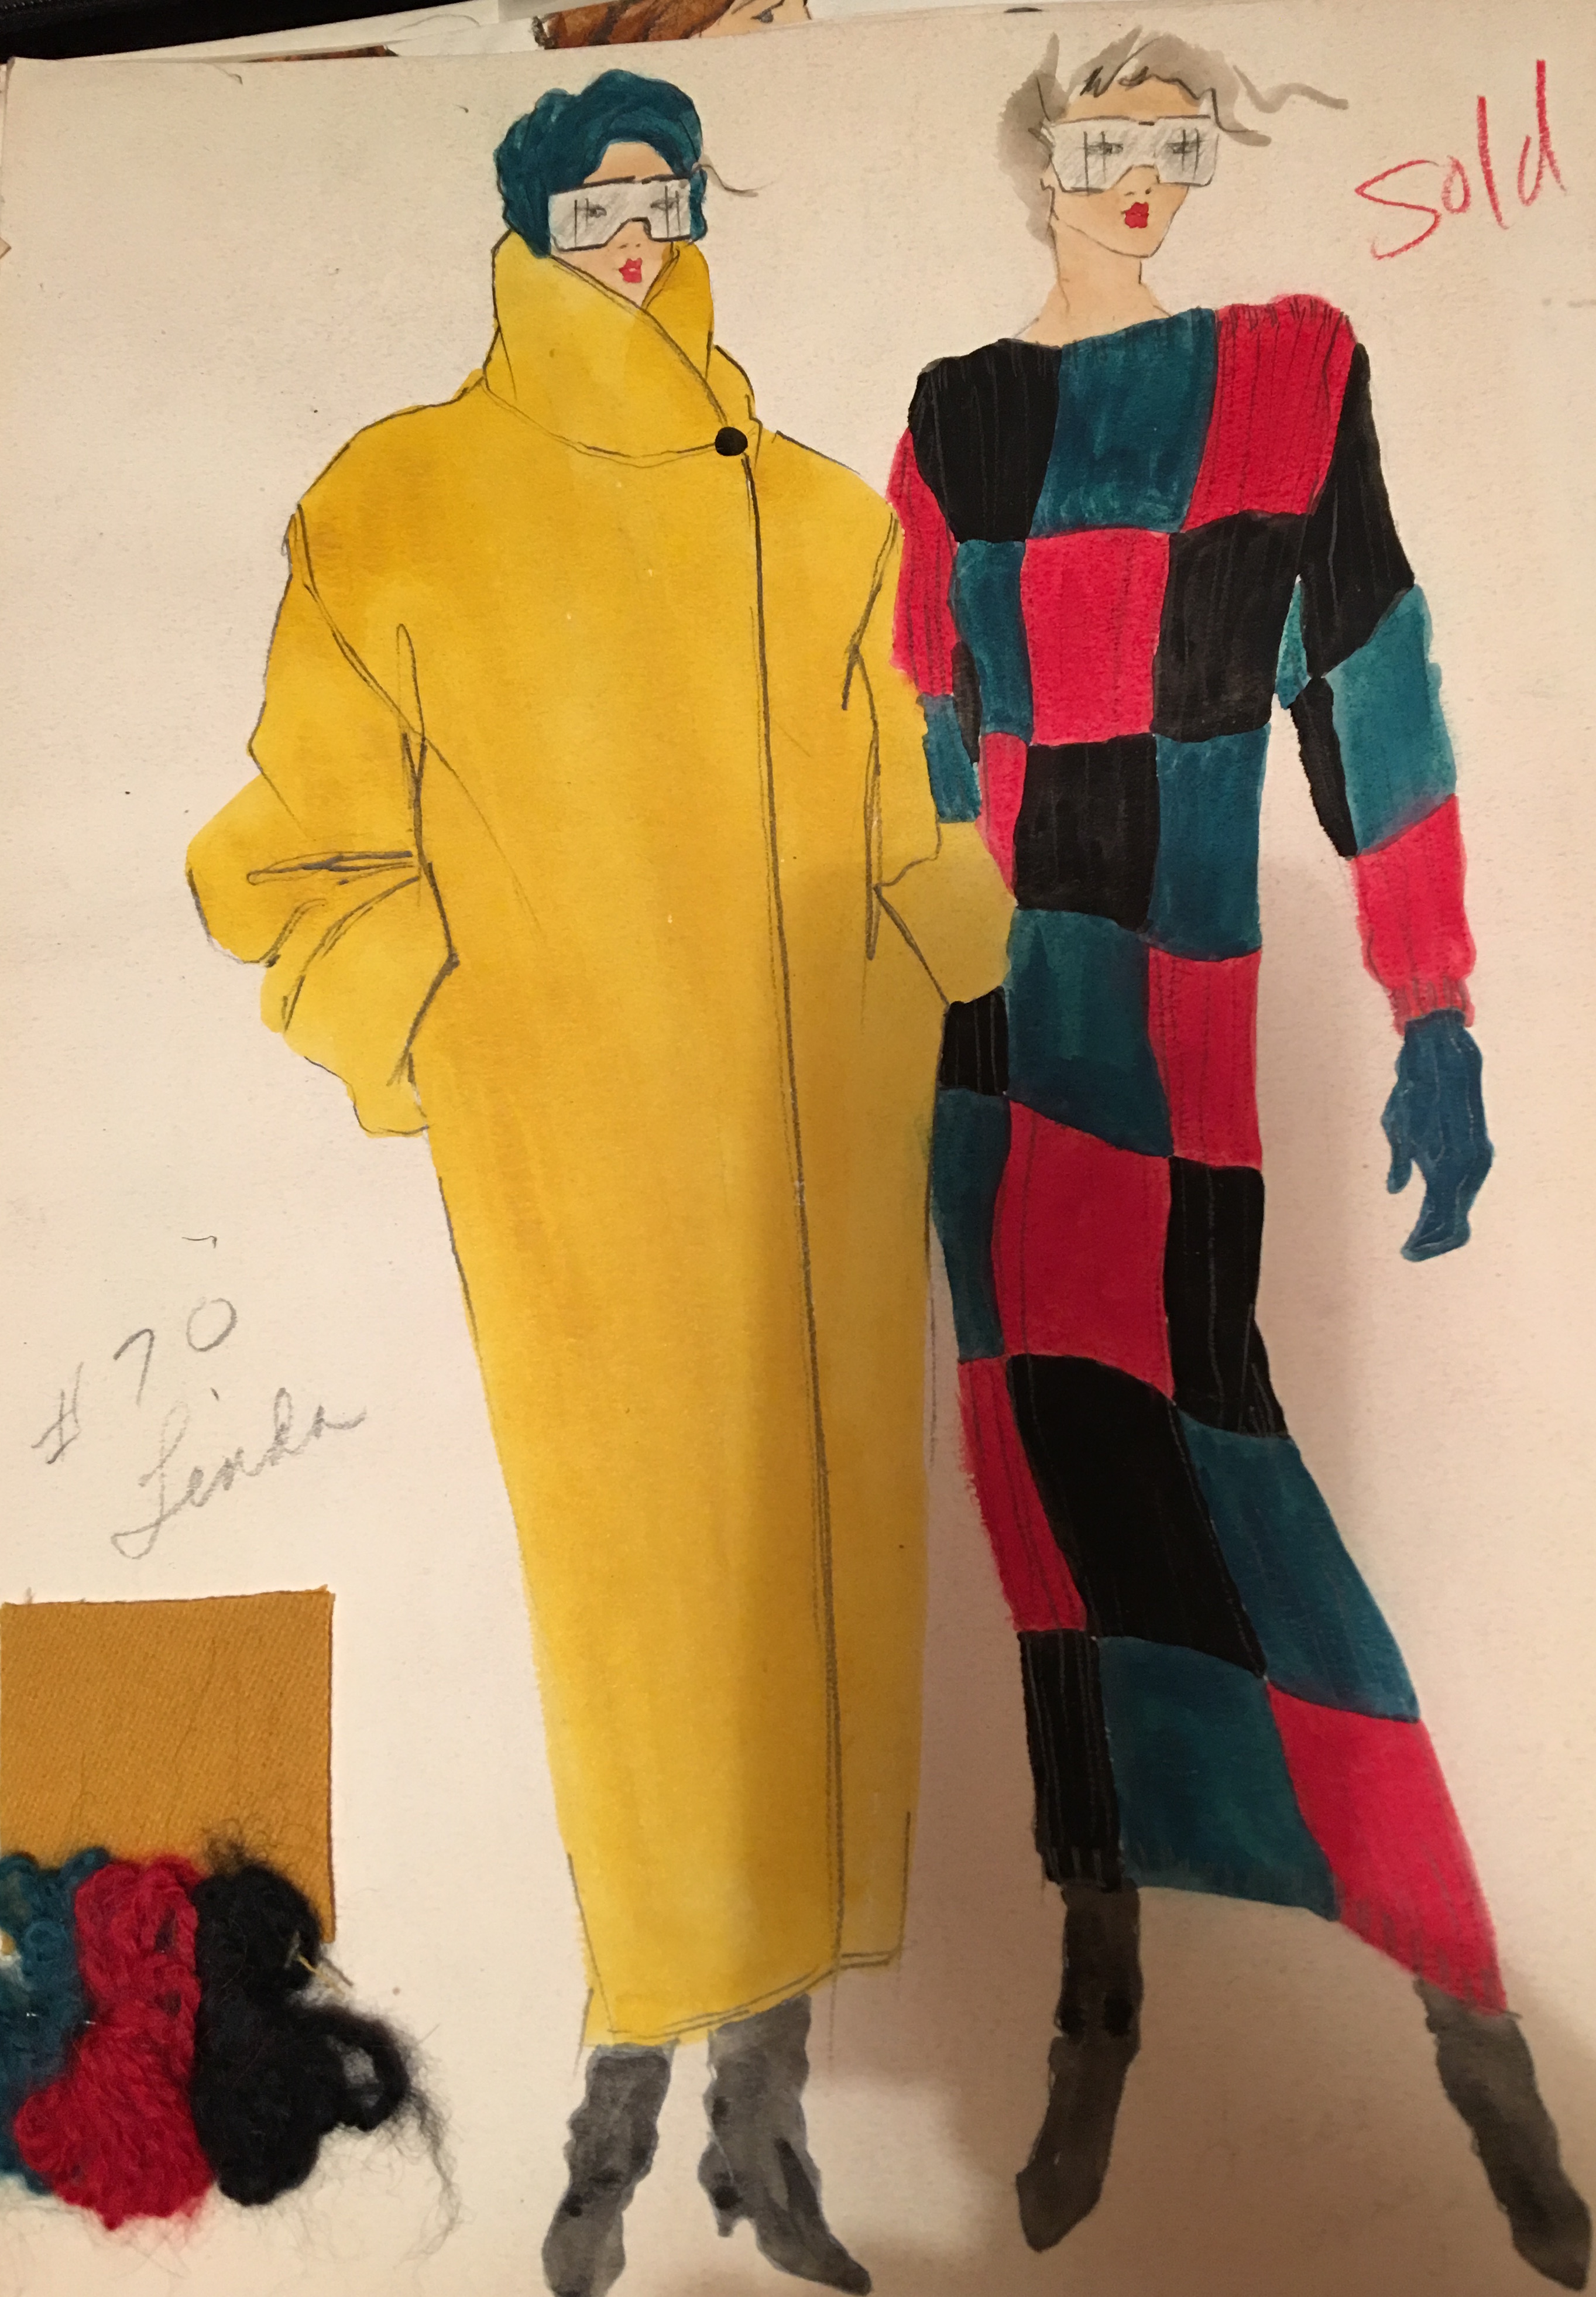
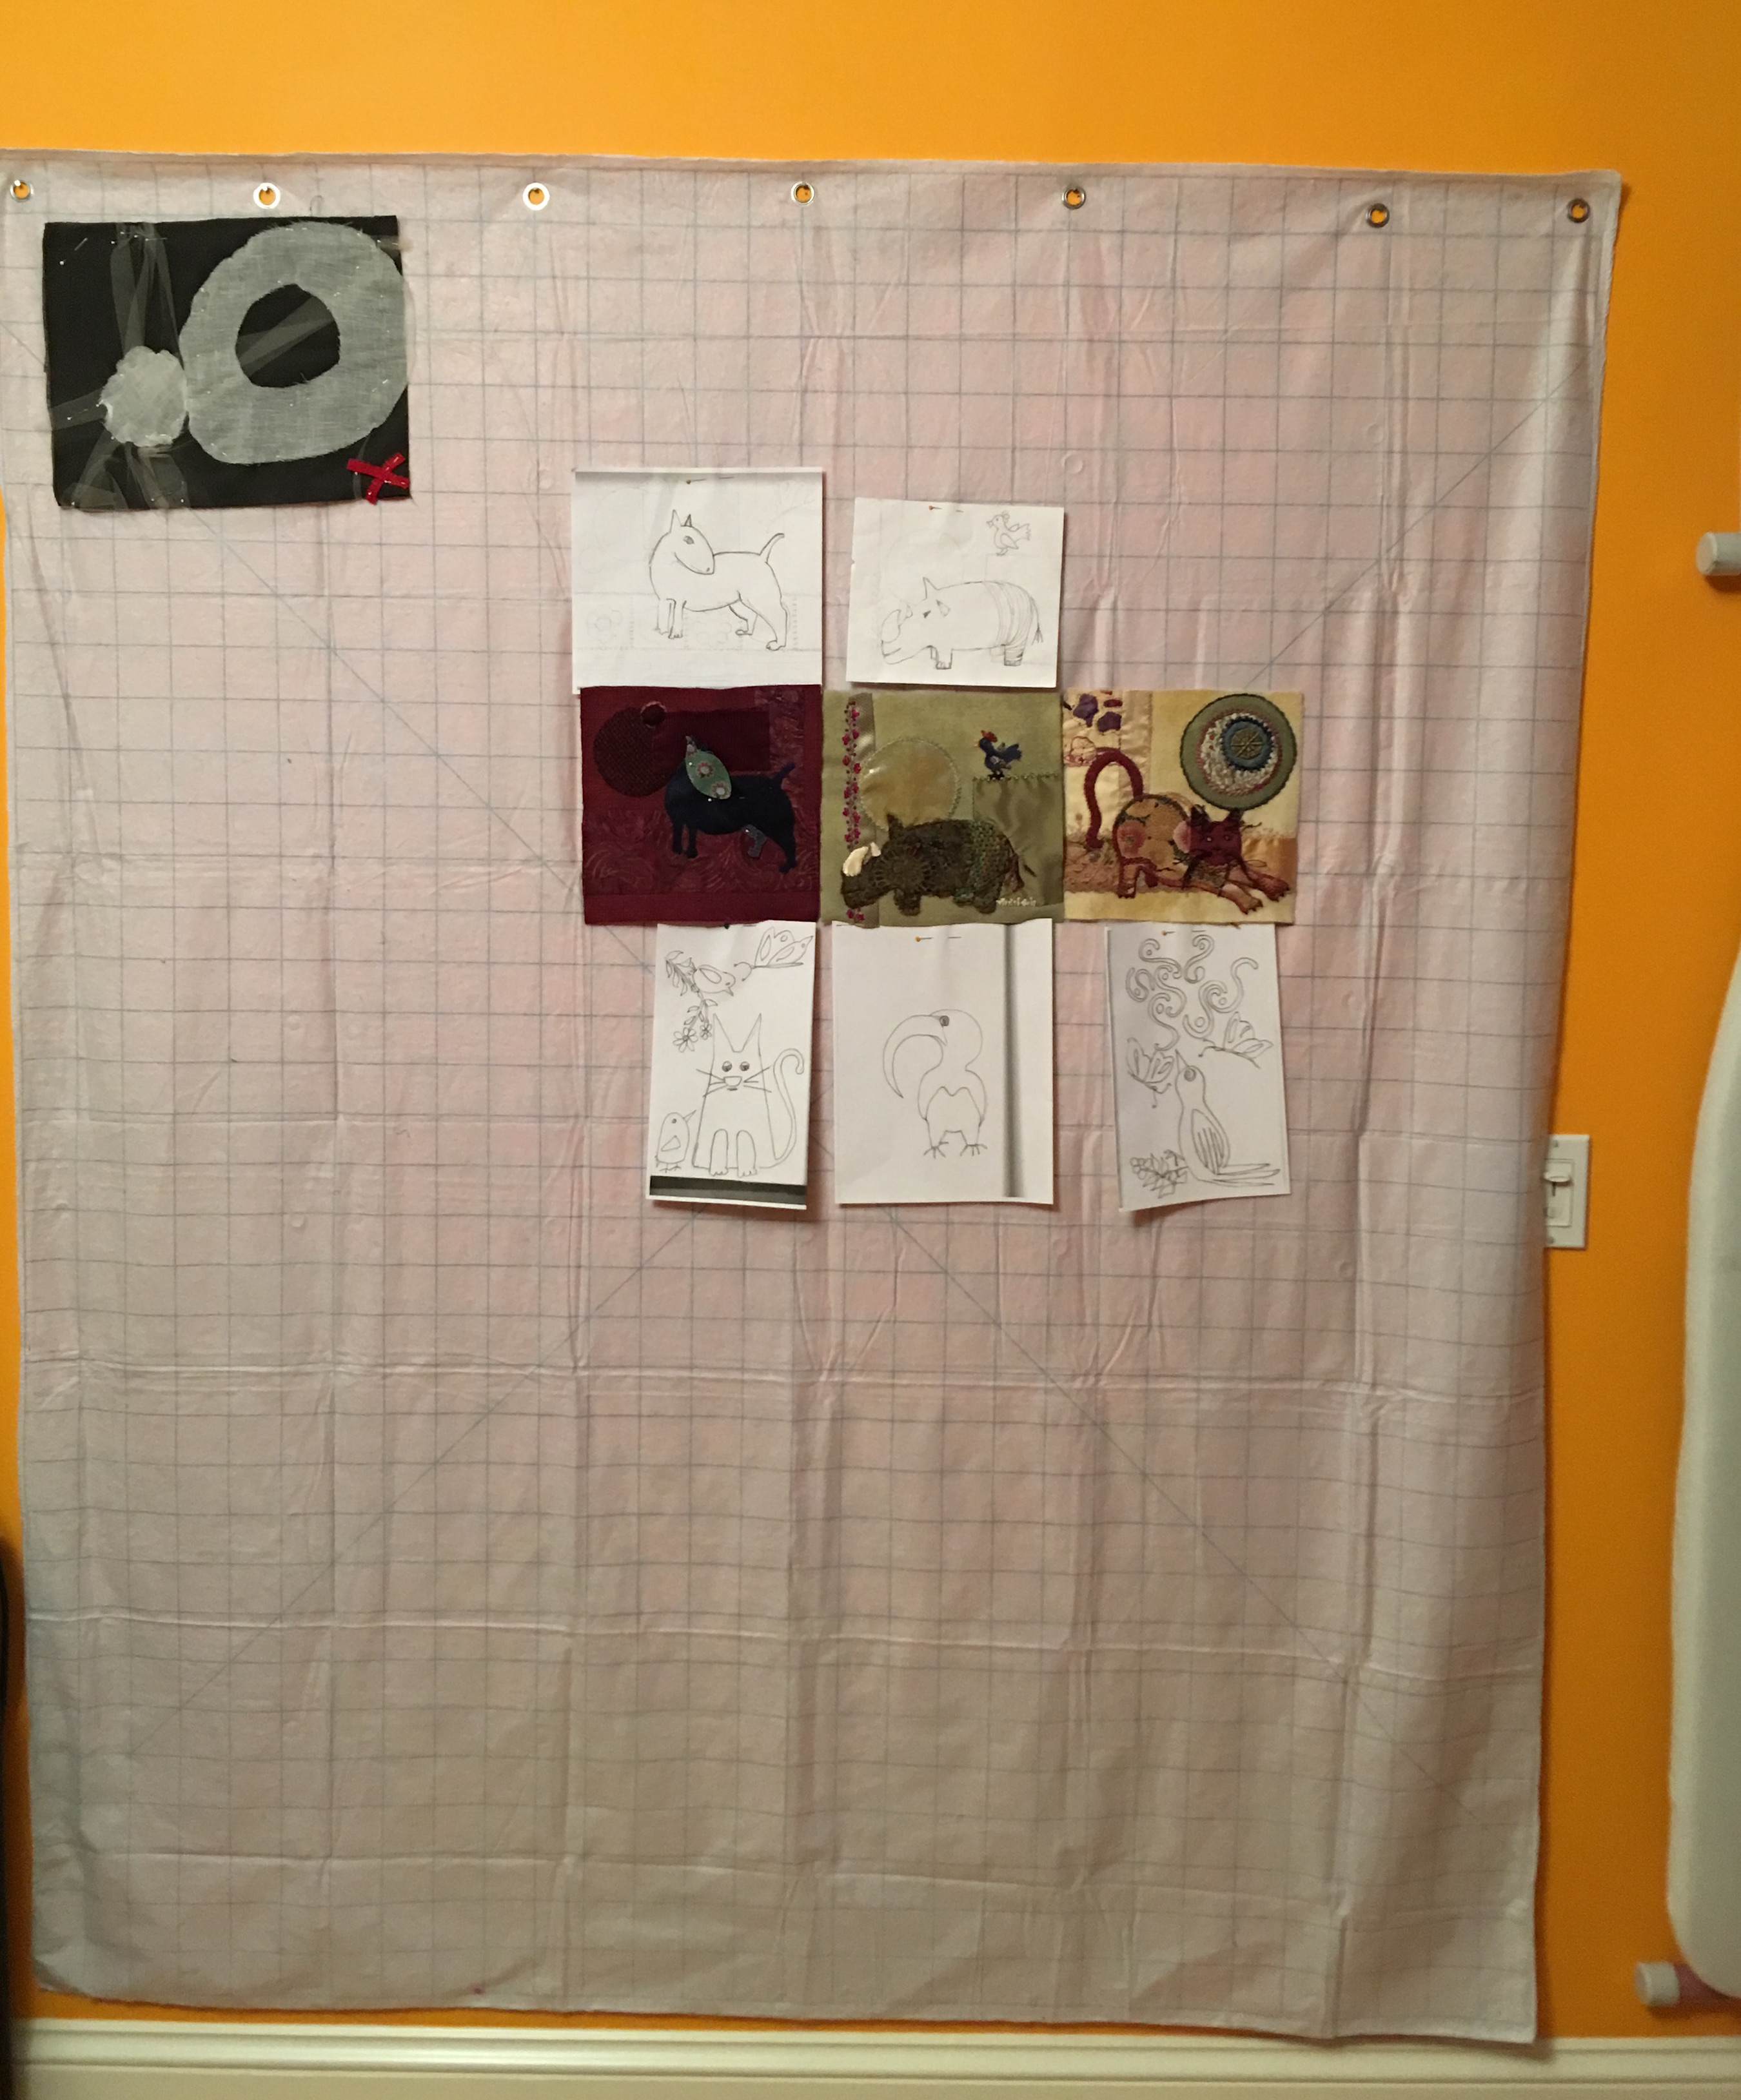 I needed to organize my fabrics and other materials that I use for my jewelry design, such as wax, files, metals, wire, etc. While I was doing all of this, I came across my old portfolio from my days in fashion design and got a little side tracked…
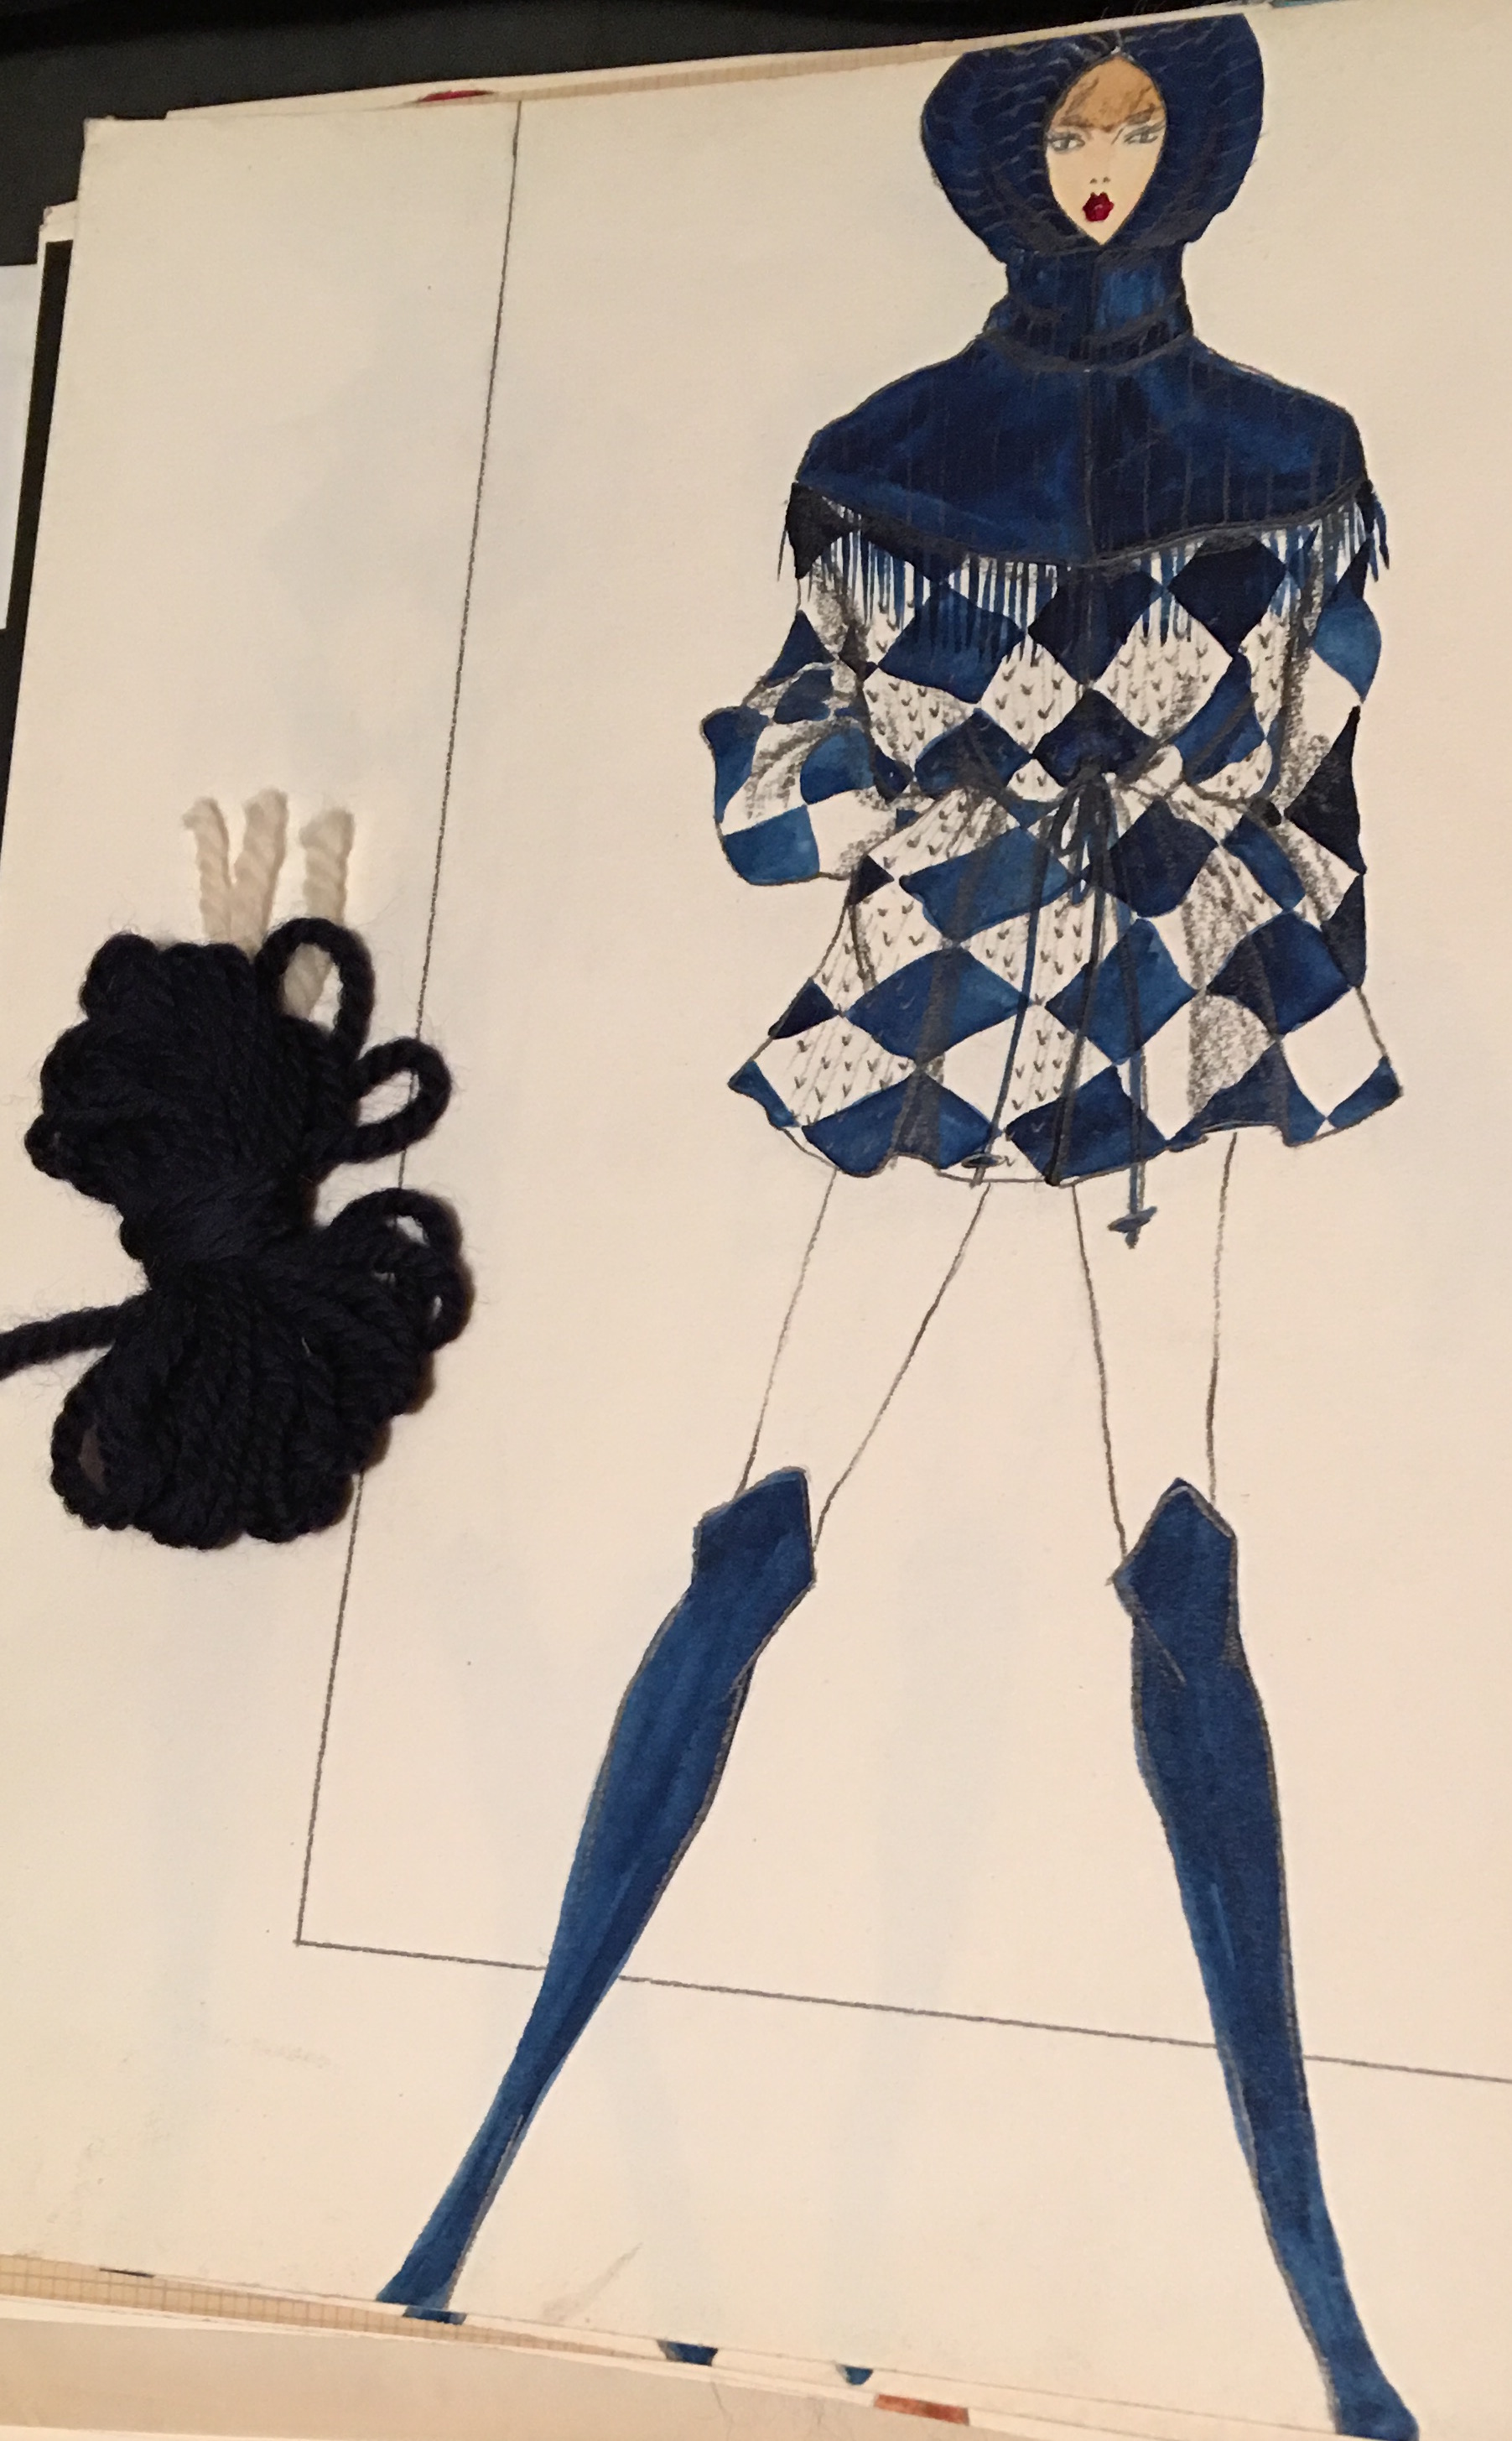
 Finally, after all of that, I got back on track.
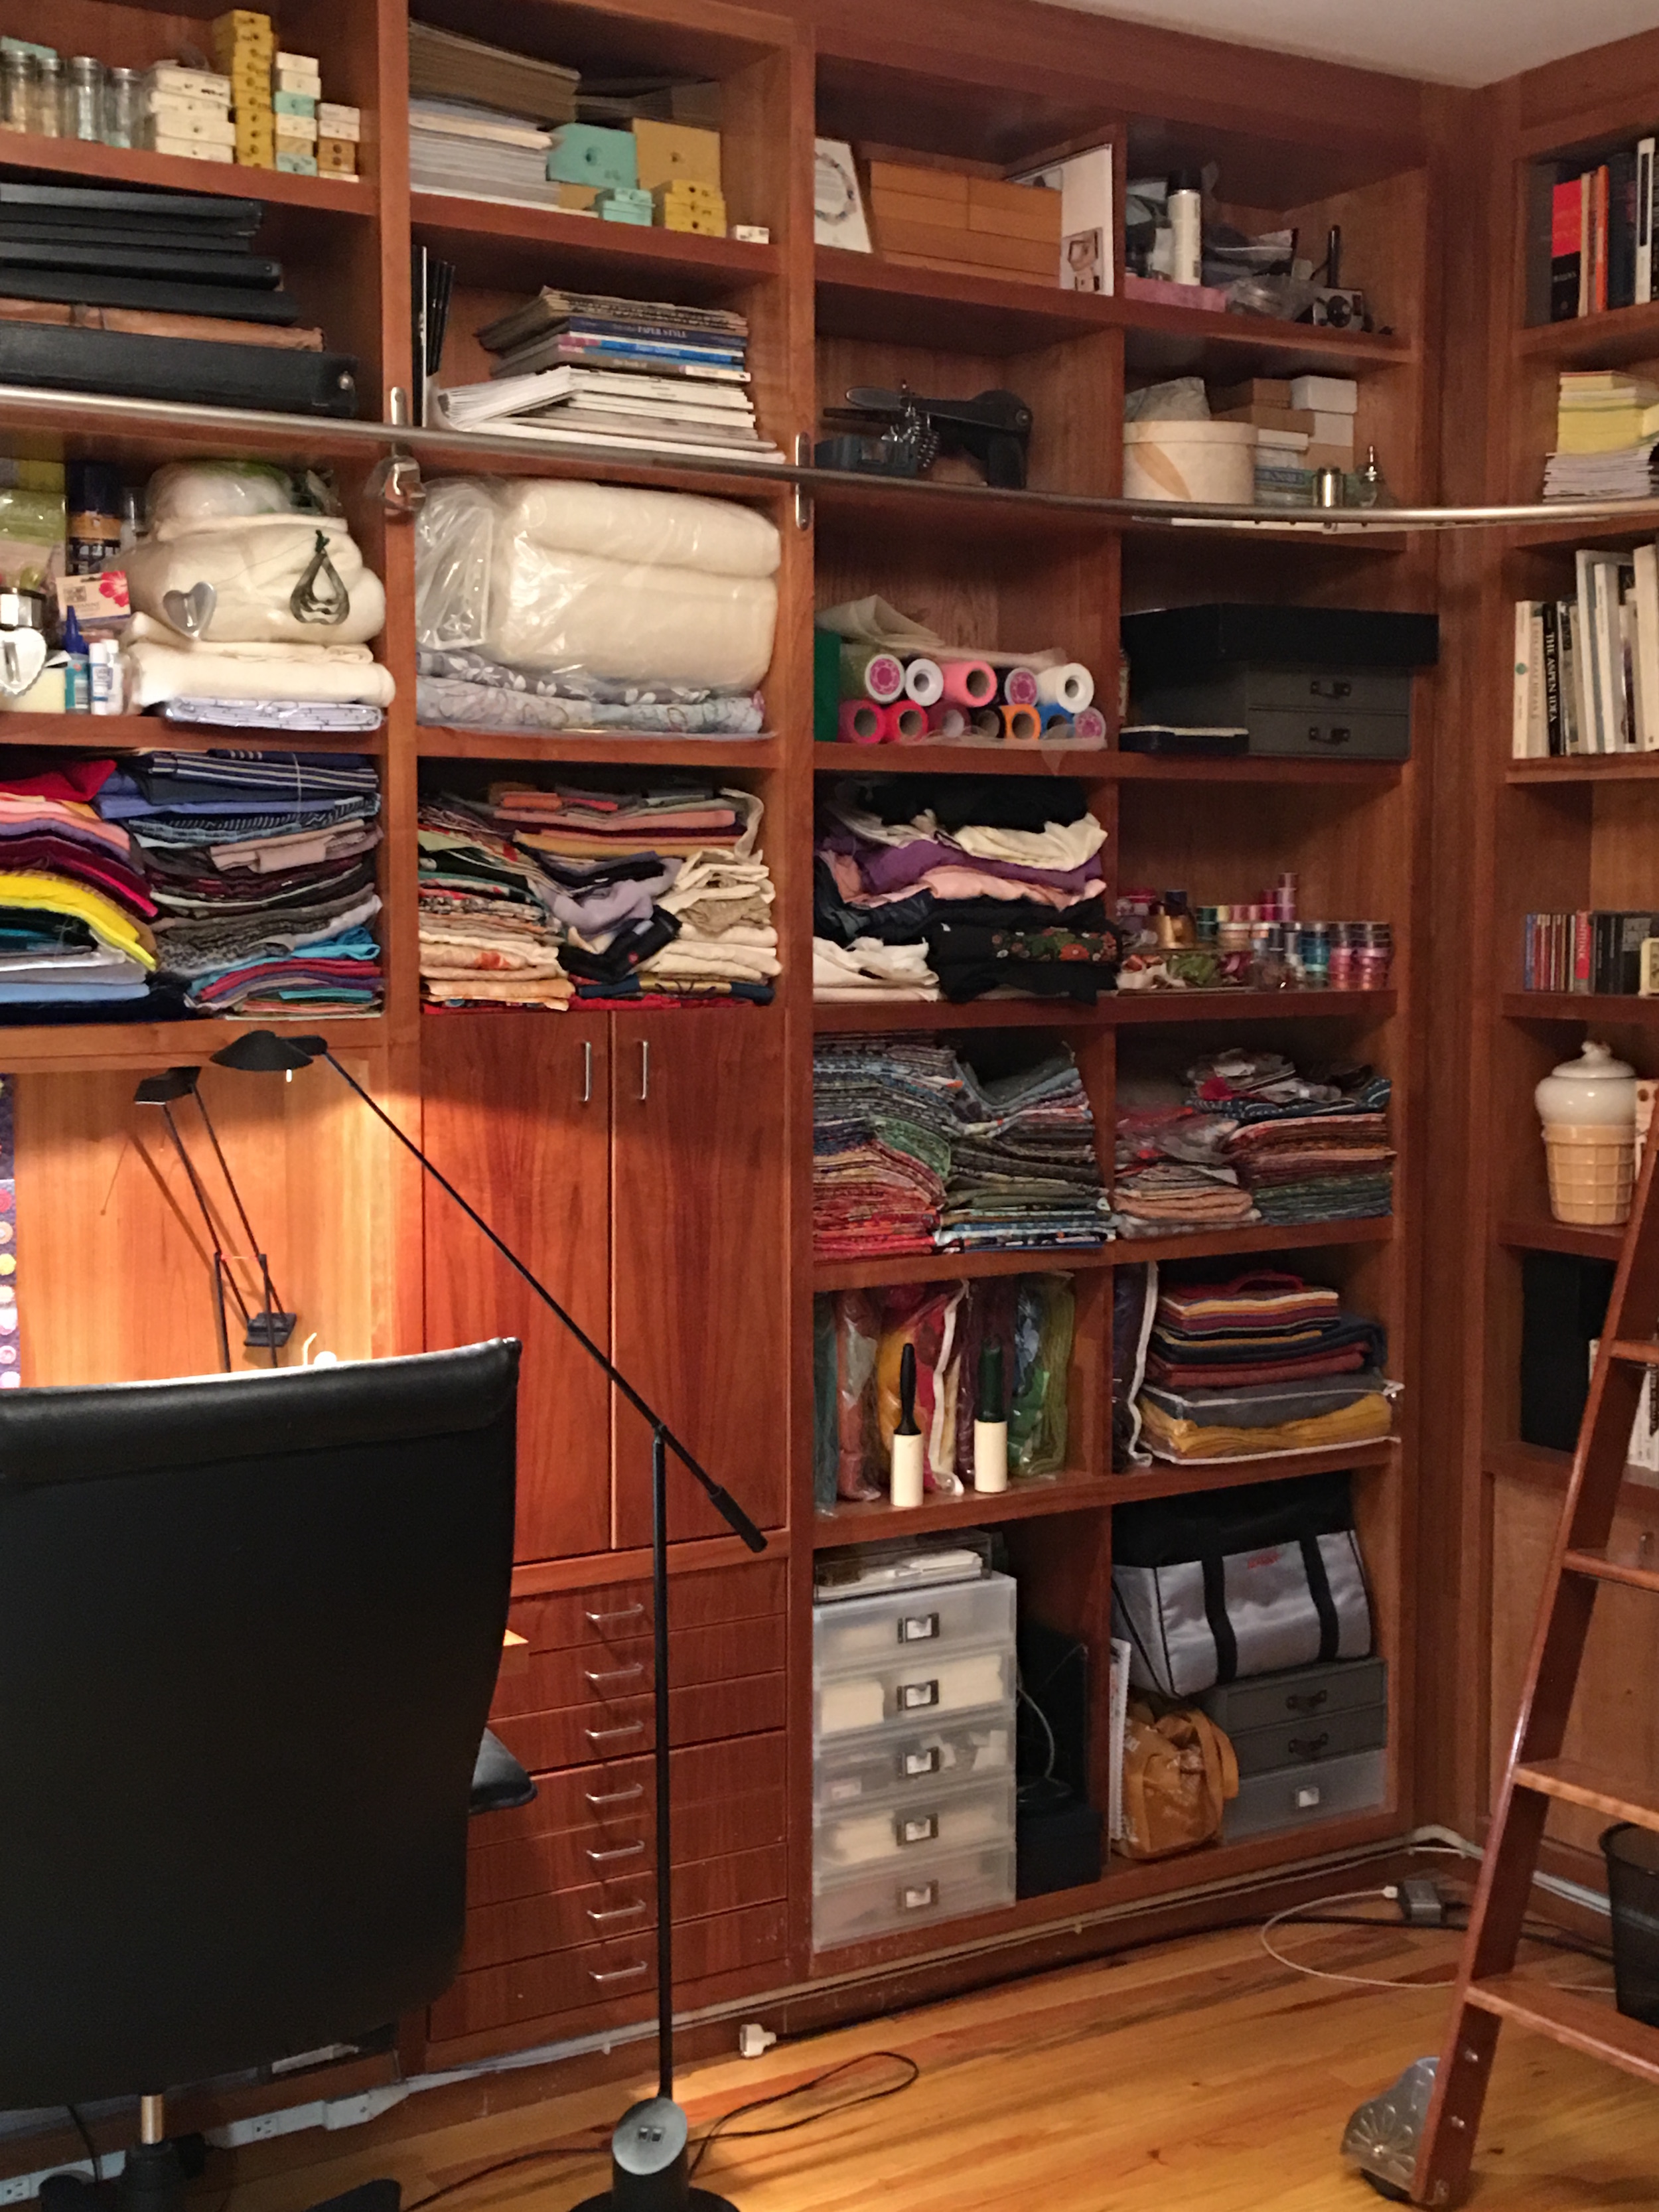
 Now it’s time to get back to work – I have a queen-sized quilt to sandwich, baste and free motion quilt and then there are these little guys who keep calling to me.
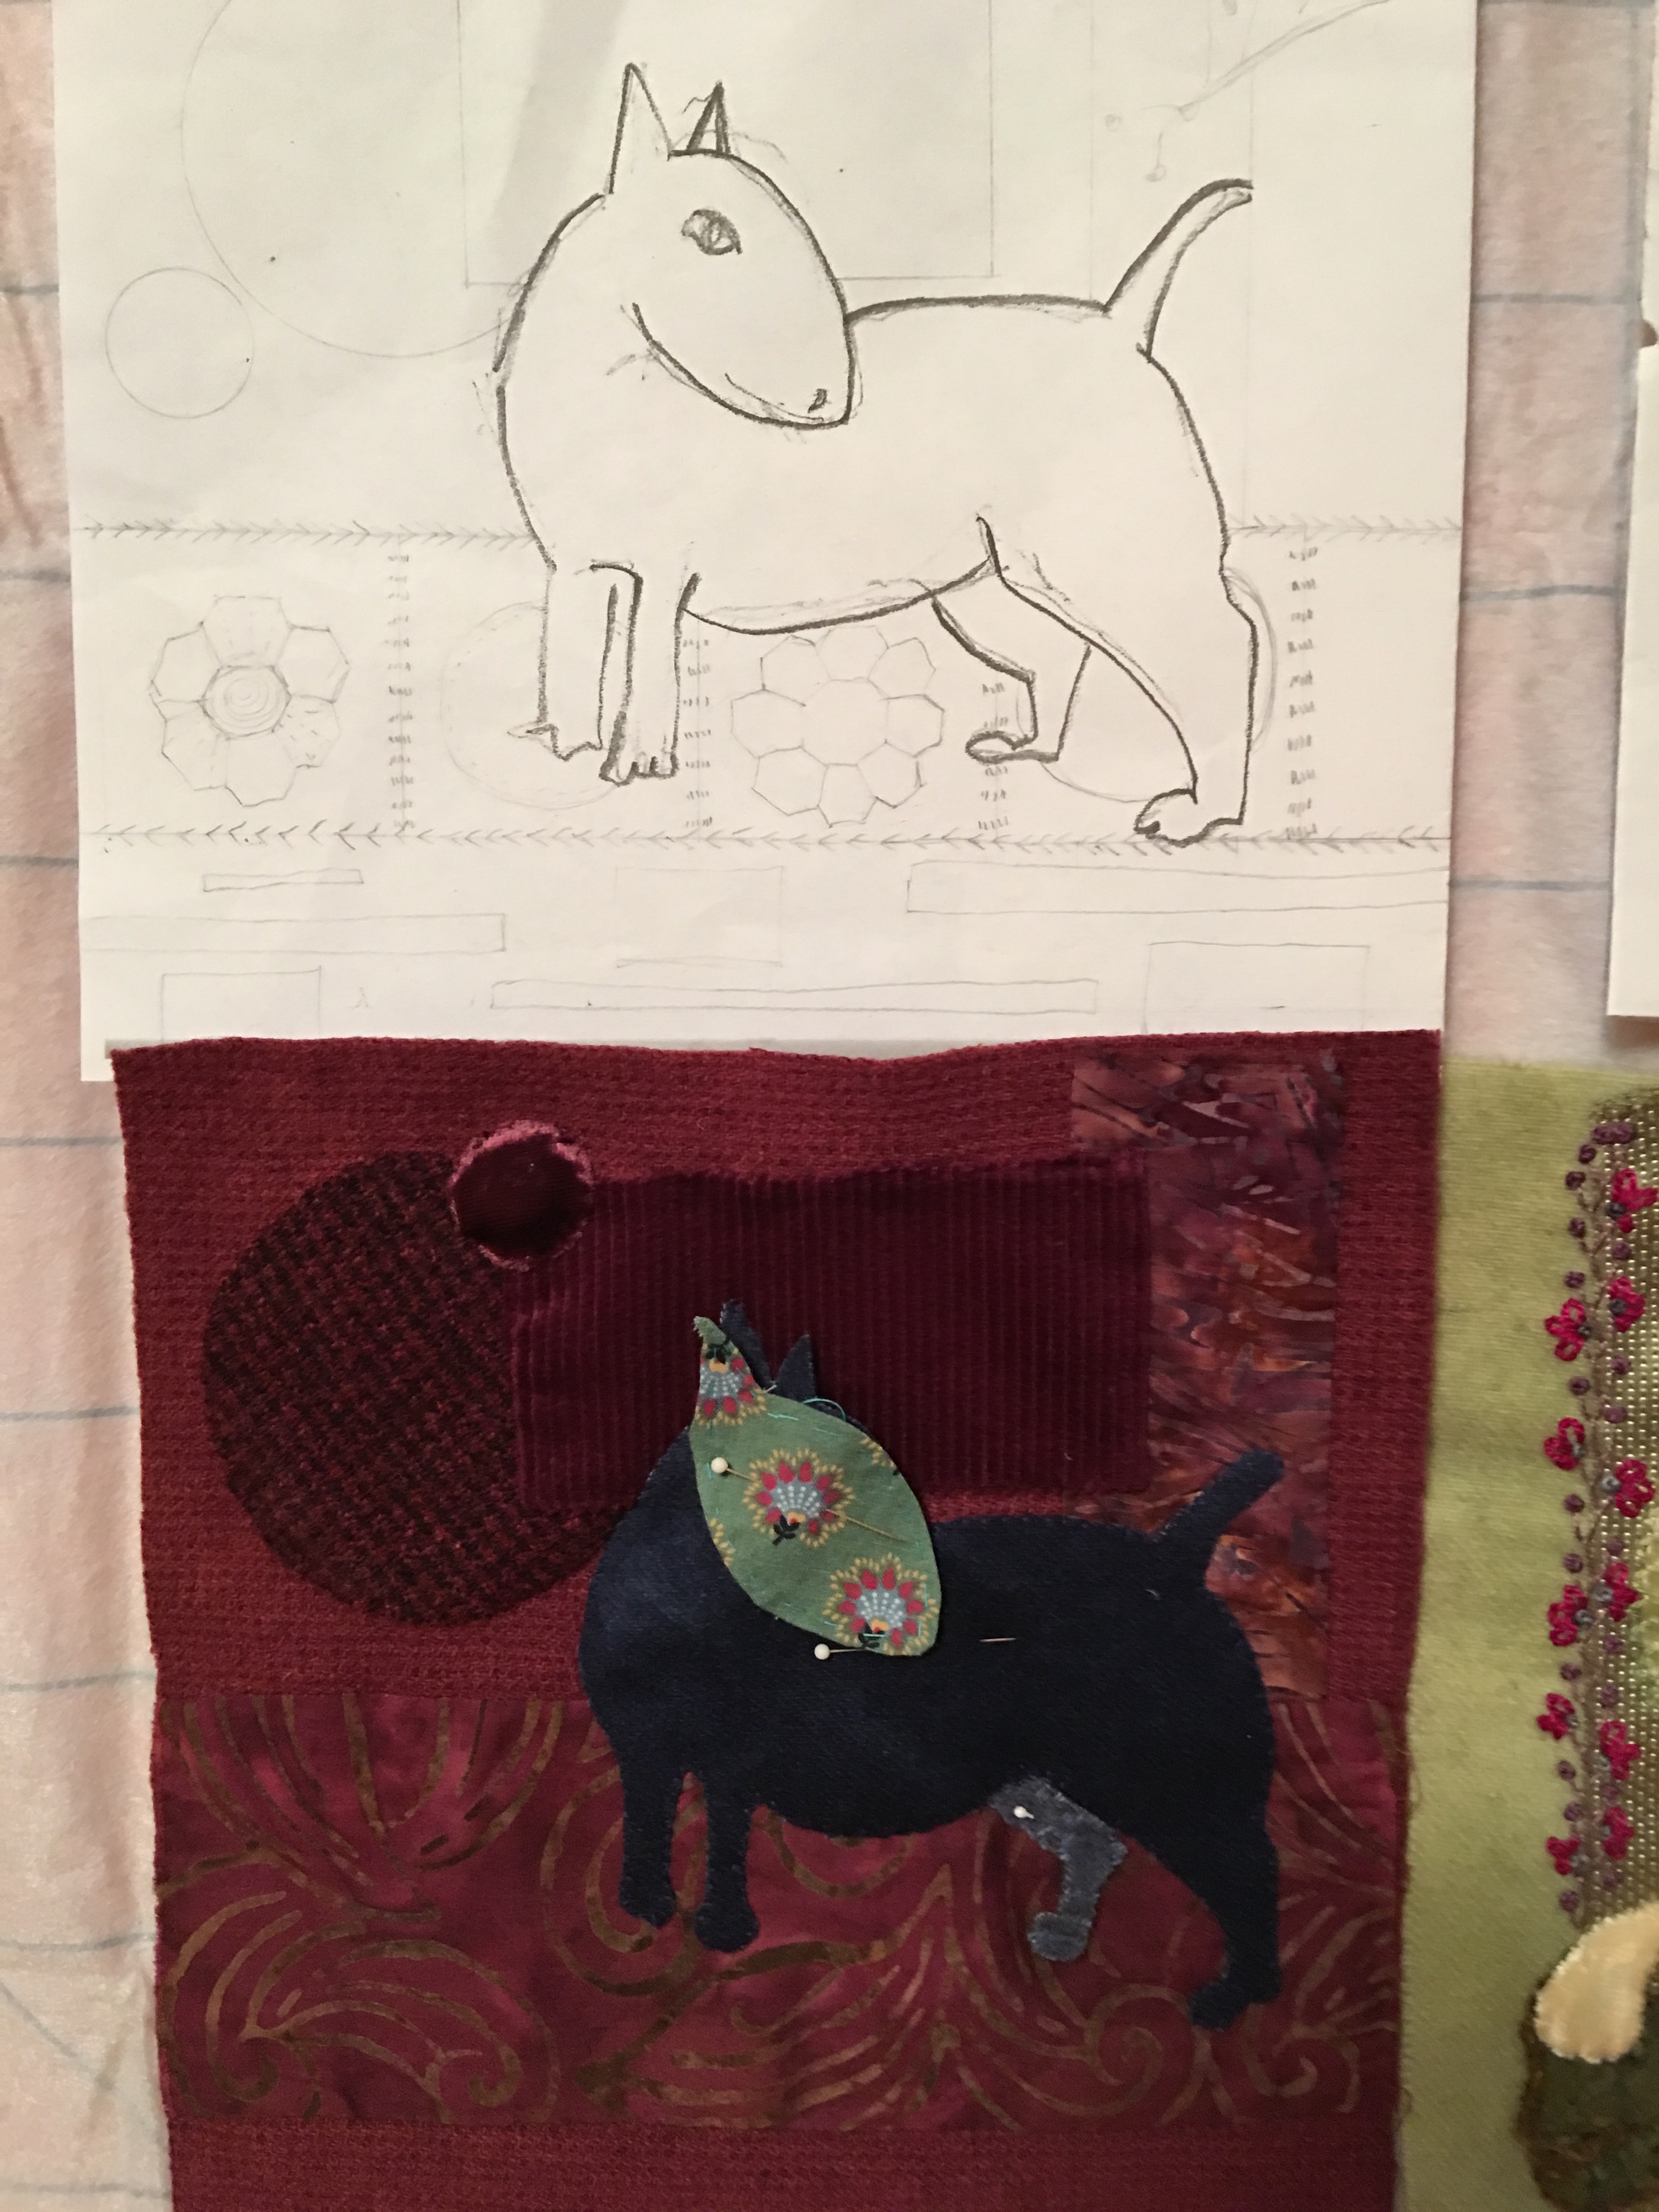
Recent comments